
Why we love floating shelves
Top dog of the shelving world.
Floating shelves have garnered a reputation for being the top dog of the shelving world. Saving space whilst providing ample storage and looking great - floating shelves work in every space.
With DIY you can make the interior design of your home unique. Only your imagination can hold you back - or a lack of tools. If tools are the problem, don’t be put off. That’s what Cutshop® is here for. We have the tools so you don’t need to.
Why use a floating shelf?
The advantages of a floating shelf are numerous, the main one being that they look great and remove the annoying sight of a shelving bracket interrupting your room design. Due to the structure of floating shelves, all the supporting rods are hidden inside the unit which is then layered with thick wood, making them very strong.
Floating shelves for every room.
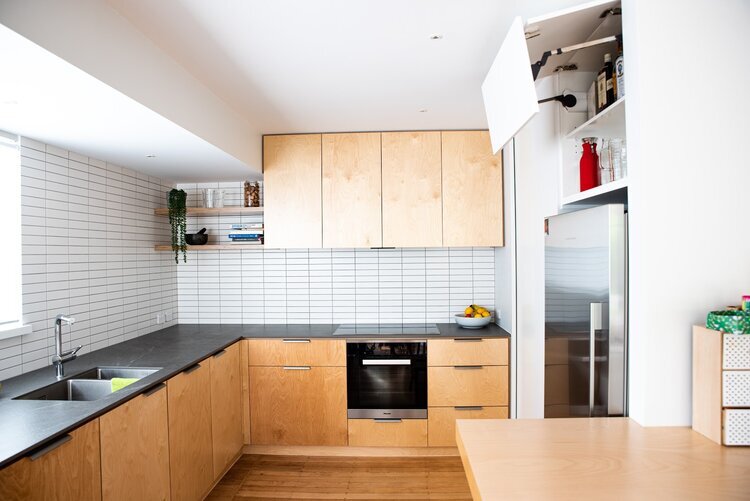
The Kitchen
Floating shelves are magic in a kitchen as they keep everything within reach whilst looking stylish. Either positioned around the hob or used to house the cookbooks. For most people, the kitchen is the busiest room in the home and so keeping that bench space decluttered, without banishing everything to the back of the kitchen pantry, is an absolute win.
Tip: Think about what you use daily and keep those items on the lower shelves and leave the higher shelves for showcasing beautiful dishware that you may use less frequently.

Rhys Mellor, of Love Kitchens, demonstrates how to use floating shelves to house the family cookbooks and they look great against the coloured wall tiles.

Discover these kitchens for home owners Nicholas Wheadon in Freemans Bay and Glendowie home owners Malin and Julian.
The Bathroom
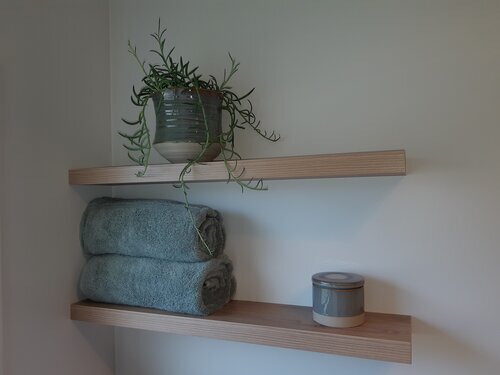
Floating shelves in a bathroom may seem indulgent but actually are a clever way of making the most of any unused wall space. Offering a sleek, stylish and smart look whilst proving plenty of functional storage.
Floating shelves work wonders in making the most of those empty wall spaces especially in an ensuite or downstairs toilet where space comes at a premium.
Need inspiration?
Check out these awesome ideas put together by Houzz to get your bathroom ship shape.
The Bedroom
For a kids bedroom, floating shelves are genius at creating useable spaces that keep the toys off the floor and allow kids to proudly showcase their belongings. Floating shelves can be used as a place to store books creating a reading corner as an alternative to a cumbersome bookcase.
In the master bedroom, replace bedside tables with a floating shelf and remove the extra clutter from the floor.
Tip: Explore the different materials available for your shelf to ensure you get the right aesthetics for your room. If you are unsure about which material to use talk to us and we can advise you from the get-go.

The Laundry
Floating shelves in the laundry can turn the space from functional and drab into stylish and slick. Making any awkward and unused spaces aesthetically pleasing and functional areas, particularly handy for smaller laundries.
Dare to be different with your laundry and shake up the conventional by using a floating drying rack. Similar in principle to the floating shelf as there are no visible supports but offer a clever and modern take on the typical clothes airer.

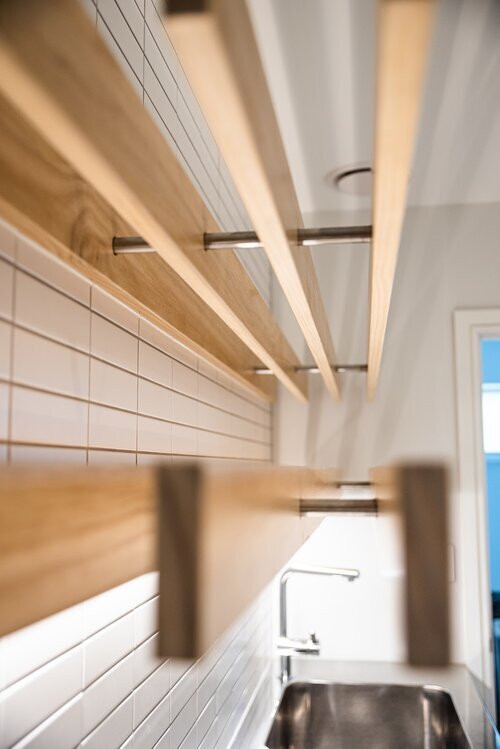
These drying racks are a great addition to Malin and Julian’s laundry in their Auckland home.
The Home Office
Floating shelves in a home office or study are a perfect way to keep the clutter off the floor whilst adding personality to your workspace. Don’t stop at a floating shelf in your home office, embrace a floating desk which leaves your floor space completely clear. This home office created by Cutshop® North Shore shows how minimalist, stylish and functional a floating desk and shelves can be.
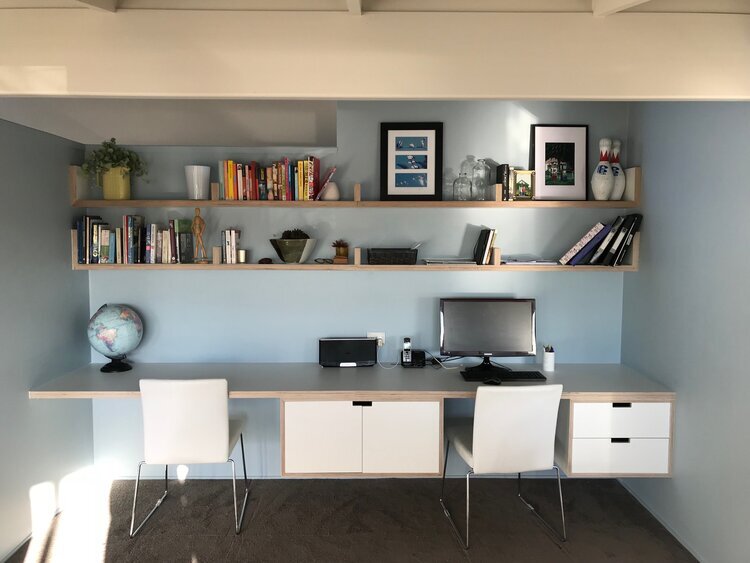
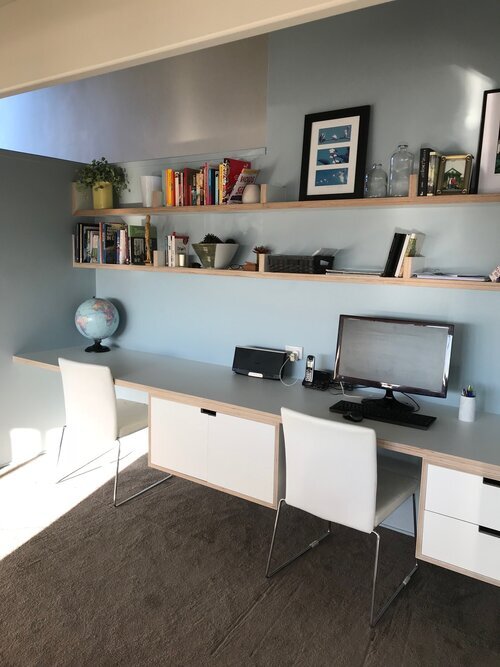
Tip: Be creative and utilise any empty space as part of your home office area. Transform the space under the stairs into a snug office space with desk and floating shelves.
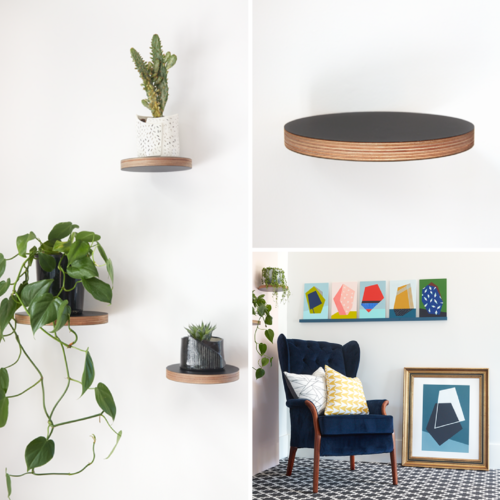
The Living Room
Your living room sees the most visitors next to your kitchen and so be creative with your floating shelves and use them as a part of the design of the room and not purely for function. Use round floating shelves to house flowers, art or photos and mix up the different sizes to maximise aesthetic impact and place against a colourful wall.
Take inspiration from Susan Christie at Formantics and her use of floating shelves.
Don’t shy away from using a floating shelf from across literal empty spaces.
We worked with Nicholas Weadon as he designed bespoke shelving for his home, making the most of every space available.

How We Make A Floating Shelf

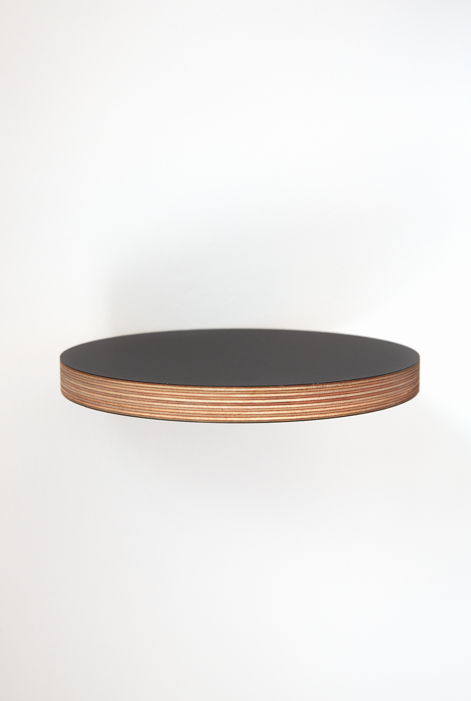
Here at Cutshop®, we make floating shelves using two pieces of 16mm or 18mm board. We cut out pockets in each piece for the mounting brackets (which can be adjusted vertically and laterally) and then laminate the pieces together. This creates a sturdy shelf 32mm or 36mm thick.
So you can’t see the join, we then edge the shelf with PVC tape that matches or complements the board’s colour.
Save yourself time by getting us to do the hard work for you. Give Cutshop® your measurements and we will do the rest, you just need to sit back and wait for them to be delivered flat pack ready for installation.
How To Install A Floating Shelf
A spot of DIY installation shouldn’t be a daunting process and installing a floating shelf is a simple process with only a couple of things to consider ahead of time.
The main challenge with floating shelves is mounting them, the shelf support brackets need something substantial to attach to — Gib board isn’t enough.
So, you must work around a wall frame’s studs or nogs. Standard stud width is 600mm, but of course, you can work around that.
Remember shelves are required to support weight; there must also be enough material for the shelf support rods to slot into.
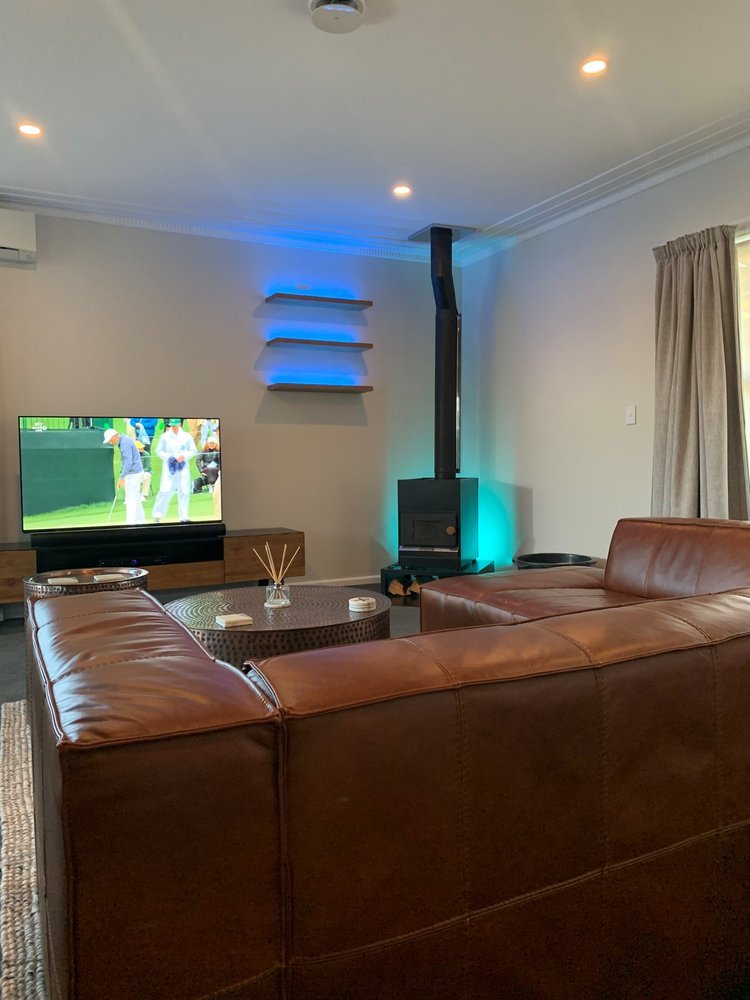
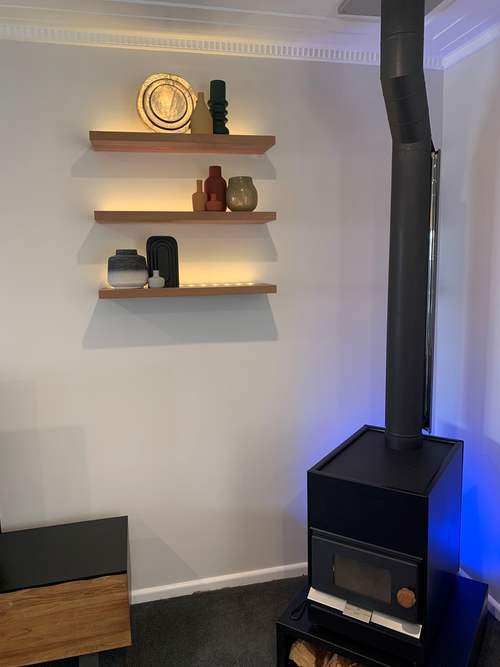
Review how James installed his floating shelves
Electrician James Murray approached Cutshop® to have three floating shelves purpose-built for his home in Auckland.
After 12 years of living at the property, he had decided to renovate. First up, he wanted to get rid of the built-in fireplace, and replace it with a new, freestanding one.
However, what started out as a single DIY project soon turned a major renovation. In order to undertake the work the carpet had to be removed, and before long James was knocking down walls and building new wardrobes. “It turned into a major thing. Most of the house has changed.”
As James went through the process, he sought the help of an interior designer, who recommended adding some floating shelves in the main living area for decorative purposes.
Searching online for further inspiration, he came across Cutshop® and decided to get in touch. “The Cutshop® blog had some great ideas for floating shelves. For me, if the website is good I feel like the work will be good.”
James ordered three floating shelves, in laminate MDF, to match his desired measurements. An added LED channel gave the shelves a unique and stylish finish.
A secure fit
To ensure the shelves were sturdy, James removed the gib on one side of the wall and installed 12ml threaded rod he had "just lying around from another project". He secured the rods with knobs using a washer on each side. With the supporting rods hidden inside the unit, the floating shelves are strong, and James says he's happy with the end result.


Installing floating shelves with Simon Briggs
Find the vertical studs. They are usually spaced 400mm or 600mm apart. A stud finder like the one pictured makes this job very easy. For the average length shelf you only need two studs and they do not have to be evenly spaced along the shelf length.
Drill a test hole with a small drill bit at each stud location to verify the location of each stud.
Drill a 90mm deep, 12mm diameter hole (12mm drill bit) at each location. Try to keep the drill bit straight and horizontal.
Cut your 12mm threaded rods into 250mm lengths (this is for a 170mm wide shelf). Measure 90mm on each rod segment and mark with a piece of sticky tape or marker pen. You need 90mm of rod into the stud and ‘almost’ the width of the floating shelf protruding from the wall.
Smear the 90mm section of each threaded rod with glue. (Something like ‘no more nails’)
Using a hammer, tap each rod 90mm into each hole keeping it as straight and horizontal as possible.
Once the glue is set, check each rod for straightness and level using a builder’s level and/or a builder’s square. The rods are easy to adjust: Simply attach the largest shifting spanner you can find to the end of the rod and gently bend it.
Measure exactly where you want the holes to be positioned in the shelf. I drew the following plan for Cutshop®: Remember that your drawing is a REAR view. Then measure again!


When you receive your Cutshop® floating shelves carefully check that the holes match up to your threaded rods.
Smear the threaded rods with glue. (You could also consider smearing some glue on the rear edge of the shelf)
Push the shelf onto the threaded rods a small way then, place a cloth over the front edge of the shelf for protection of the surface. Hold a piece of wood against the front edge of the shelf and gently and evenly knock the shelf all the way onto wall.
One the shelf is fully against the wall you may need some filler like ‘no more gaps’ to tidy up if the wall is not perfectly straight.
JOB DONE!

Use floating shelves to create an effortless, seamless and elegant look throughout your home.
Get in touch with Cutshop® and begin transforming your home one room at a time.