
How Custom Cabinetry Unlocks Your Sleepout's Full Potential
Custom cabinetry is the single most effective way to make a sleepout feel and function like a proper room, and with precision-cut panels from Cutshop®, it costs significantly less than most homeowners expect.
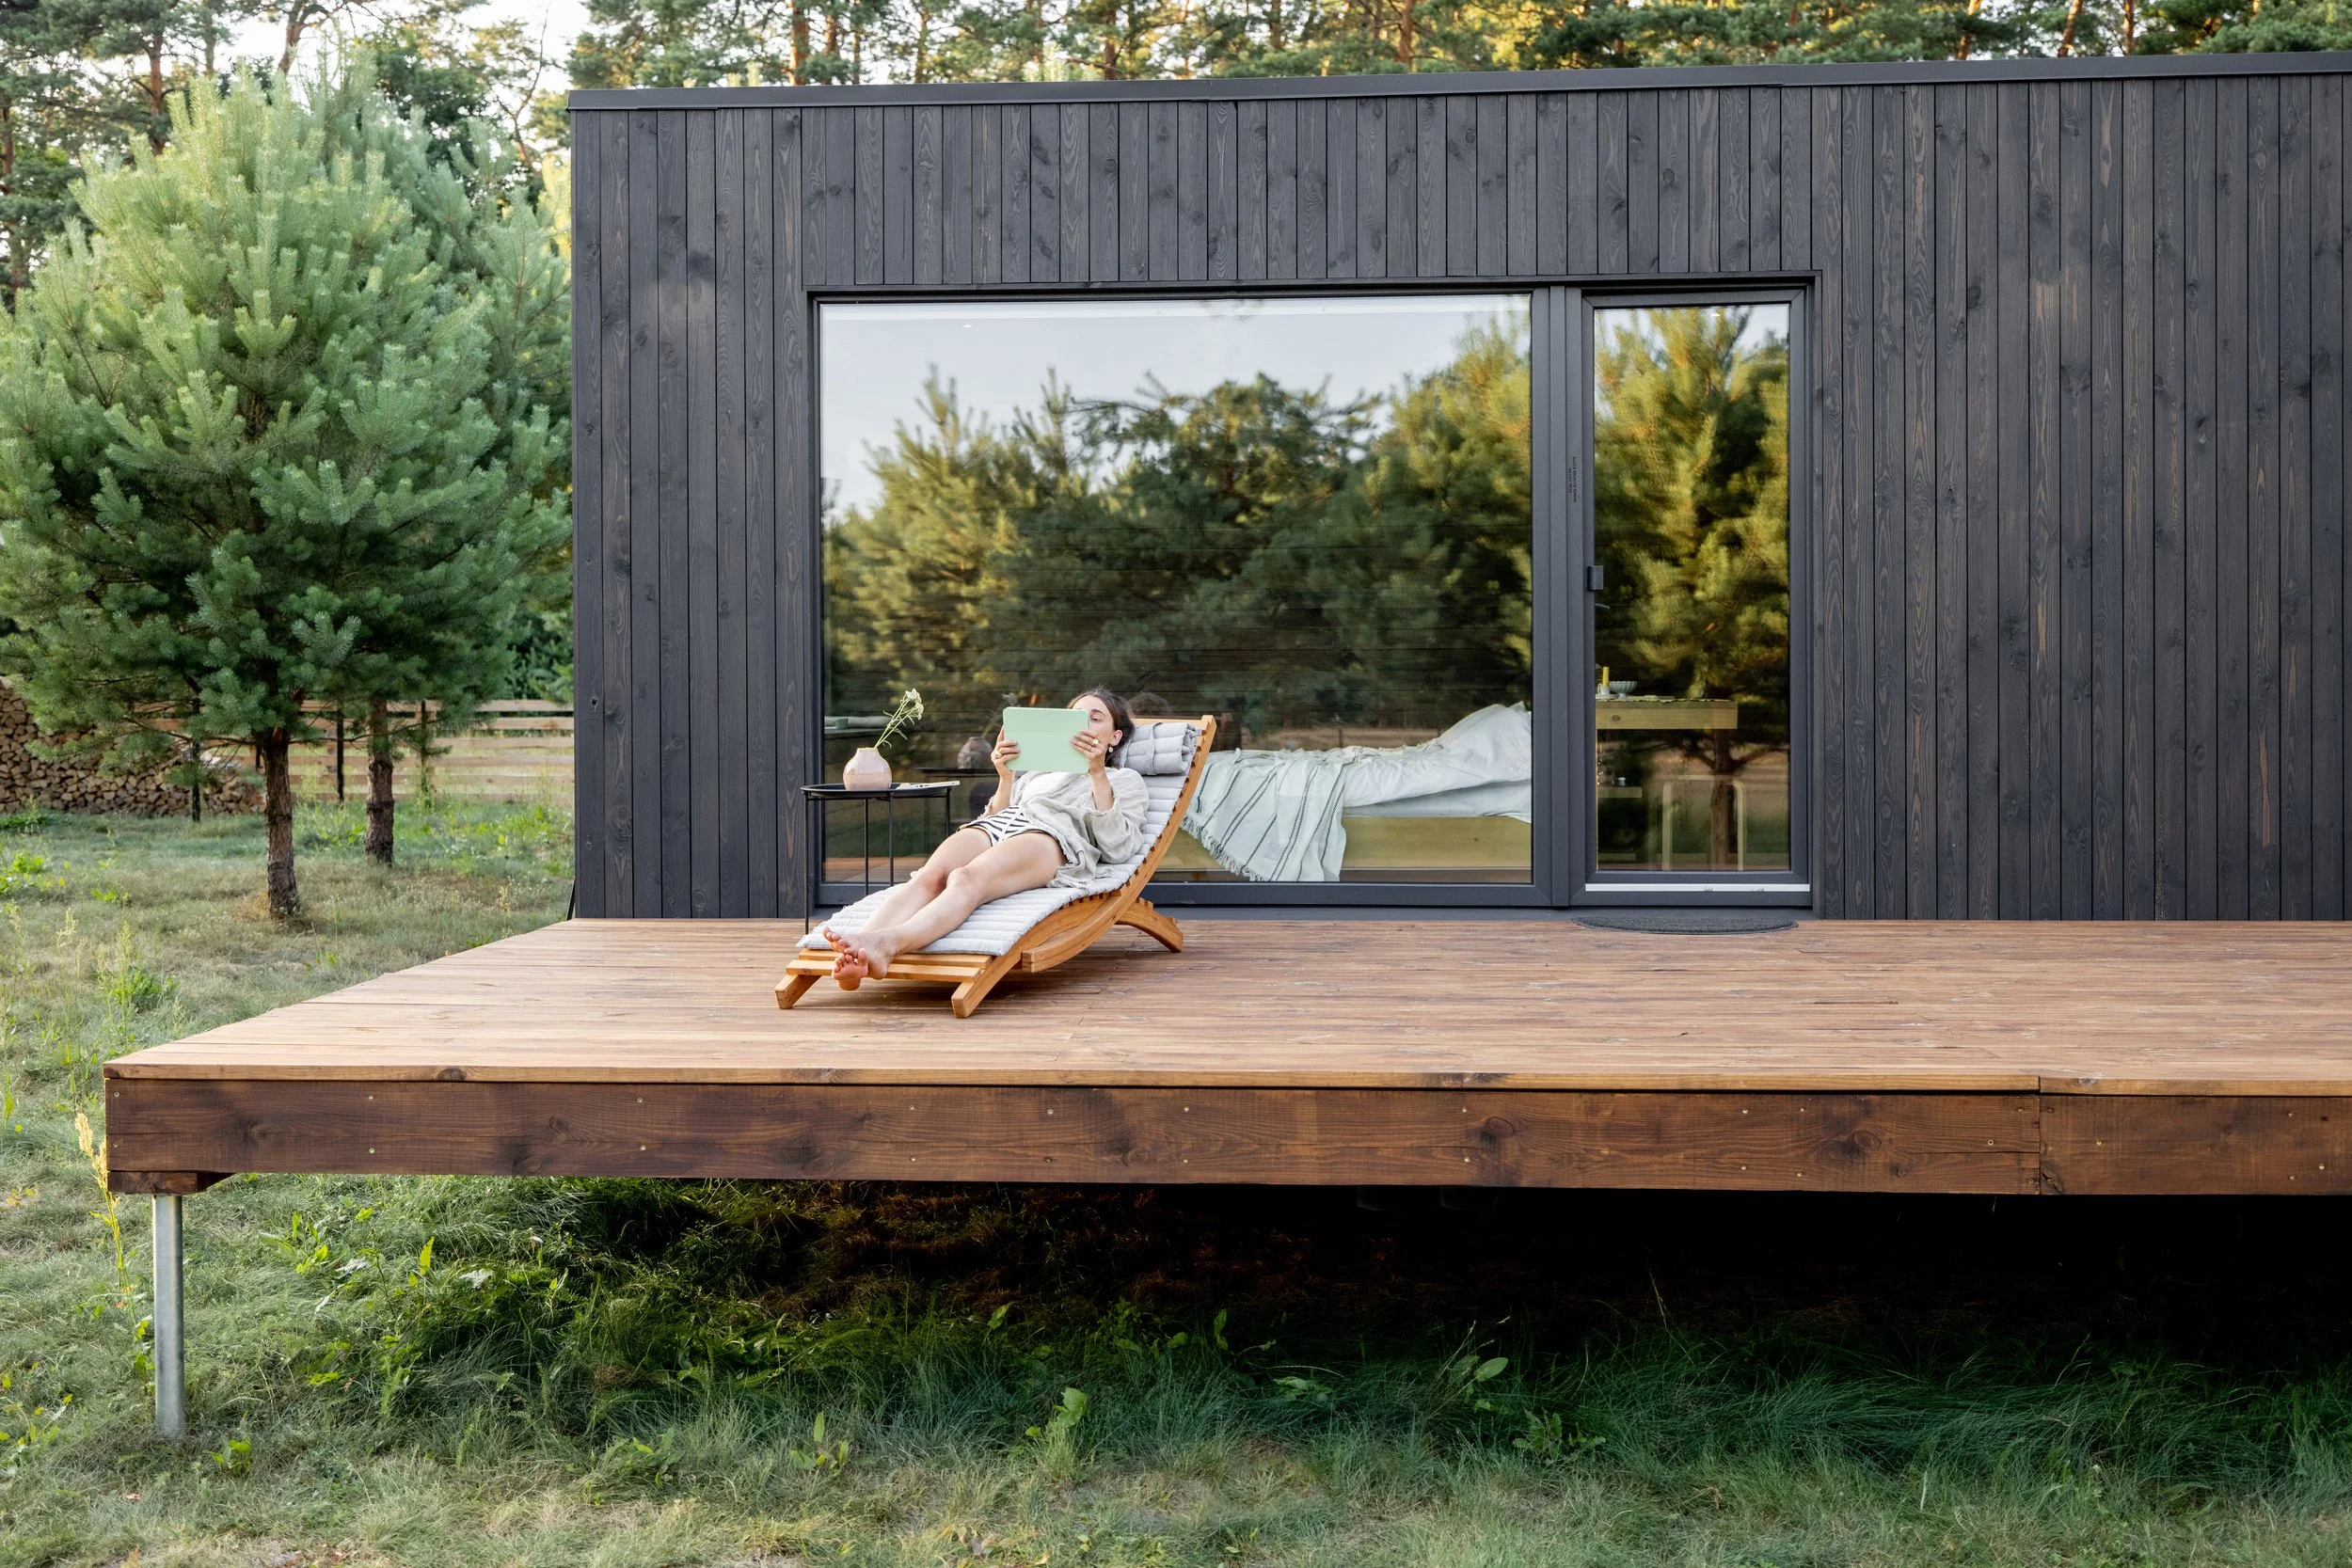
The Kiwi sleepout has come a long way over the past decade. These days, backyard studios are doing serious work: housing teenagers, hosting guests, generating rental income, and giving remote workers somewhere decent to actually focus. Here’s the problem that almost every sleepout owner eventually runs into: the space is too good to waste, but too small and too awkward for standard furniture to handle well.
Off-the-shelf wardrobes don’t fit, flat-pack units leave gaps, a freestanding desk eats up precious floor space. The result? A room that functions at about 60% of its potential, filled with furniture that looks like it was never quite meant to be there.
Custom cabinetry changes everything. And thanks to Cutshop’s® precision-cut panels, it’s more achievable and more affordable than you might think.
Why Don’t Standard Cabinets Work in Sleepouts?
Standard cabinets fail in sleepouts because sleepouts are rarely built to standard dimensions. Standard homes are built around fairly predictable dimensions. Sleepouts are not. Whether you’re working with a prefab kit home, a converted garage bay, or a purpose-built studio, you’re almost always dealing with walls that aren’t exactly 2400mm wide, ceiling pitches that slope at unexpected angles, and corners that don’t quite meet at 90 degrees.
These quirks make standard furniture frustrating. A wardrobe that’s 800mm wide when your wall is 860mm means a dusty gap and a unit that doesn’t fit. A kitchen cabinet designed for a 2400mm ceiling simply won't fit under a 2200mm roofline. Standard cabinetry forces compromises and in a small space, every compromise shows.
Cutshop’s® precision CNC manufacturing cuts panels to millimetre accuracy, so your cabinetry works with the space rather than fighting it. The result isn’t just functional, it looks intentional, considered, and far more expensive than it actually is.
What Are the Key Cabinetry Zones in a Well-Designed Sleepout?
The five cabinetry zones that have the biggest impact on a sleepout’s liveability are: the sleeping nook, the kitchenette, the wardrobe wall, the work corner, and the entry wall. Each can be designed and built with custom flat-pack panels from Cutshop®, and tackled one at a time as budget allows.
Think of a sleepout as a miniature apartment. The challenge is fitting the function of several rooms into one. The right cabinetry design makes this feel seamless rather than cramped. Here are the five zones worth planning carefully:
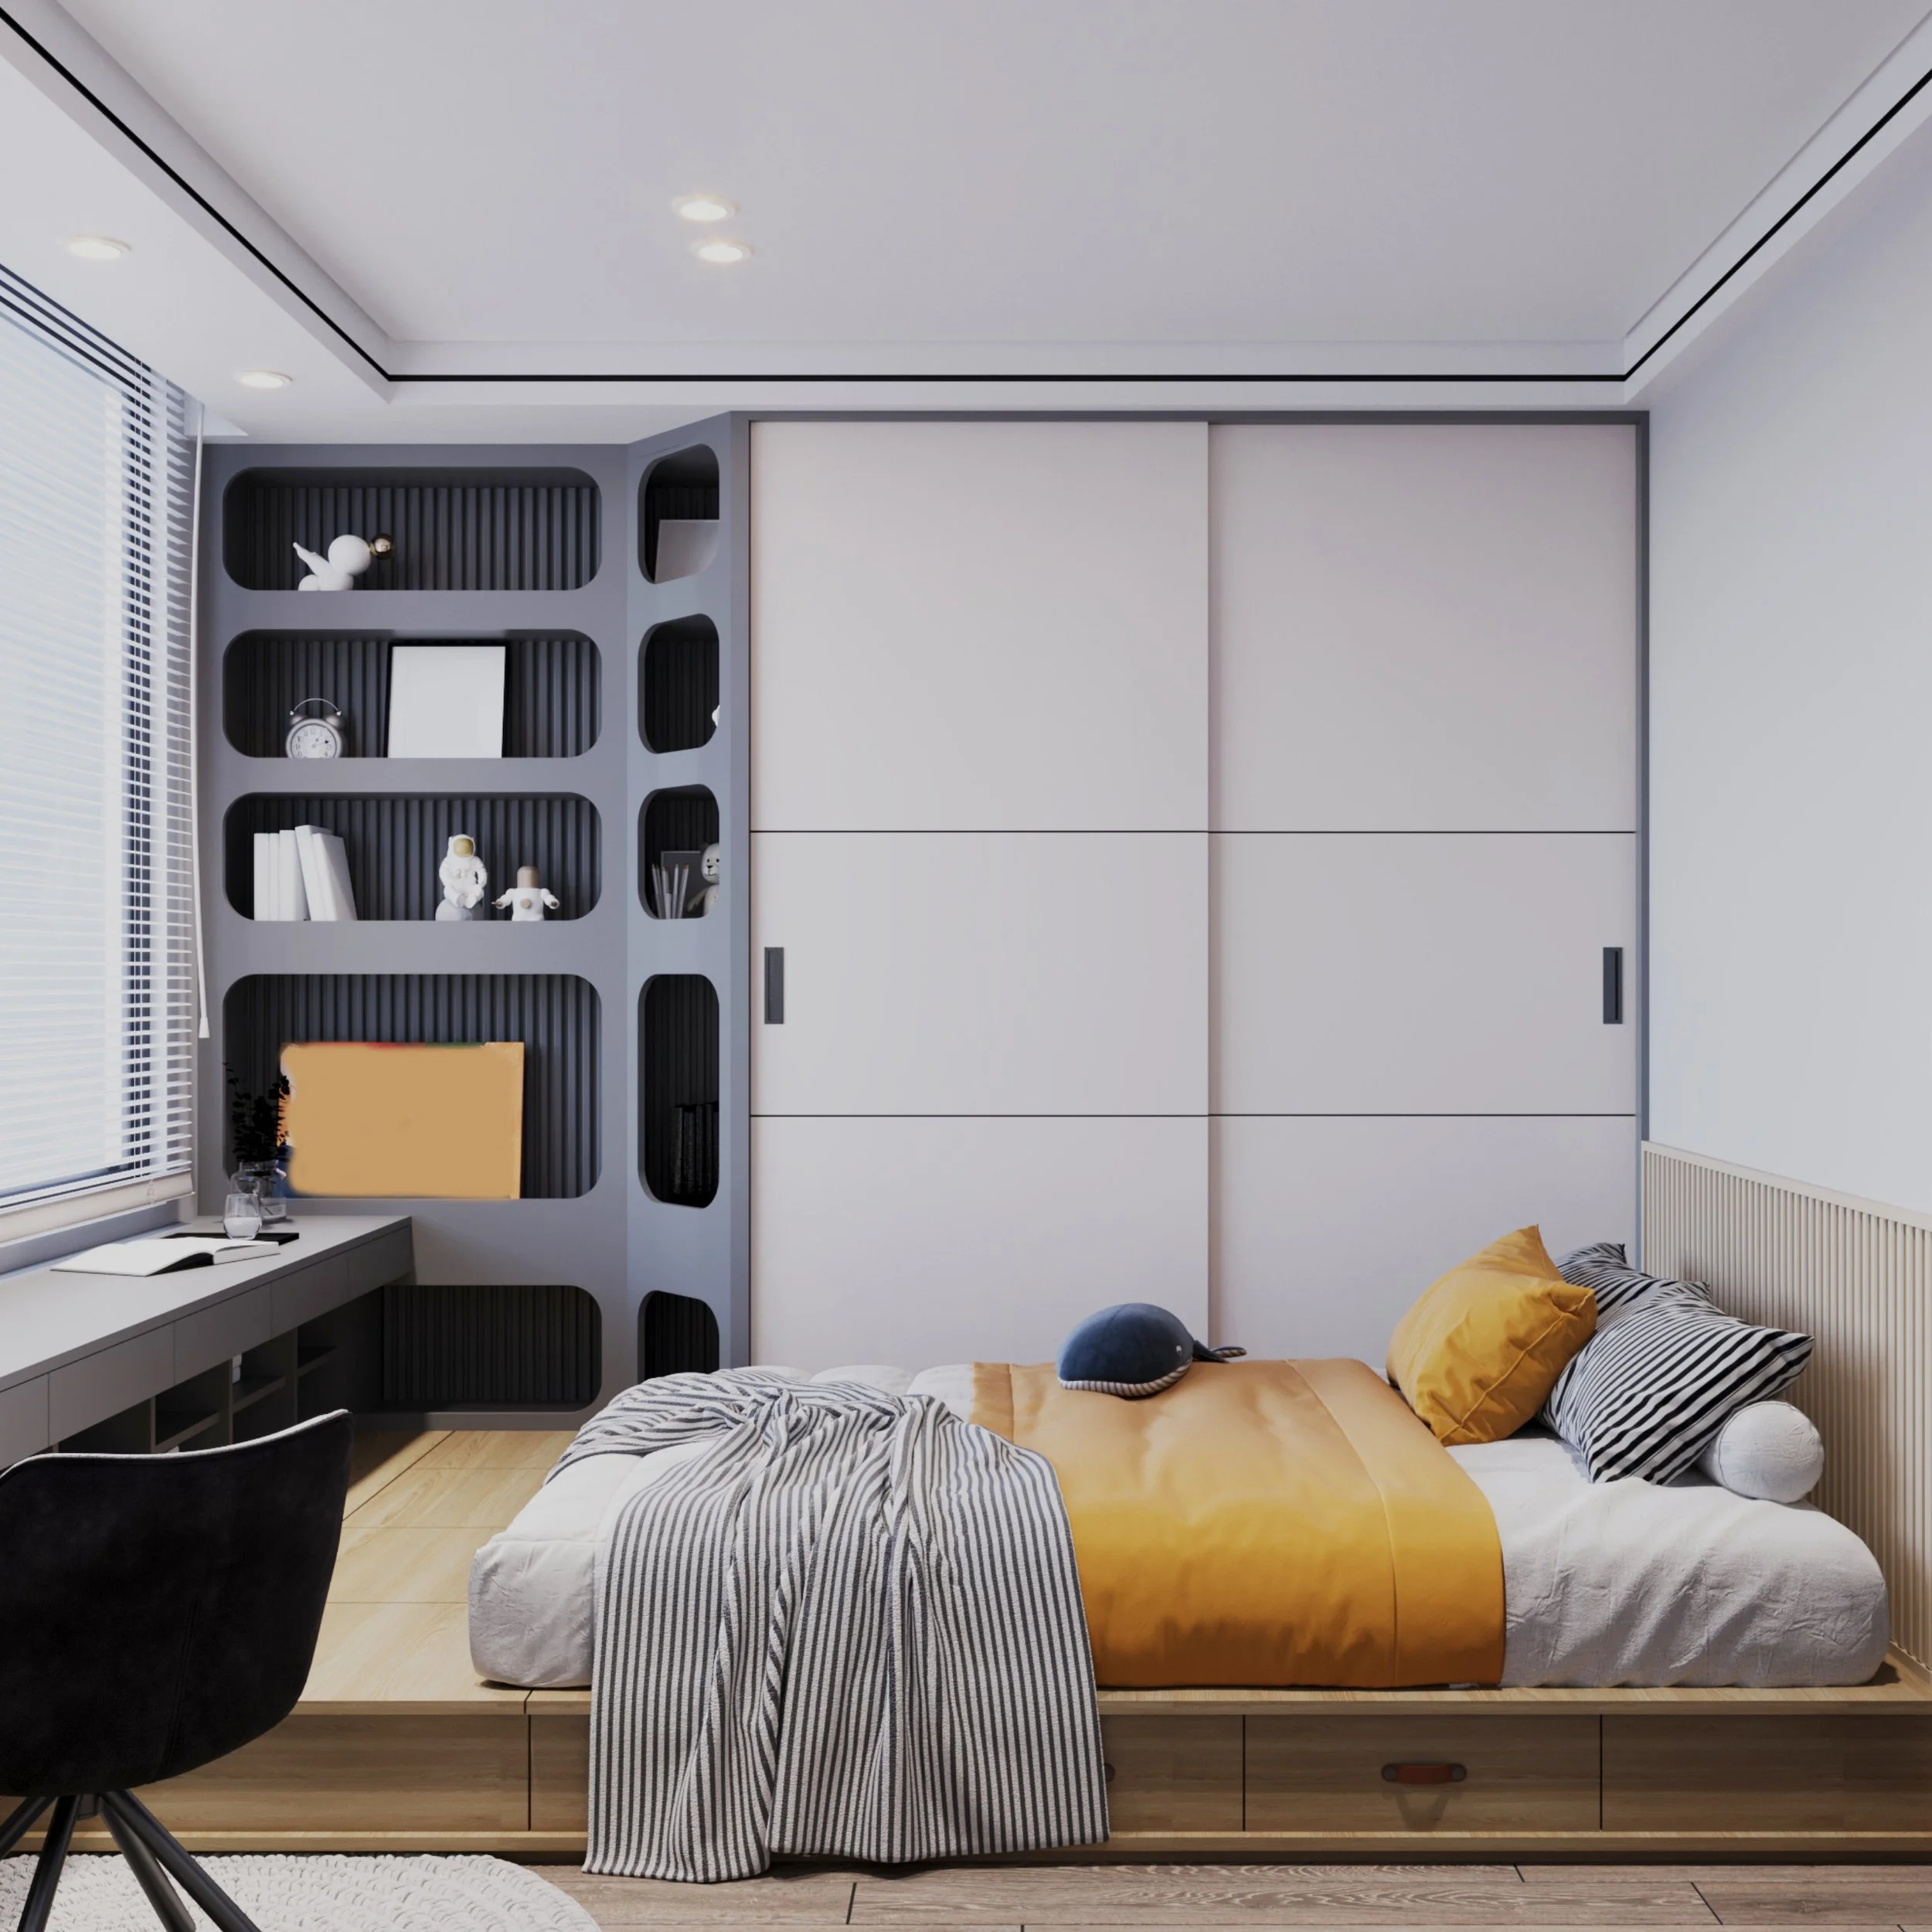
1. The Sleeping Nook: How Do You Maximise Floor Space Around a Bed?
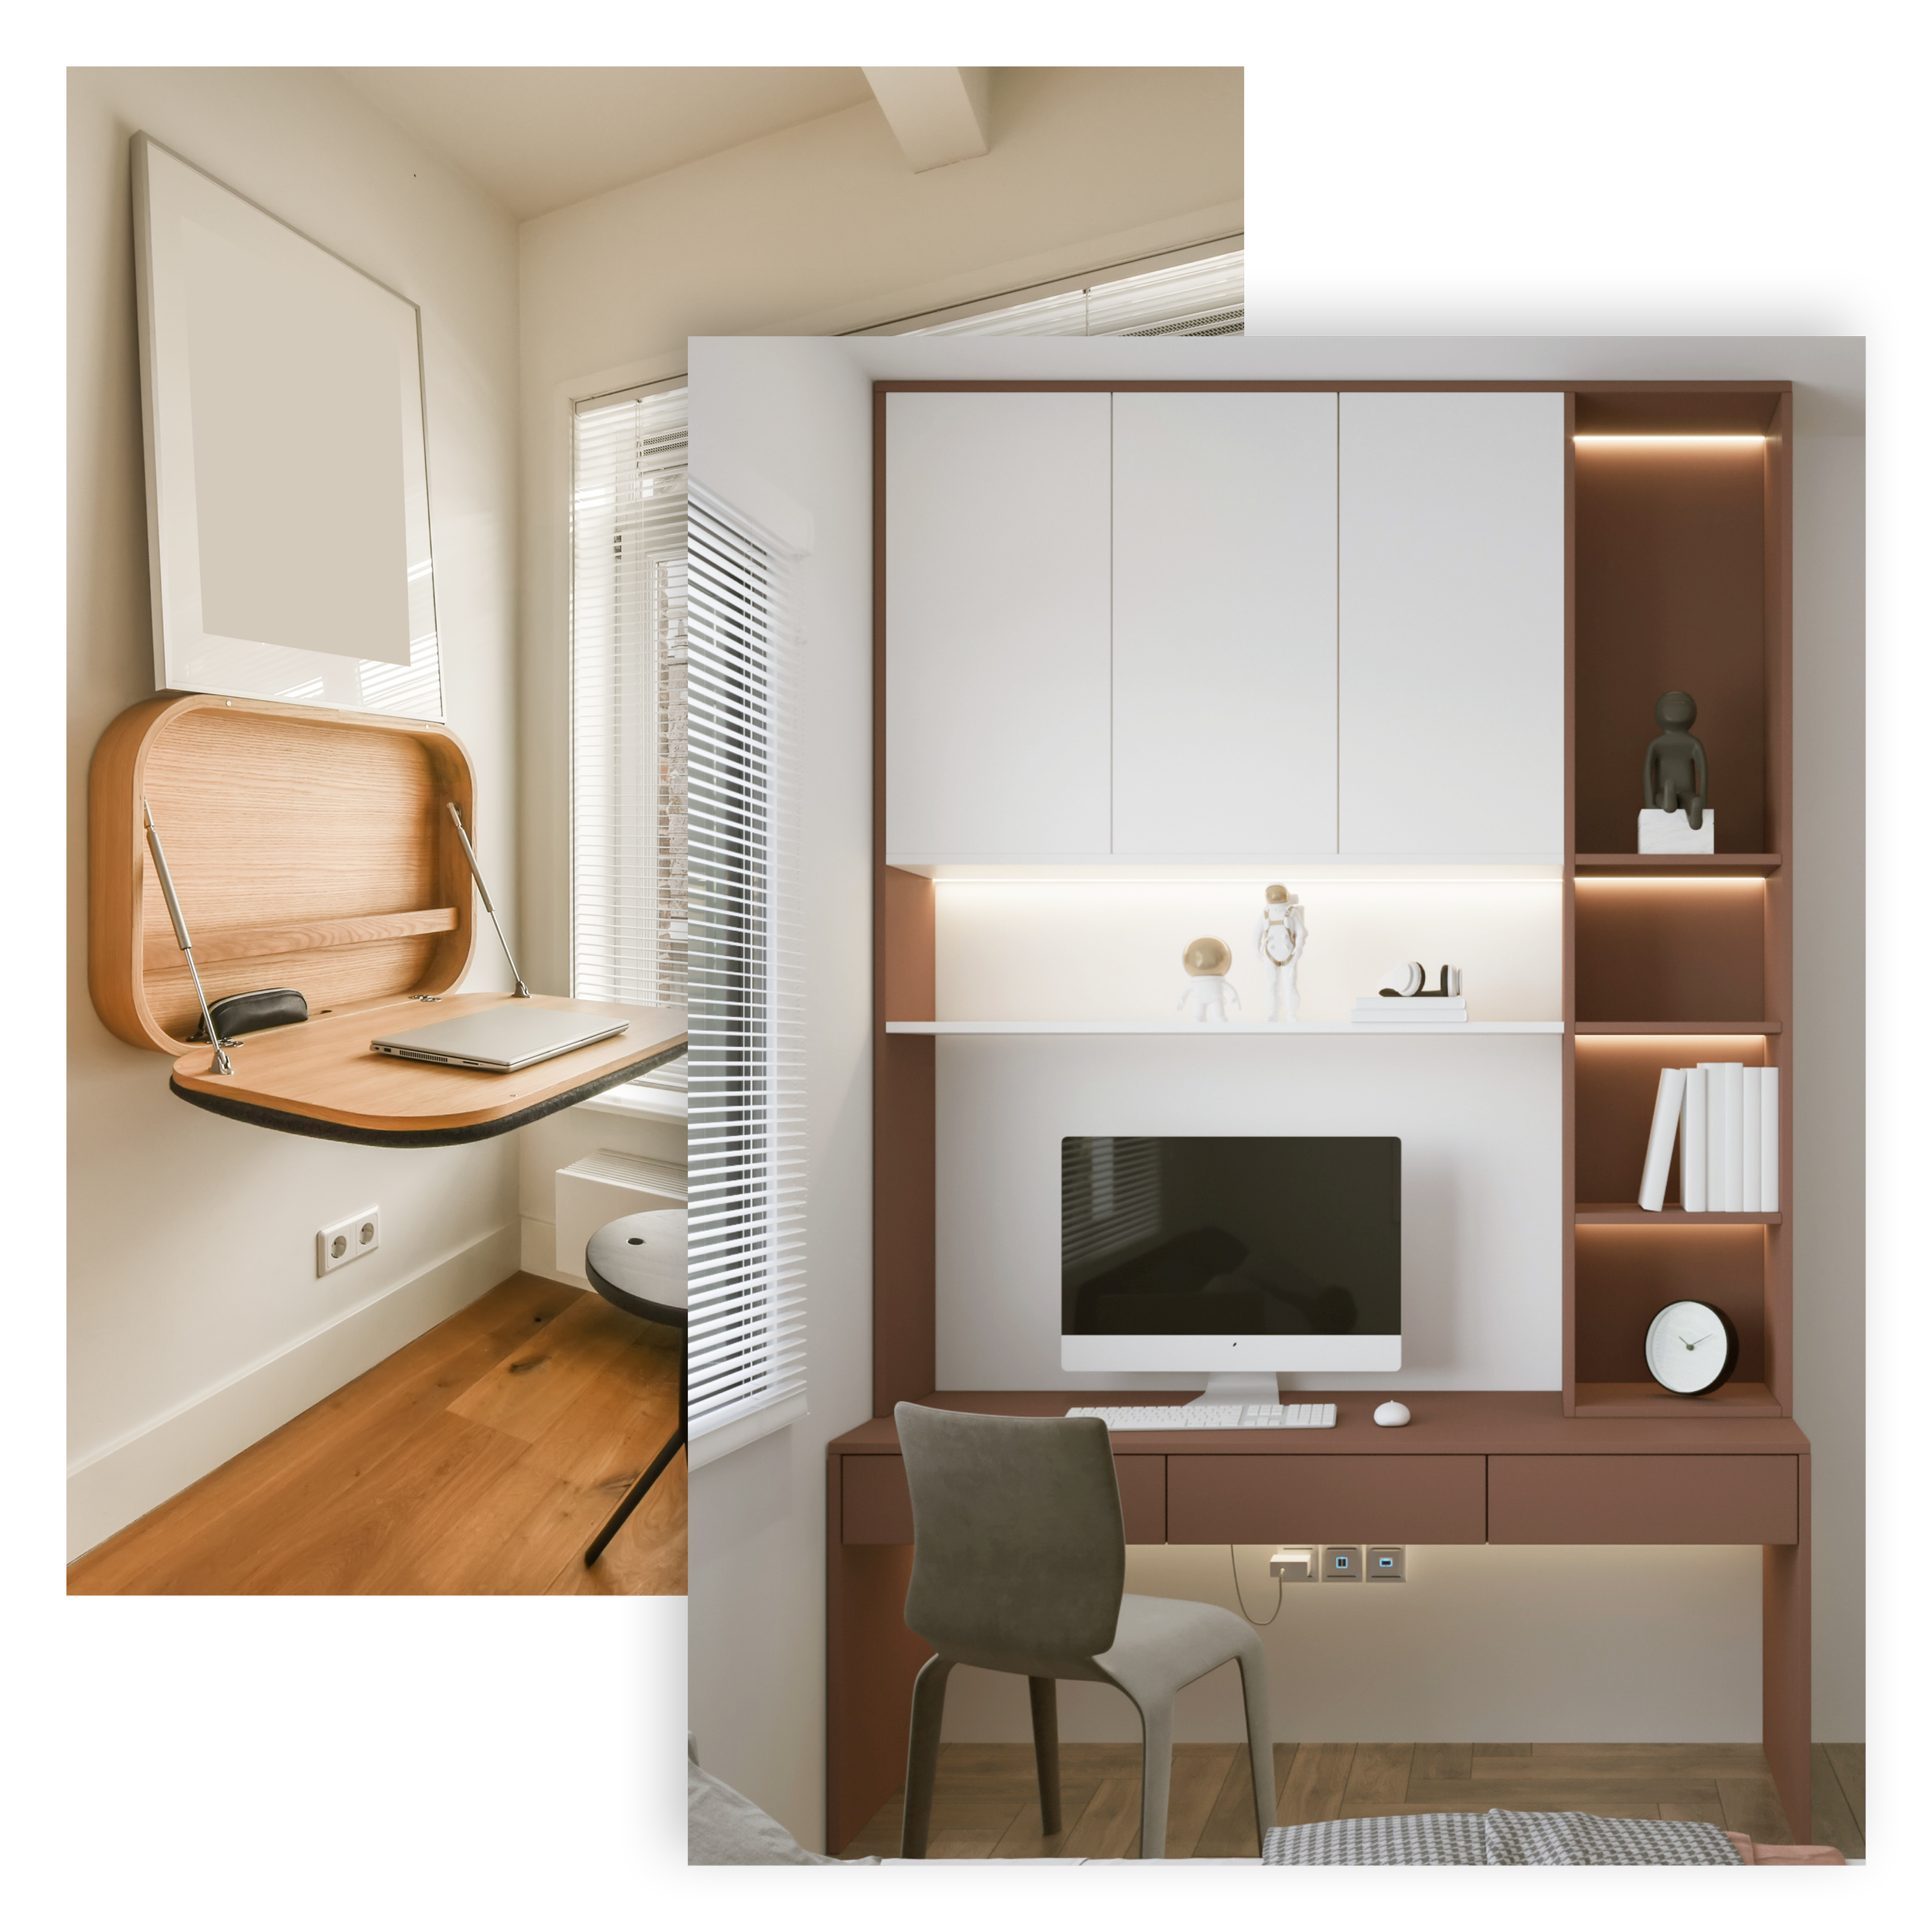
A custom-built platform bed frame with integrated storage underneath is the most space-efficient sleeping solution for a compact sleepout. In a compact sleepout, a fixed bed can consume more than a third of the total floor area. A custom-built platform bed frame constructed from precision-cut panels, solves this beautifully. Deep drawers underneath store linen and luggage. A headboard panel doubles as a built-in bedside unit with shelving on both sides. Where space is really tight, a murphy-bed-style fold-down frame built into a floor-to-ceiling cabinet unit gives you the full room back during the day (check out an example of this working here). Because every panel is cut to your exact mattress and room dimensions, the result fits perfectly, no wasted clearance, no awkward gaps.
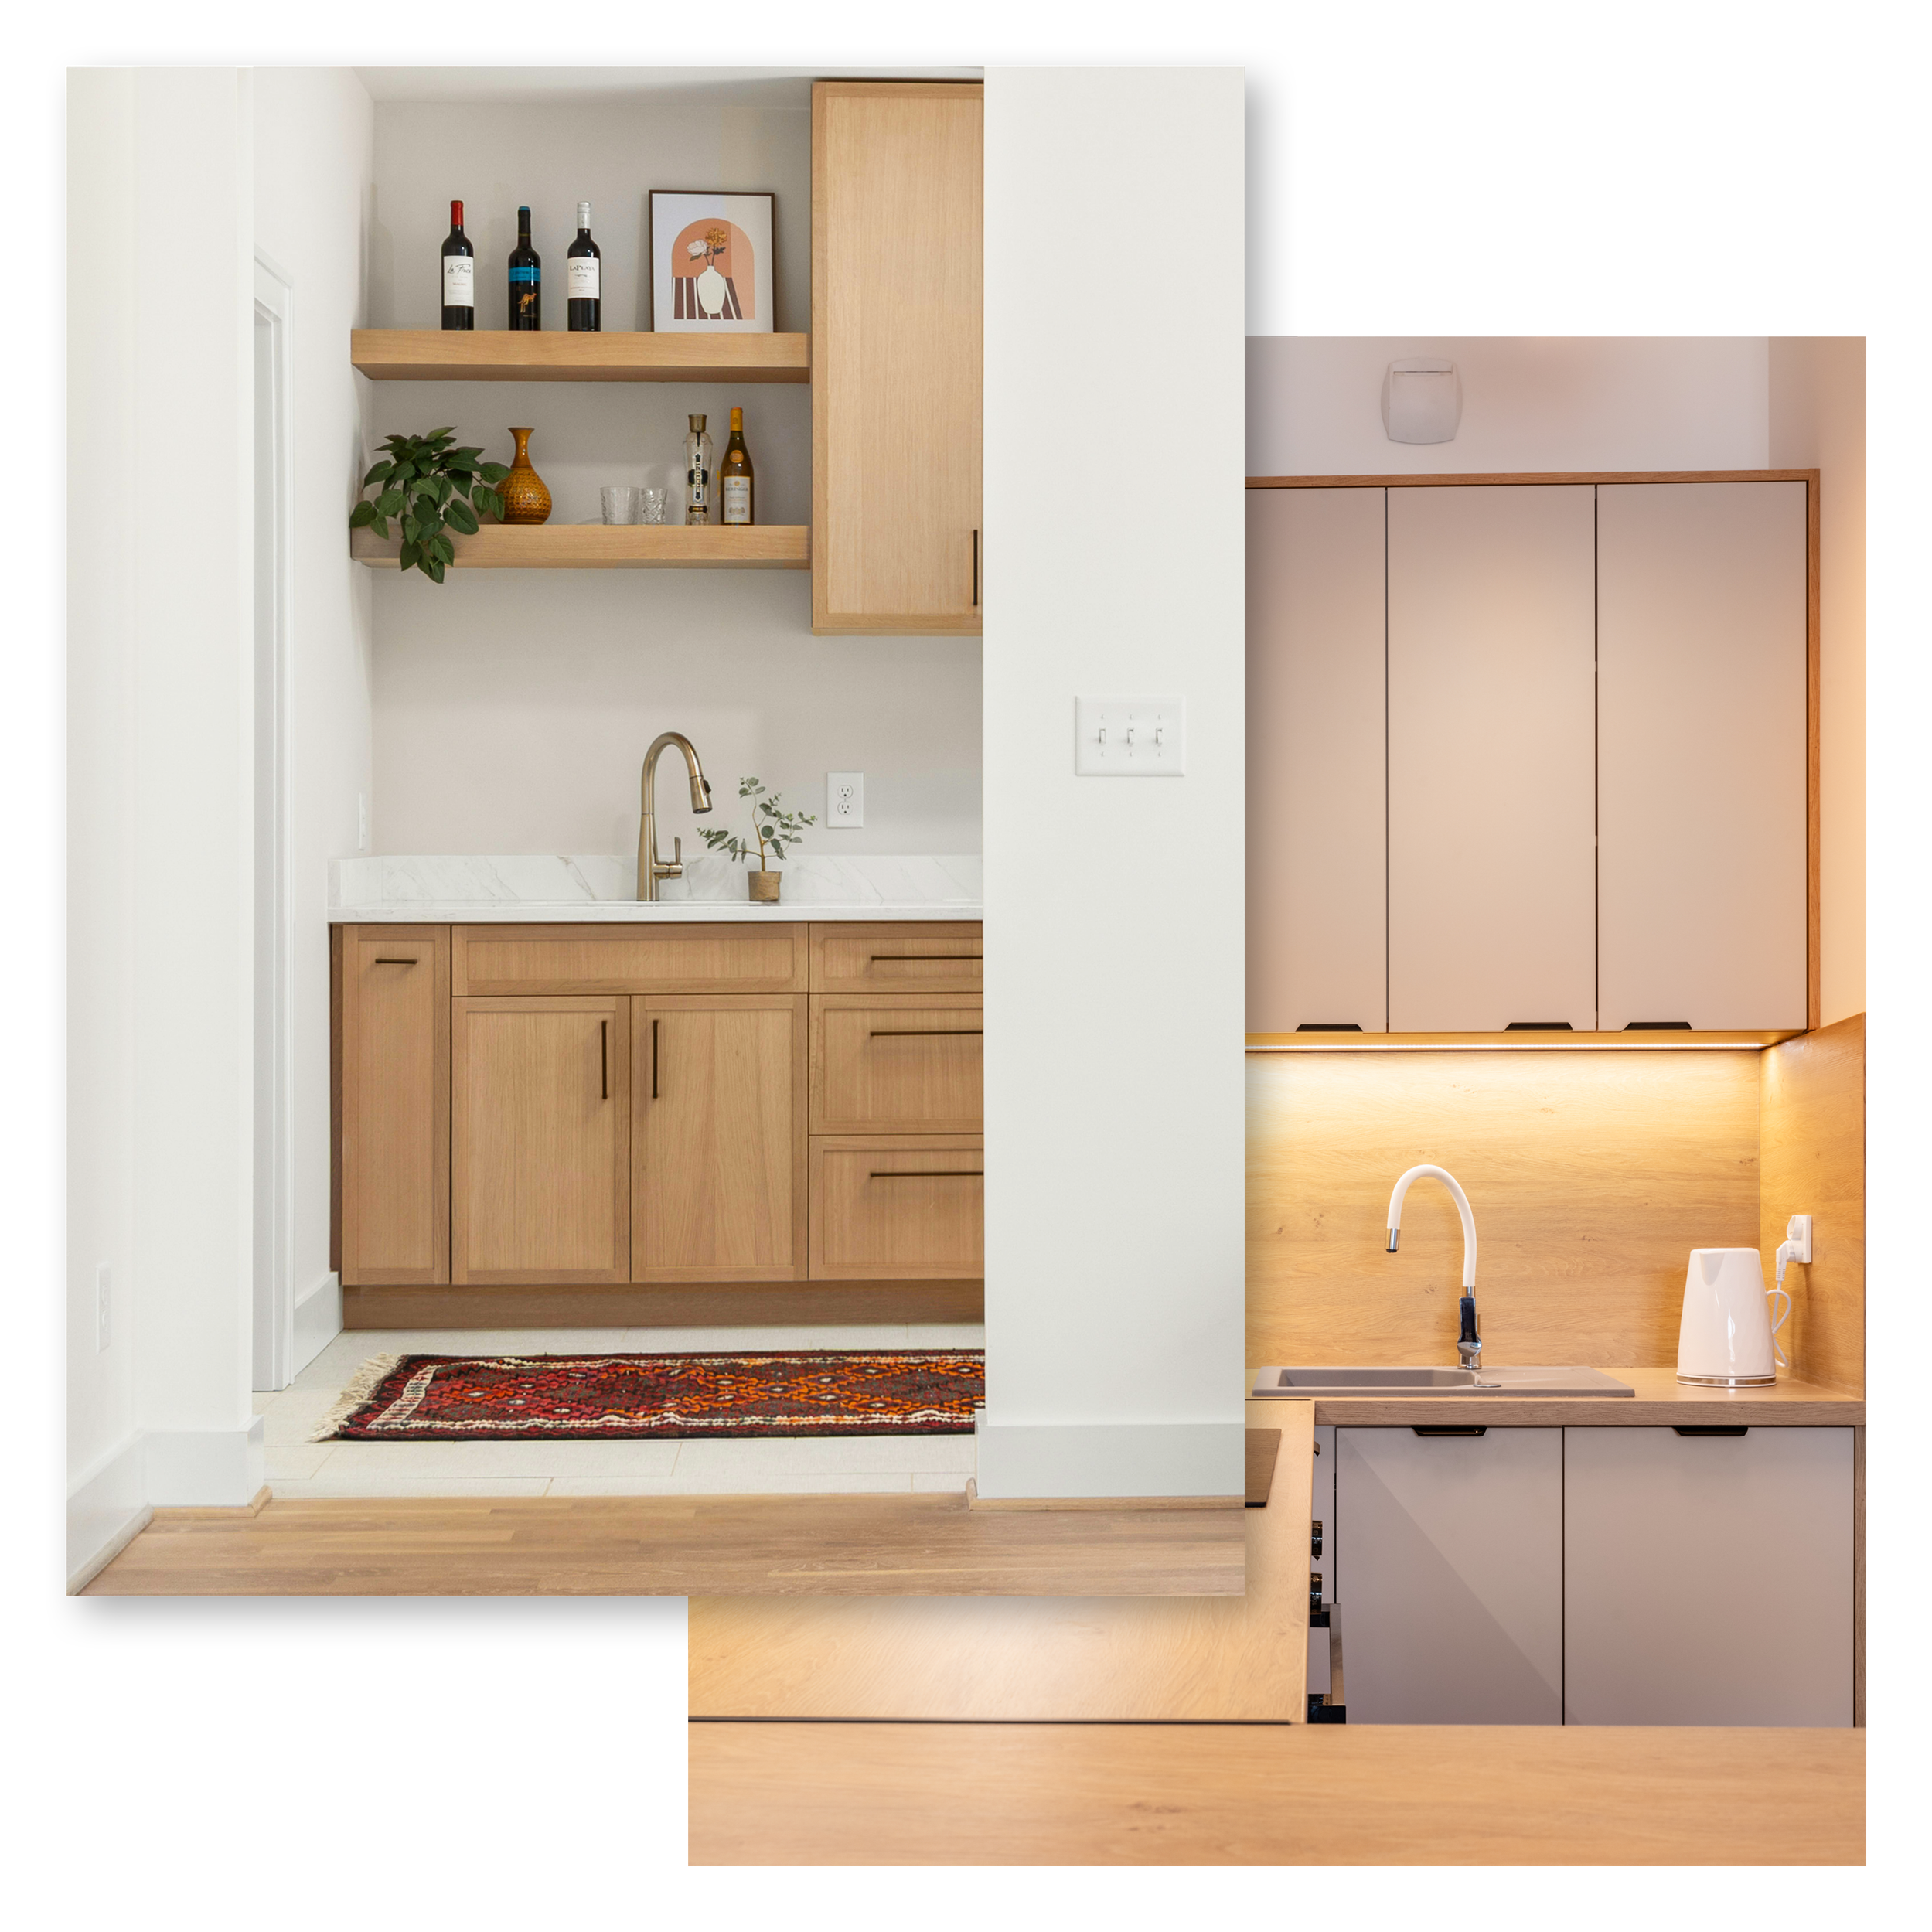
2. The Kitchenette: Can You Fit a Functional Kitchen in a Small Sleepout?
Yes, a custom kitchenette can fit in as little as 1.2 metres of wall space and transforms a sleepout’s rental value and liveability overnight. Standard kitchen cabinets are designed for full kitchens, not sleepouts. Custom cabinetry lets you design a kitchenette that fits your exact footprint: a base cabinet sized perfectly around a bar fridge, a slim overhead unit at precisely the right height, a benchtop cut wall-to-wall with no awkward overhangs. Add a custom panel to house a microwave neatly at eye level, and you’ve created a fully functional mini-kitchen that looks like it was always meant to be there. For appliance cutouts, sinks, cooktops, or integrated dishwashers Cutshop®’s large CNC machine handles these with precision, straight from your design specs.
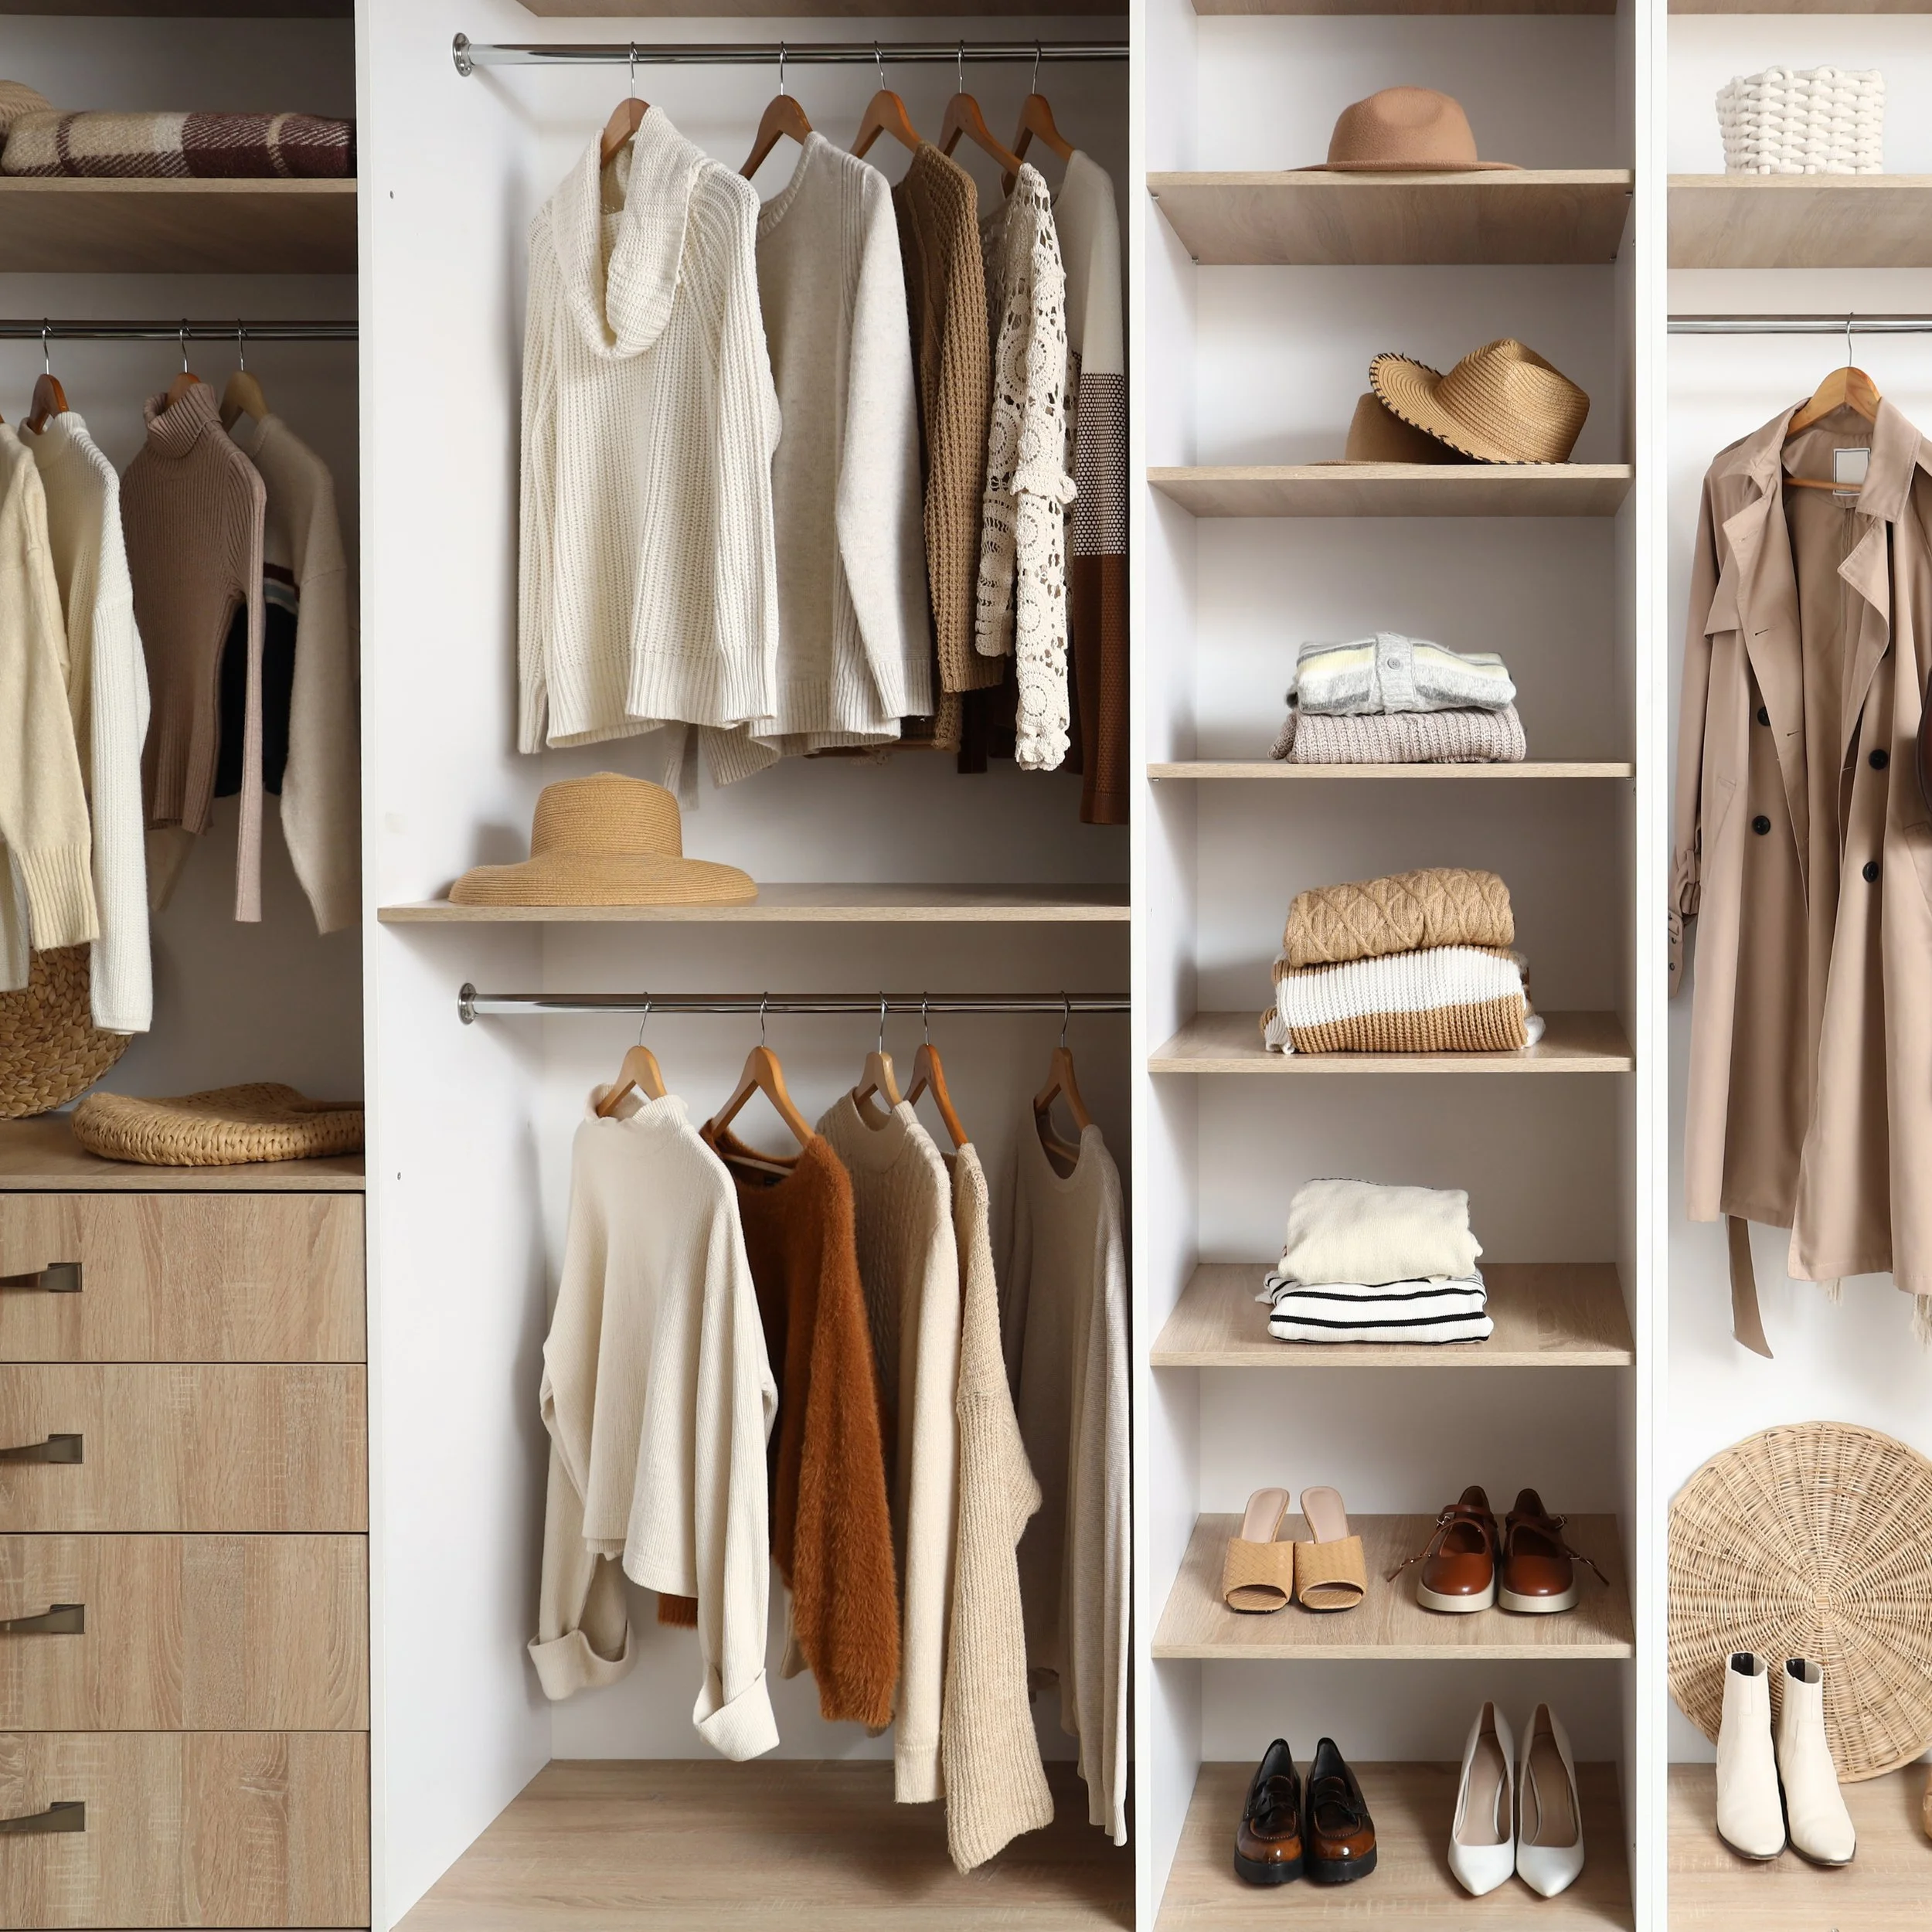
3. The Wardrobe Wall: What’s the Best Wardrobe Solution for a Sleepout?
A floor-to-ceiling wardrobe built to the exact width of your available wall is the single fastest way to make a sleepout feel like a real room. This alone transforms the storage situation entirely. You specify exactly how the interior is divided: hanging space, shelving, a shoe rack at the bottom, pull-out baskets, even a concealed laundry hamper. Because the unit is built to fit the wall precisely, it looks architectural rather than added-on and frees up the floor space that a freestanding wardrobe would have occupied.
4. The Work Corner: How Do You Create a Home Office in a Sleepout?
A custom-cut desk panel fitted at your preferred height, with integrated cabinetry underneath for drawers and tech storage, creates a functional work corner in even a very small sleepout. For sleepouts doubling as home offices or teenage study spaces, a dedicated work corner is essential. An overhead shelving unit built to the exact width of the desk ties it all together. For smaller spaces, a fold-down desk panel stows vertically within the cabinetry and pulls out to a full working surface when needed, disappearing completely when the space needs to serve another purpose. The ability to make every centimetre count is what separates a custom work corner from a table shoved under a window.
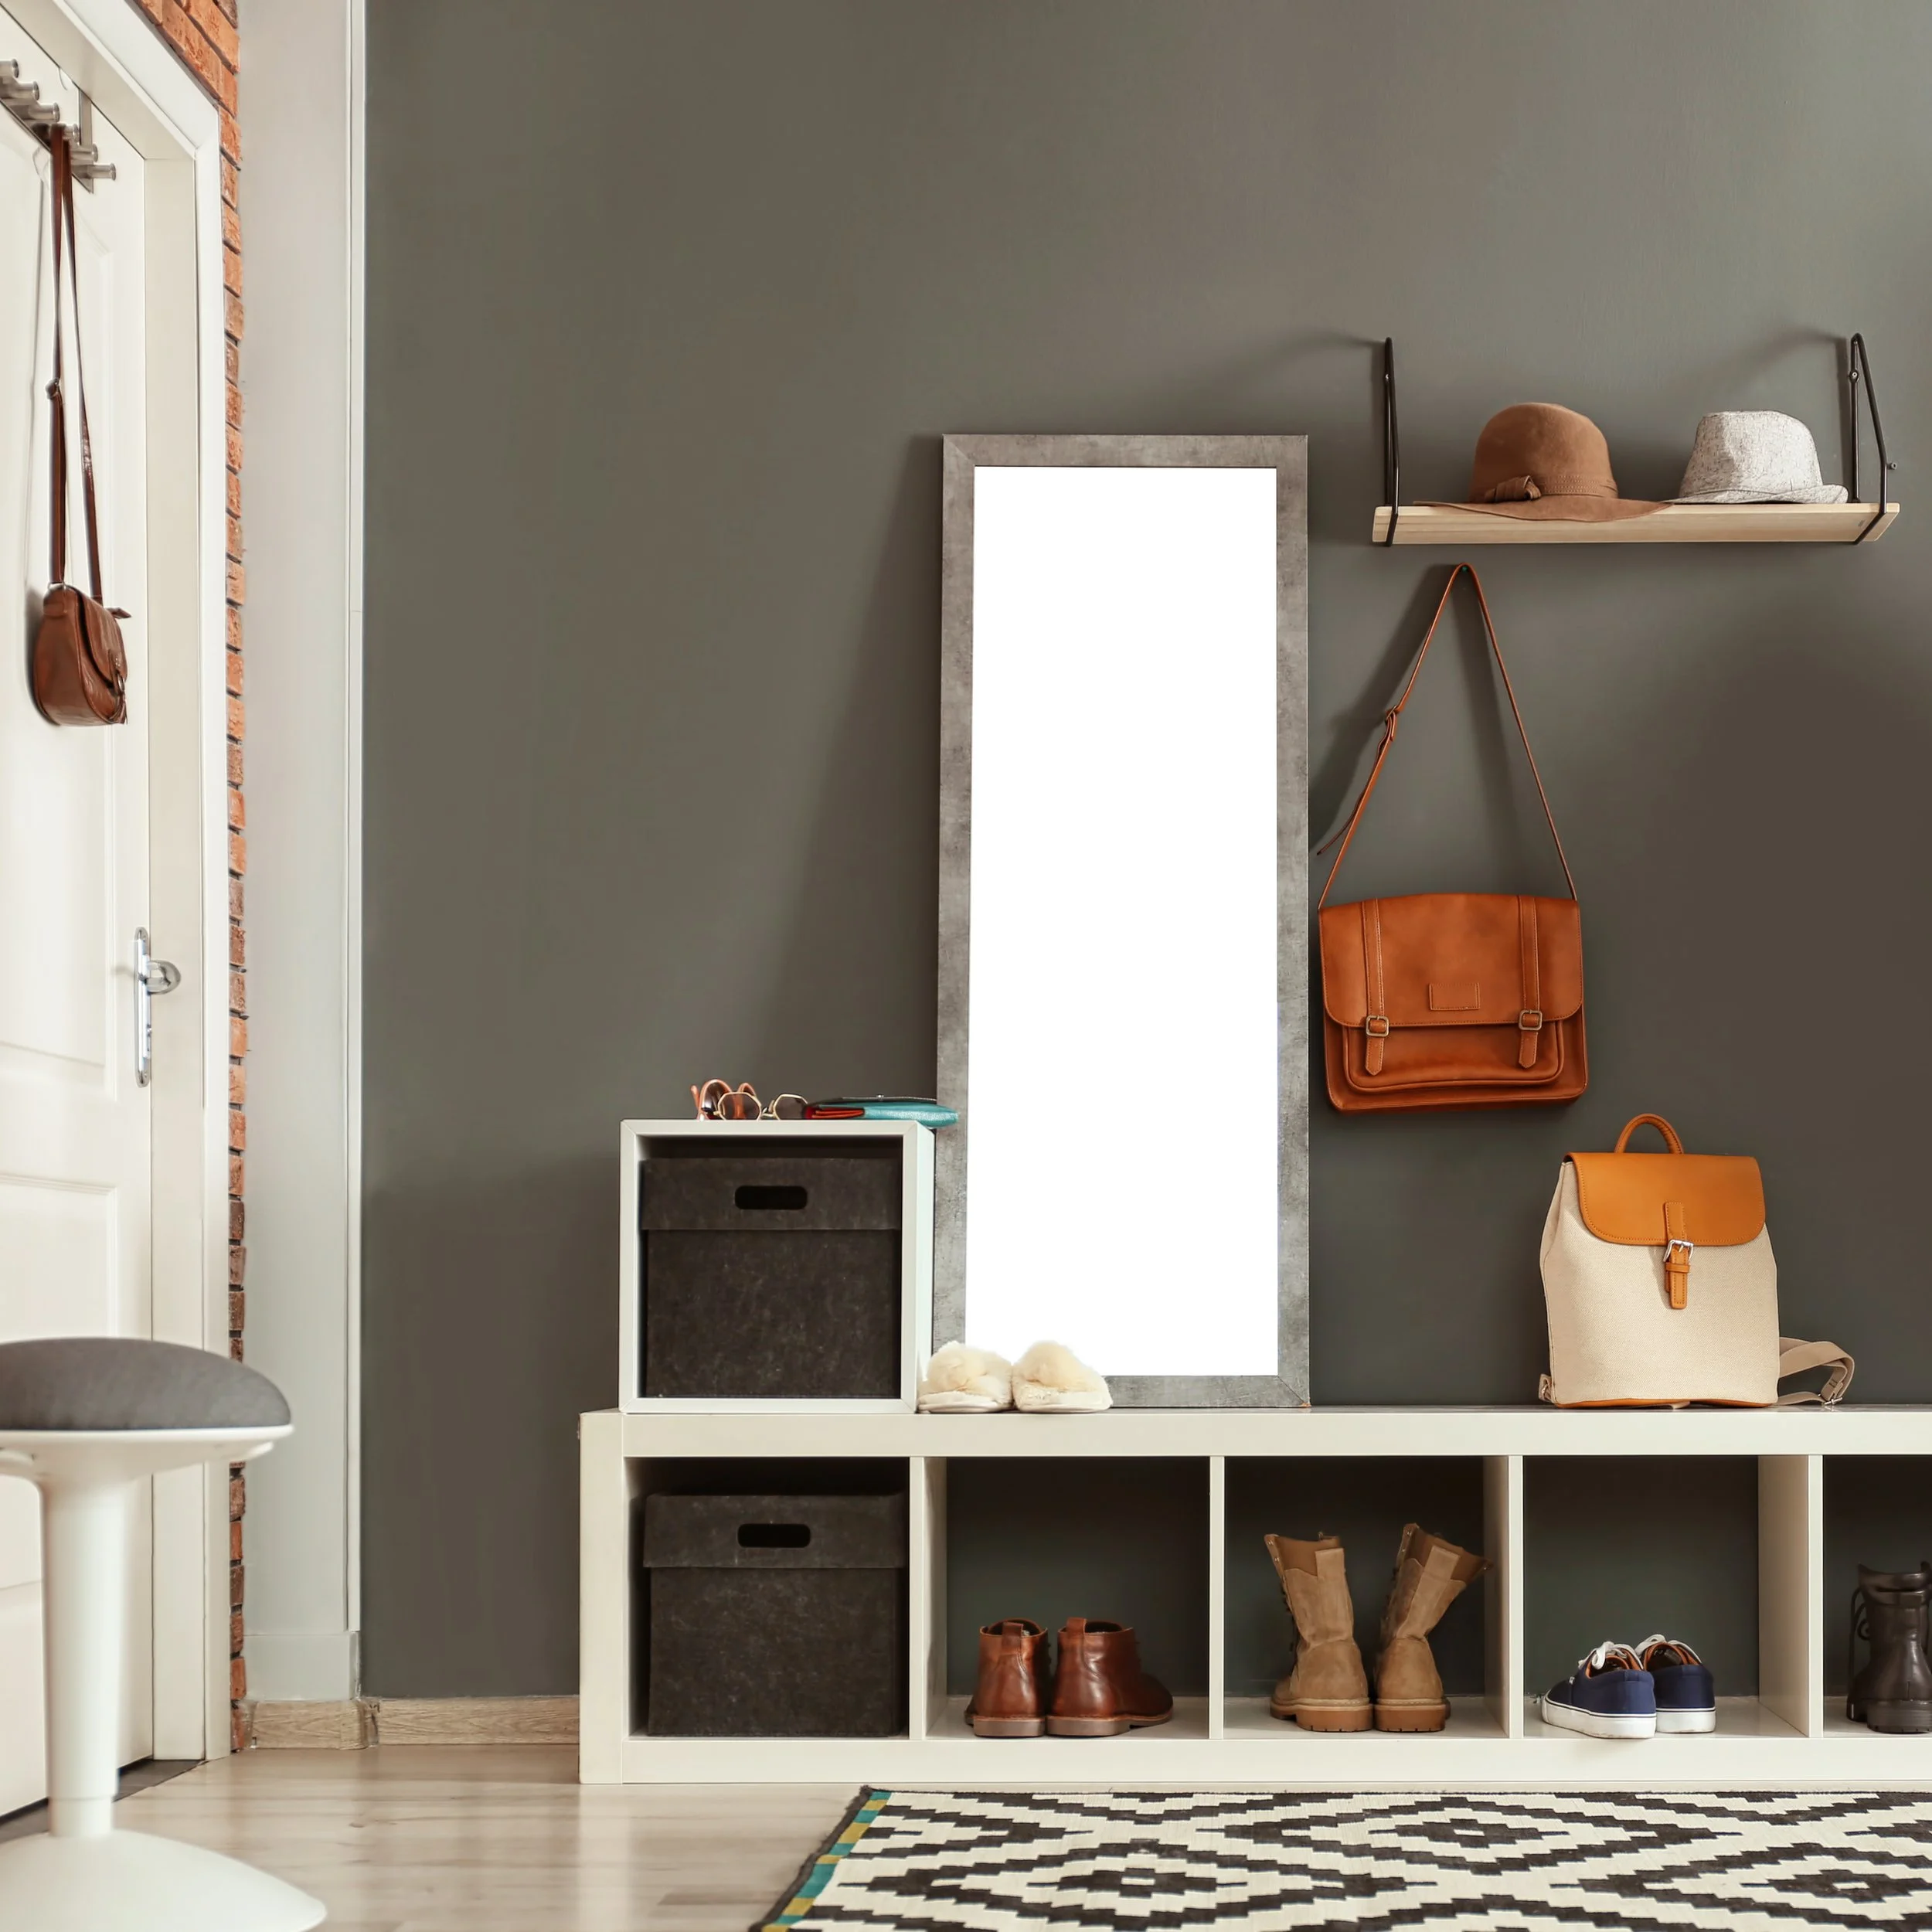
5. The Entry Wall: Why Does the Entry Matter in a Small Space?
The entry wall is the most overlooked zone in a sleepout, and one of the highest-impact ones. The wall immediately inside the door is often wasted; a coat hook screwed into the gib and a shoe rack always in the way. A slim, custom entry cabinet, perhaps just 300mm deep, can include concealed hooks, a bench seat for removing shoes, overhead enclosed storage for bags, and pull-out shoe cubbies below. This creates a proper transition zone between outside and inside, which makes a sleepout feel less like a converted structure and more like a considered home.
What Materials Should You Use for the Cabinetry in a Sleepout?
Moisture-resistant MDF and melamine-faced particleboard are the best all-round choices for NZ sleepout cabinetry, with timber veneer for feature zones and stainless or powder-coated hardware throughout. Sleepouts present a slightly different environment to a main house. Depending on their construction, they can experience greater temperature fluctuation and higher humidity, especially in New Zealand’s variable climate. Material selection matters here more than it does in a standard home renovation.
Best materials to use for your sleep out cabinetry in New Zealand:
HMR MDF
Best for kitchenettes and wet zones
Resists swelling, warping and edge breakdown
Excellent in all climatesMelamine Particleboard
Best for wardrobes, general storage
Cost-effective, wide colour range, easy to clean
Good in dry zones, avoid in high humidityTimber Veneer
Best for feature cabinetry and living zones
Premium aesthetic at mid-range cost
Good in most areas with correct sealingS/S or Powder-coated Hardware
Best hardware for all zones
Rust and salt-air resistant
Excellent in coastal & humid environments
Is Custom Cabinetry for a Sleepout Expensive?
No. Precision-cut flat-pack cabinetry from Cutshop® delivers custom fit without the custom labour cost. There’s a common misconception that custom cabinetry means expensive cabinetry. The moment the word “custom” appears, people assume they need to call a joiner, wait six to eight weeks, and spend twice their budget.
Precision-cut flat-pack panels turn that assumption on its head. You design the cabinetry to your exact measurements, the panels arrive cut and edge-banded, and you assemble them yourself. The custom precision is built in. The expensive labour is not.
For sleepouts specifically, this is ideal. Many sleepout builds are DIY or semi-DIY projects to begin with, so assembling custom flat-pack cabinetry fits naturally into that ethos and produces a result that looks anything but DIY. With Cutshop’s® you can tackle the cabinetry zone by zone. Start with the wardrobe wall. Add the kitchenette six months later. Build out the desk corner when the budget allows. Because every panel is cut to the exact dimensions of your specific space, each addition fits perfectly, no matter when you order it.
Build the Sleepout Your Property Deserves
A well-fitted sleepout doesn’t just improve your lifestyle, it adds real value to your property. In a market where usable square metres matter, a backyard studio that functions as an extra room is a big asset. The difference between a sleepout that feels like a shed conversion and one that feels like a beautifully designed space almost always comes down to the cabinetry. So whether you’re building a wardrobe wall, a compact kitchenette, or a full suite of built-in cabinetry for your backyard studio, Cutshop® is here to help.
Ready to unlock your sleepout’s full potential?
Talk to our team today to discuss your ideas.