
The Window Seat Library: Built for Cold Days and Long Books
The household reading nook usually picks itself: a bay window, dormer or hallway alcove. An armchair has been parked there for years, with a bookcase leaning against the nearest wall and a side table balancing a mug, a lamp, and a stack of paperbacks that keeps falling over.
The pieces are individually fine. They just don't add up to the thing you actually wanted, which is a deep bench under the window, shelves running up both sides, a thick cushion you can curl into, and a place to set the hot drink down without taking your eyes off the page.
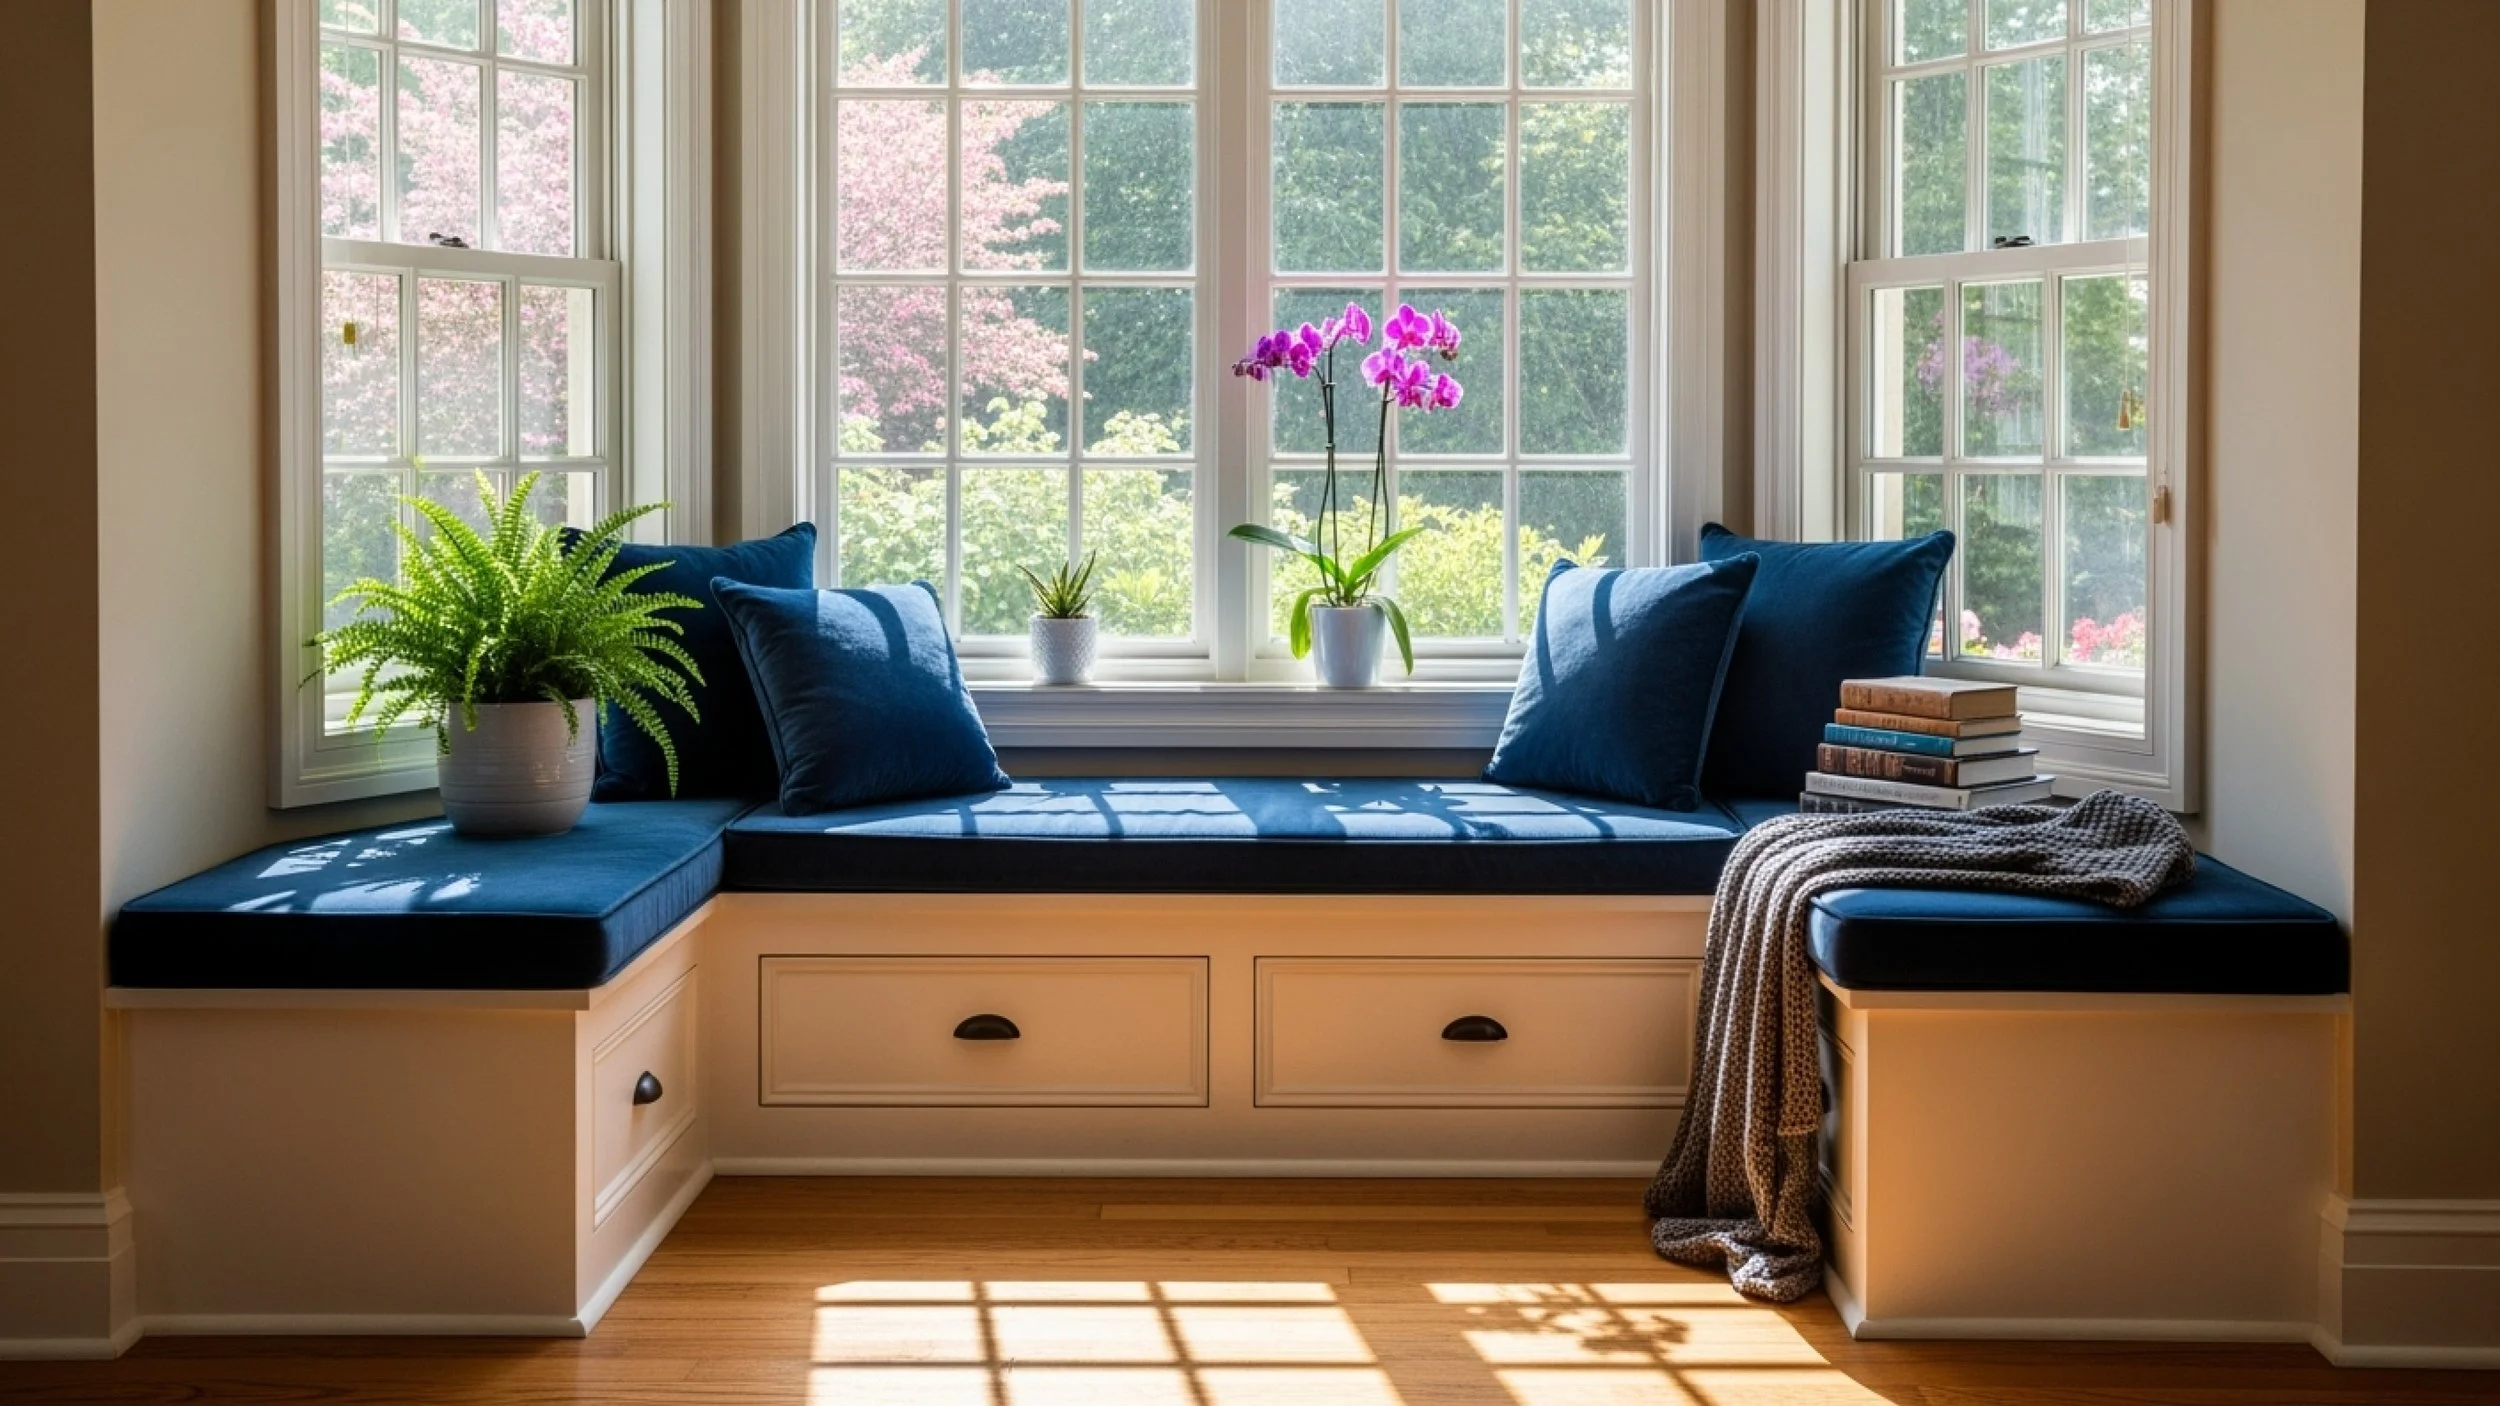
A window seat library is the built-in version of that idea cut to fit the space you already have. With precision panels from Cutshop®, the bay window that's been doing nothing useful for years becomes the coziest room in the house.
Why the armchair-and-bookcase setup never really works
A window seat is doing three jobs at once, and freestanding furniture can only do one at a time.
It needs to be a seat at the right height, deep enough to tuck your feet up, with a backrest that meets the wall cleanly. It needs to be storage for the wool throws, the spare reading pillow, the books that don't fit on the shelf yet. And it needs to have bookshelves either side, cut to the right heights for books, magazines and a reading lamp.
An armchair from a furniture store handles the seat. A bookcase from the same store handles the books. But the proportions never quite line up. The seat sits 50mm forward of the bookcase. The cushion is the wrong depth for the wall behind. The shelves are full-depth where they don't need to be and shallow where you wanted a row of taller hardbacks. The corner ends up looking gathered rather than designed.
A built-in solves all three problems at once. The seat sits flush against the wall. The shelves are cut to the heights of the books you actually own. The whole thing becomes a single piece of joinery.
Three configurations for three kinds of rooms
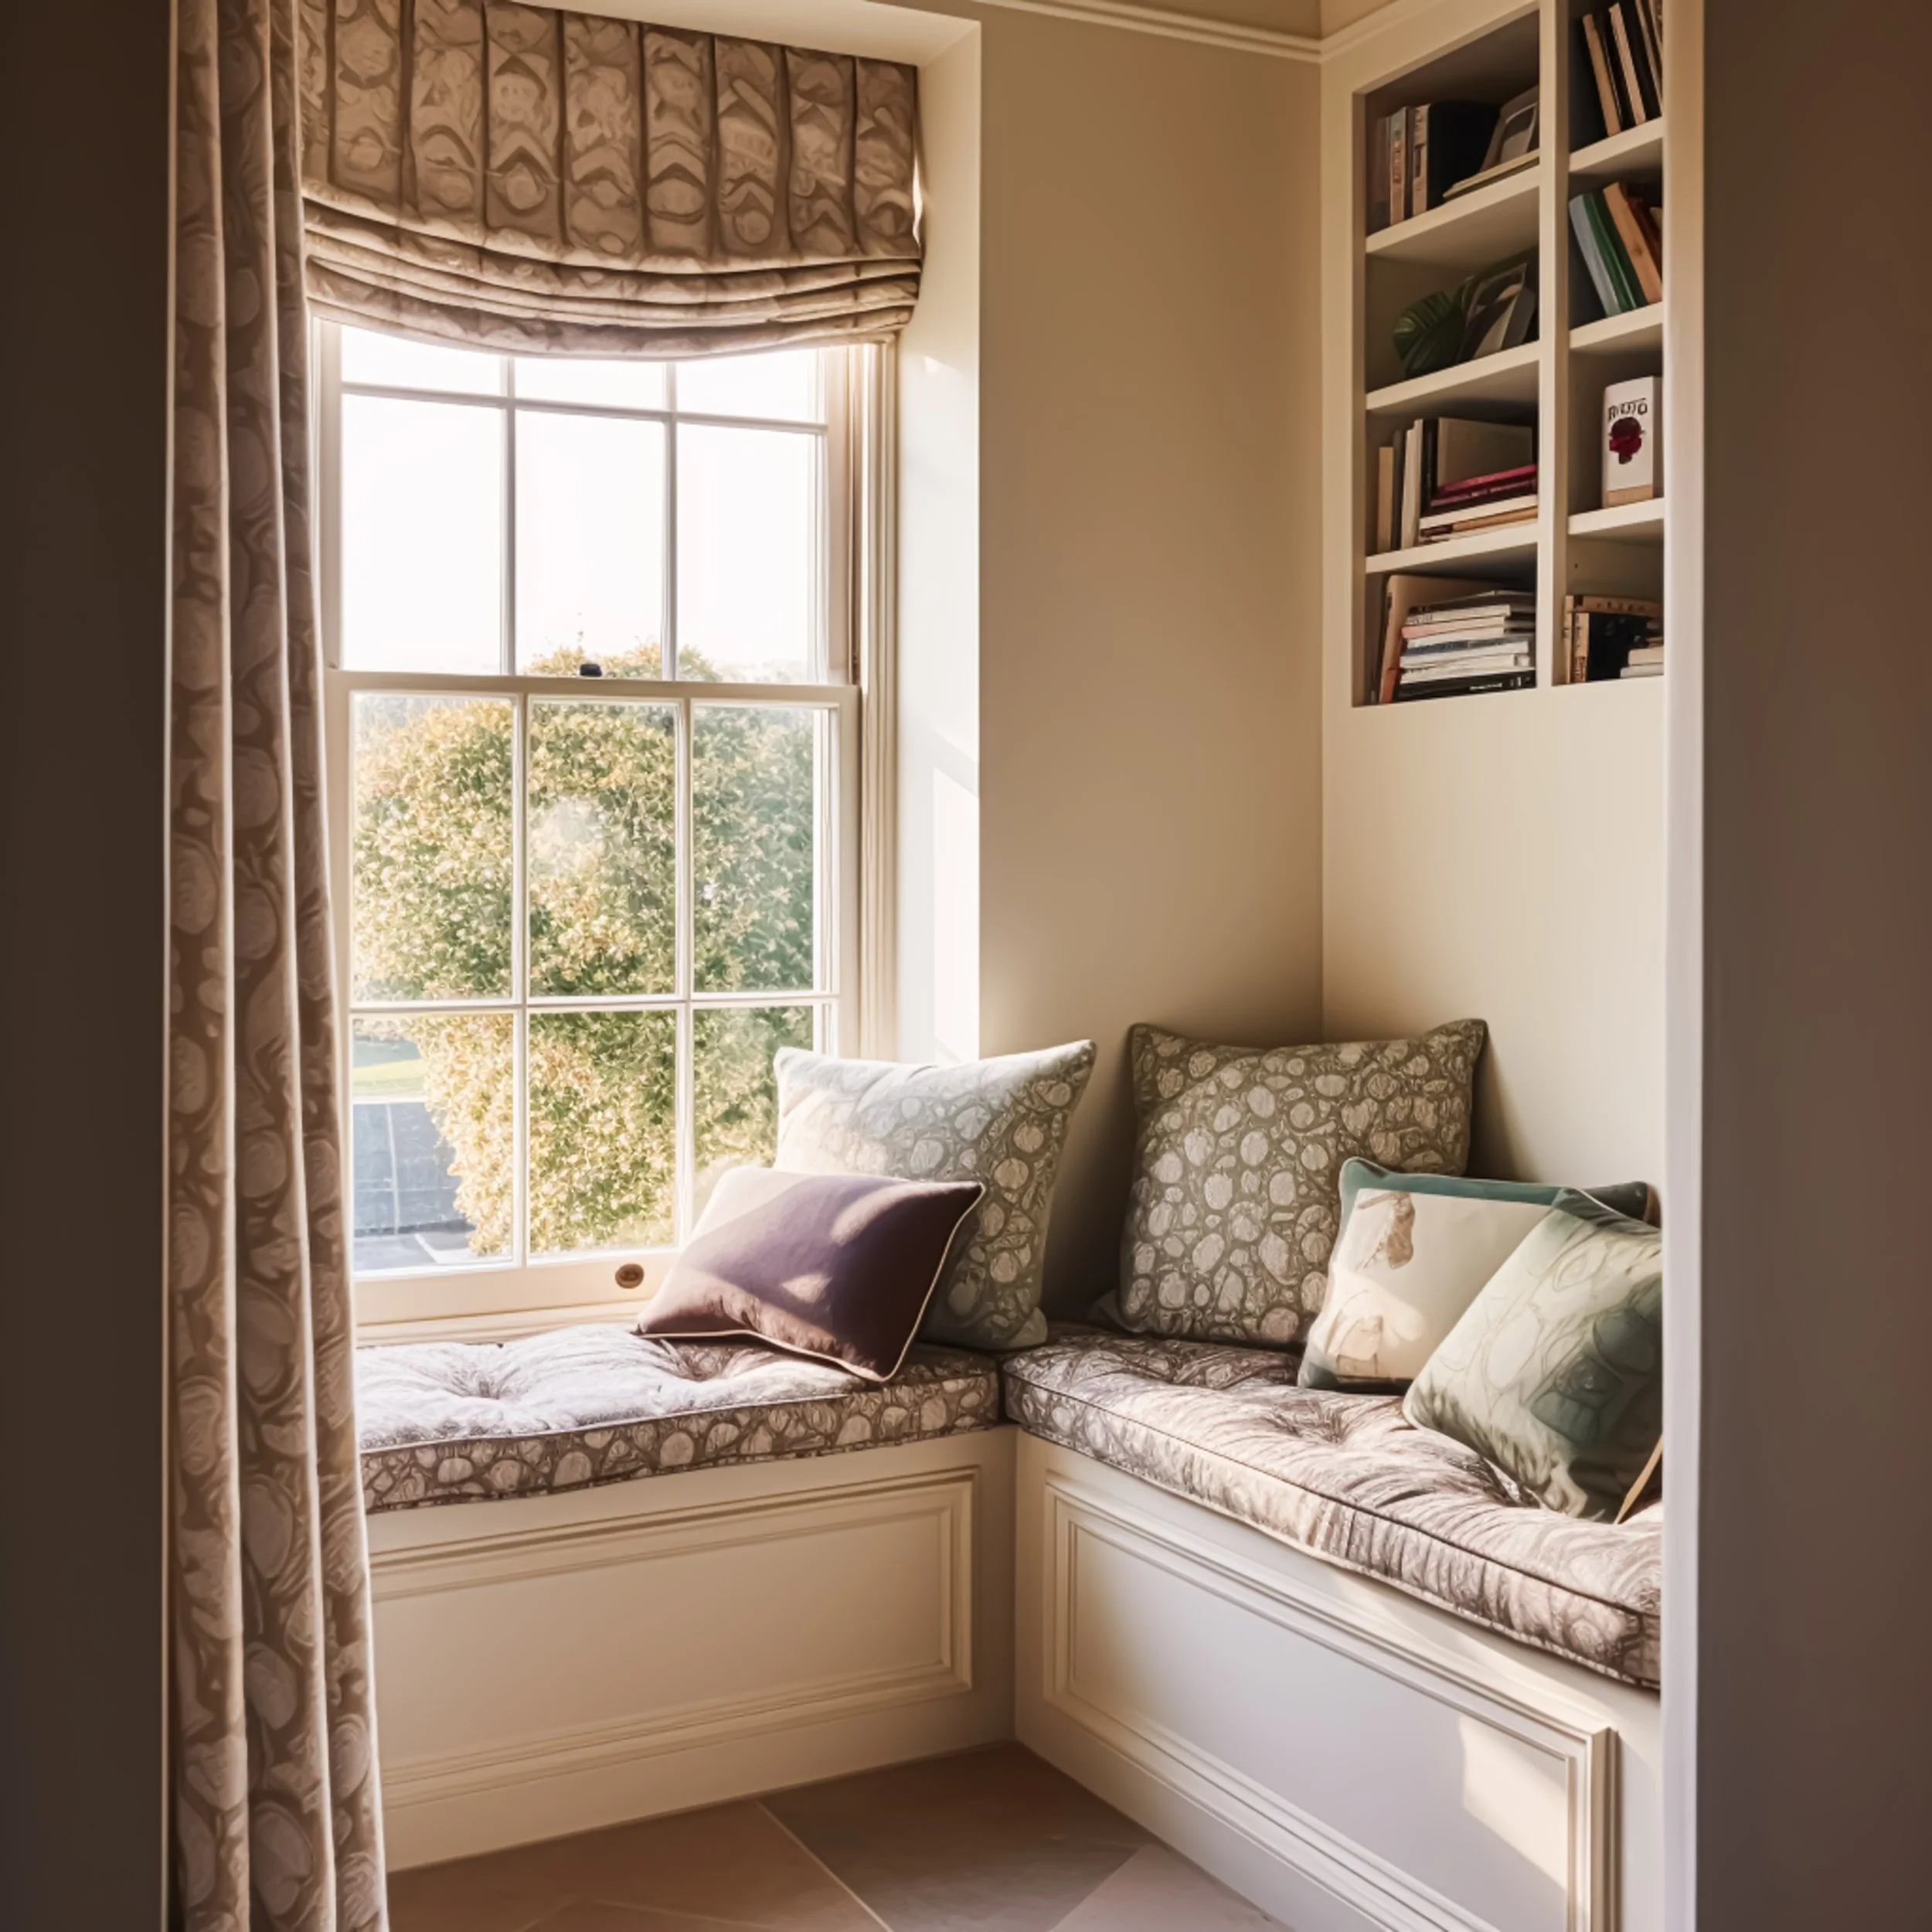
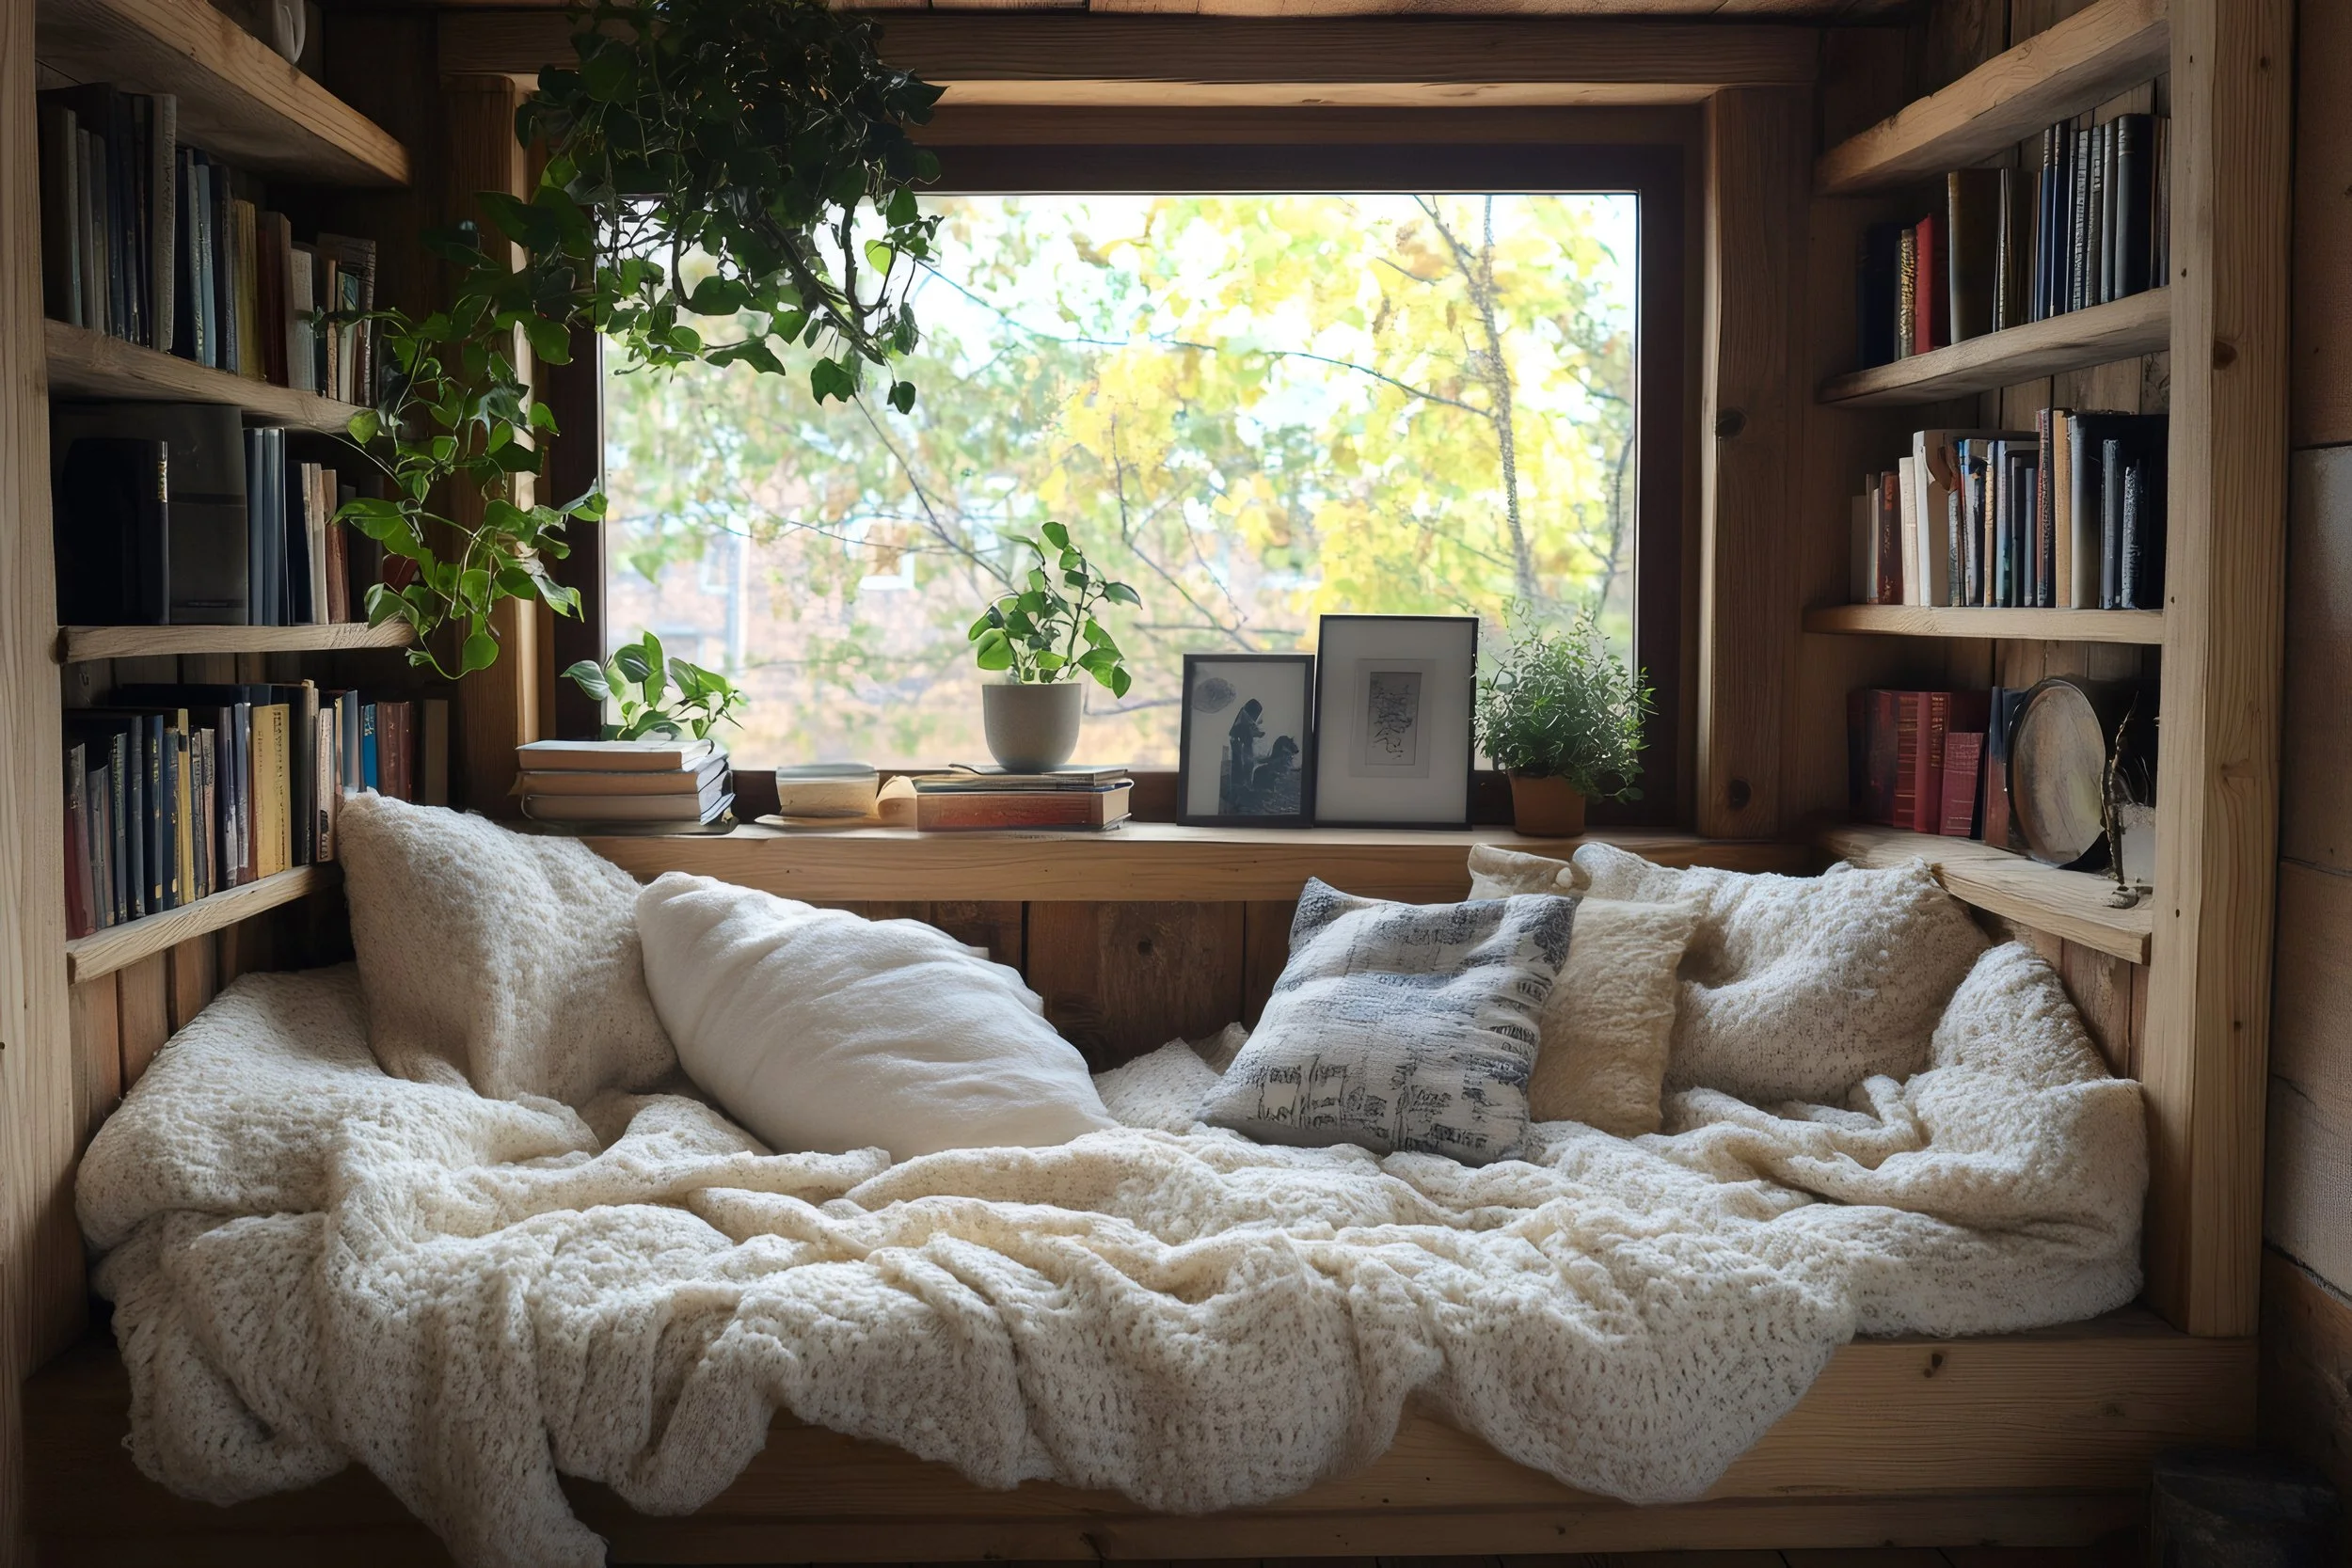
The bay window
Classic villa or bungalow detail. The bay creates a natural alcove with three walls and a window above. A custom bench seat slots into the bay (typically 1800–2400mm long) with hinged-lid storage underneath and shelving columns flanking the bay opening. The cushion runs the full length, and the shelves frame the window without blocking the view.
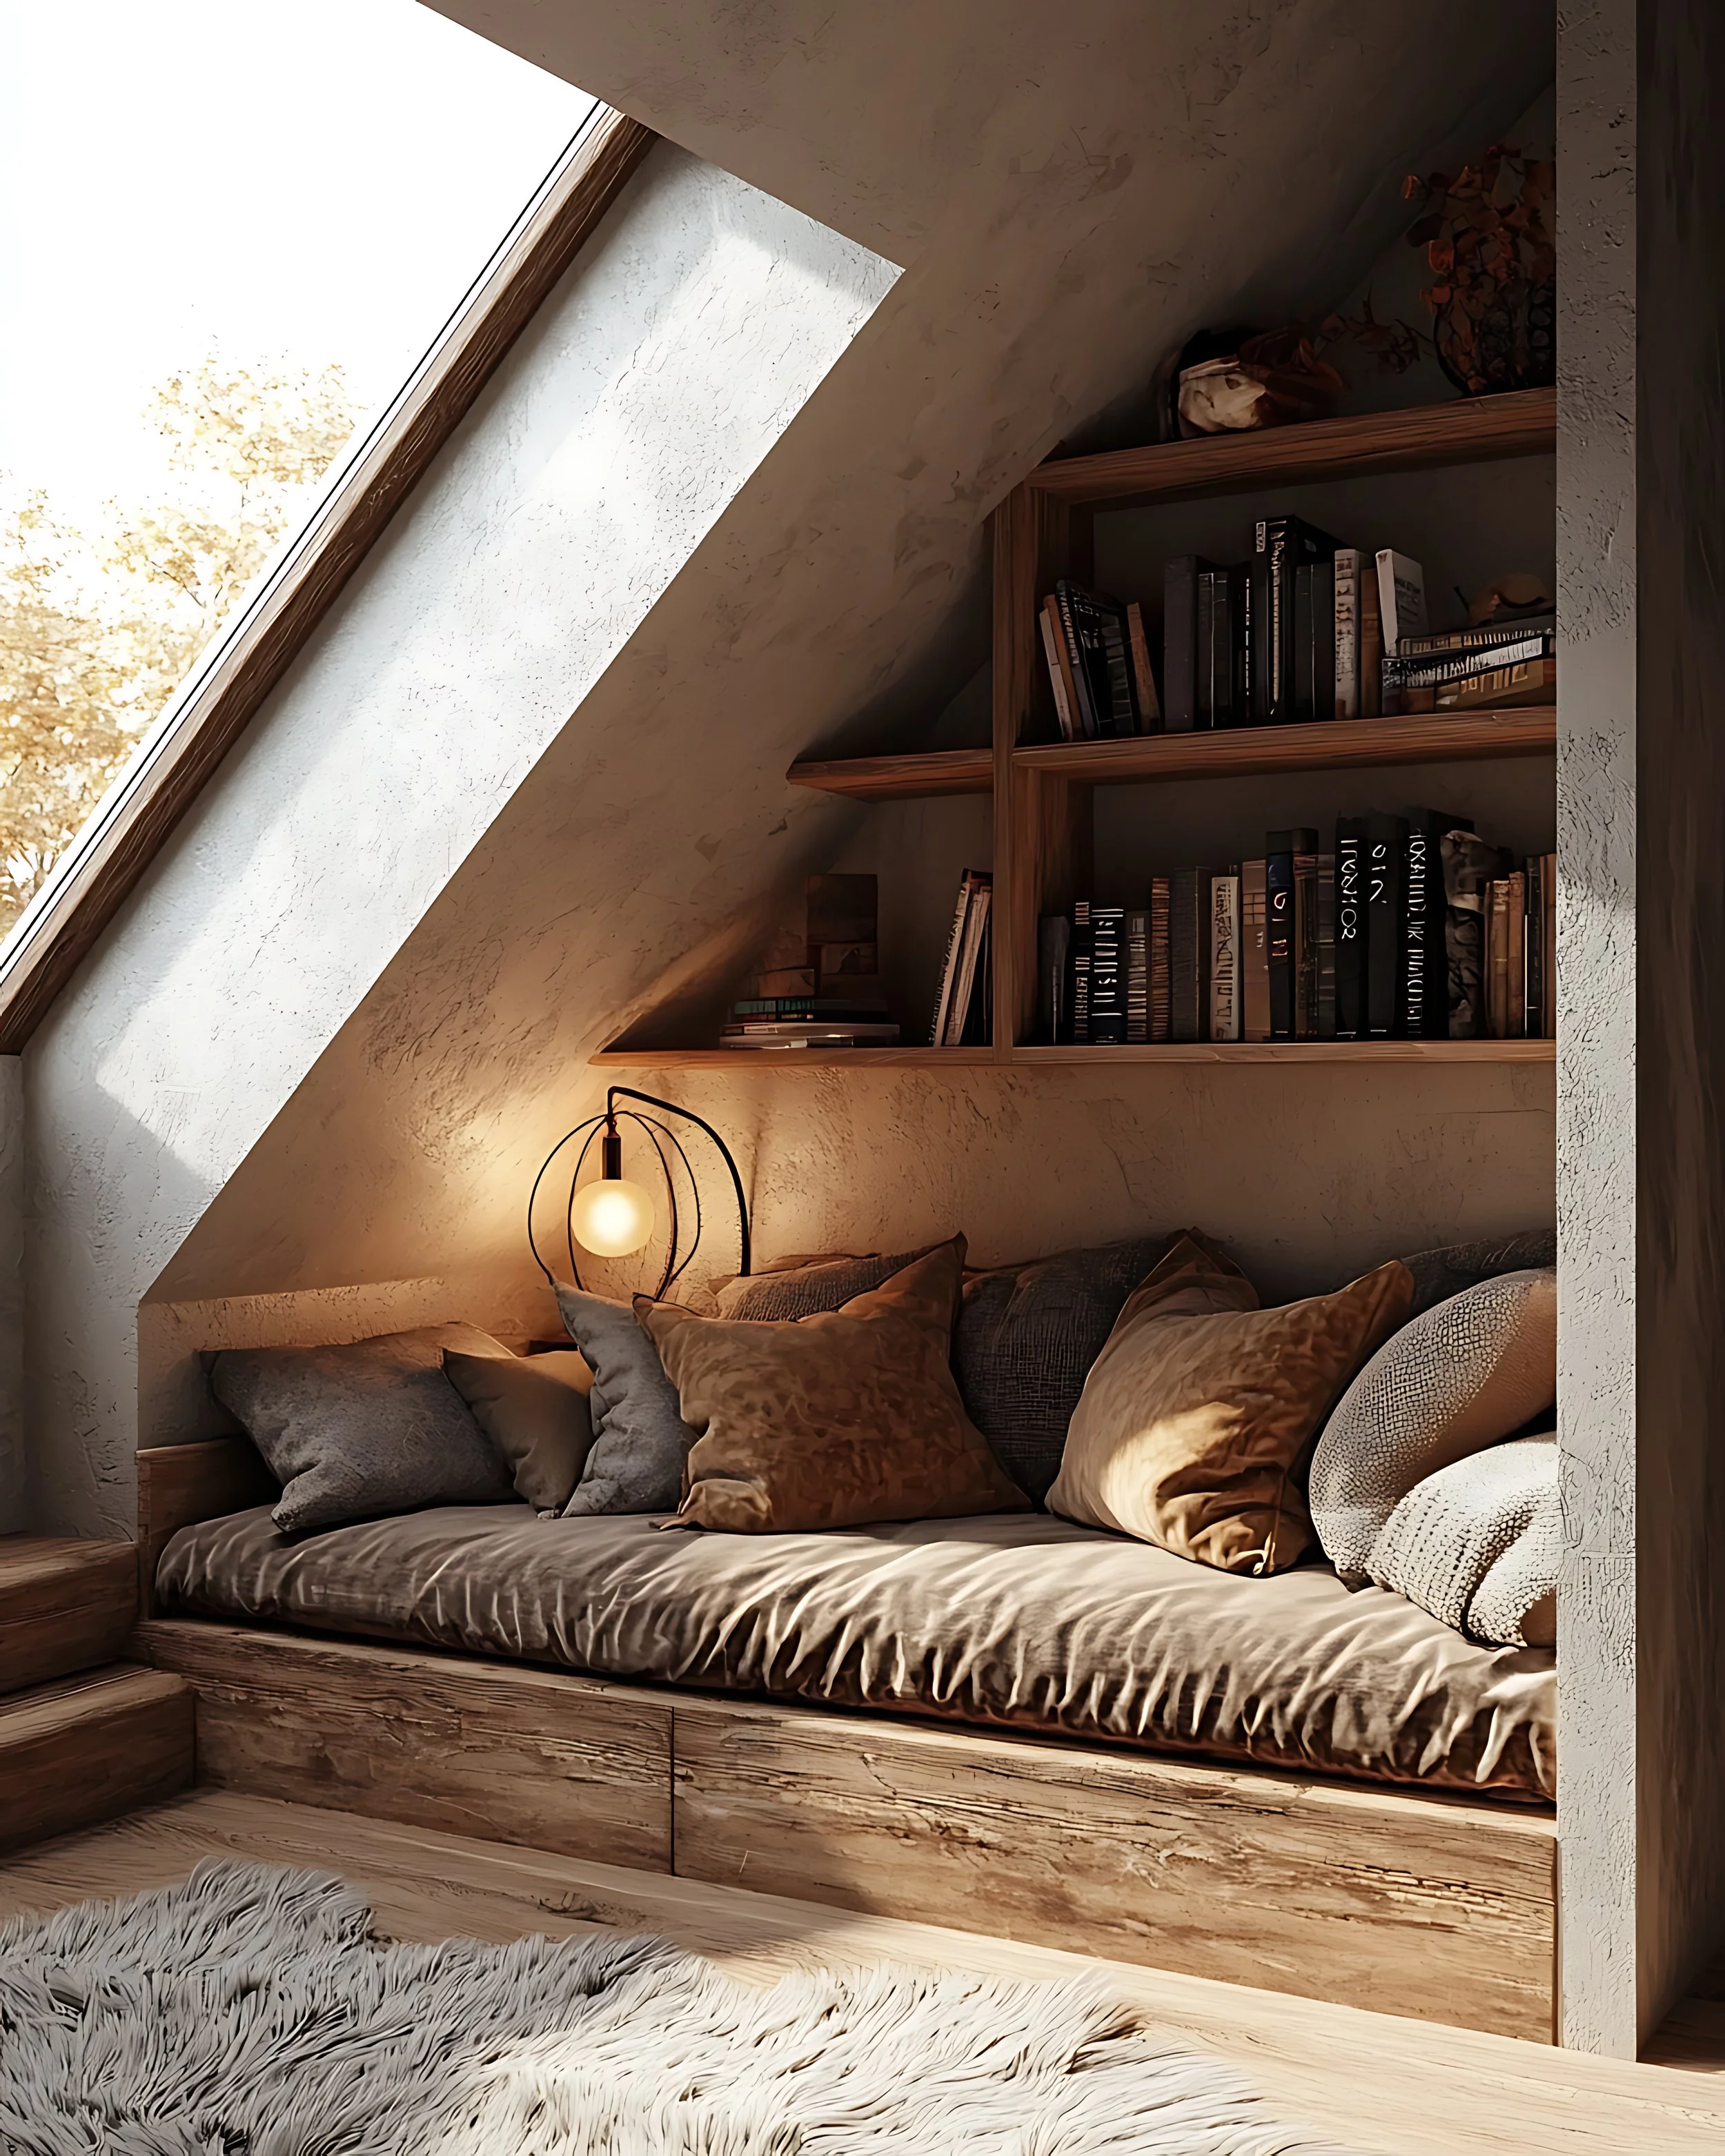
The dormer
The forgotten space in a half-storey villa or a renovated attic. A dormer creates a recessed window box that begs for a bench. Build a seat to fill the dormer floor exactly, with low shelving along the side walls so the books sit at lap height when you're reading. The sloping ceiling stays clear above, which keeps the small space feeling open rather than crowded.
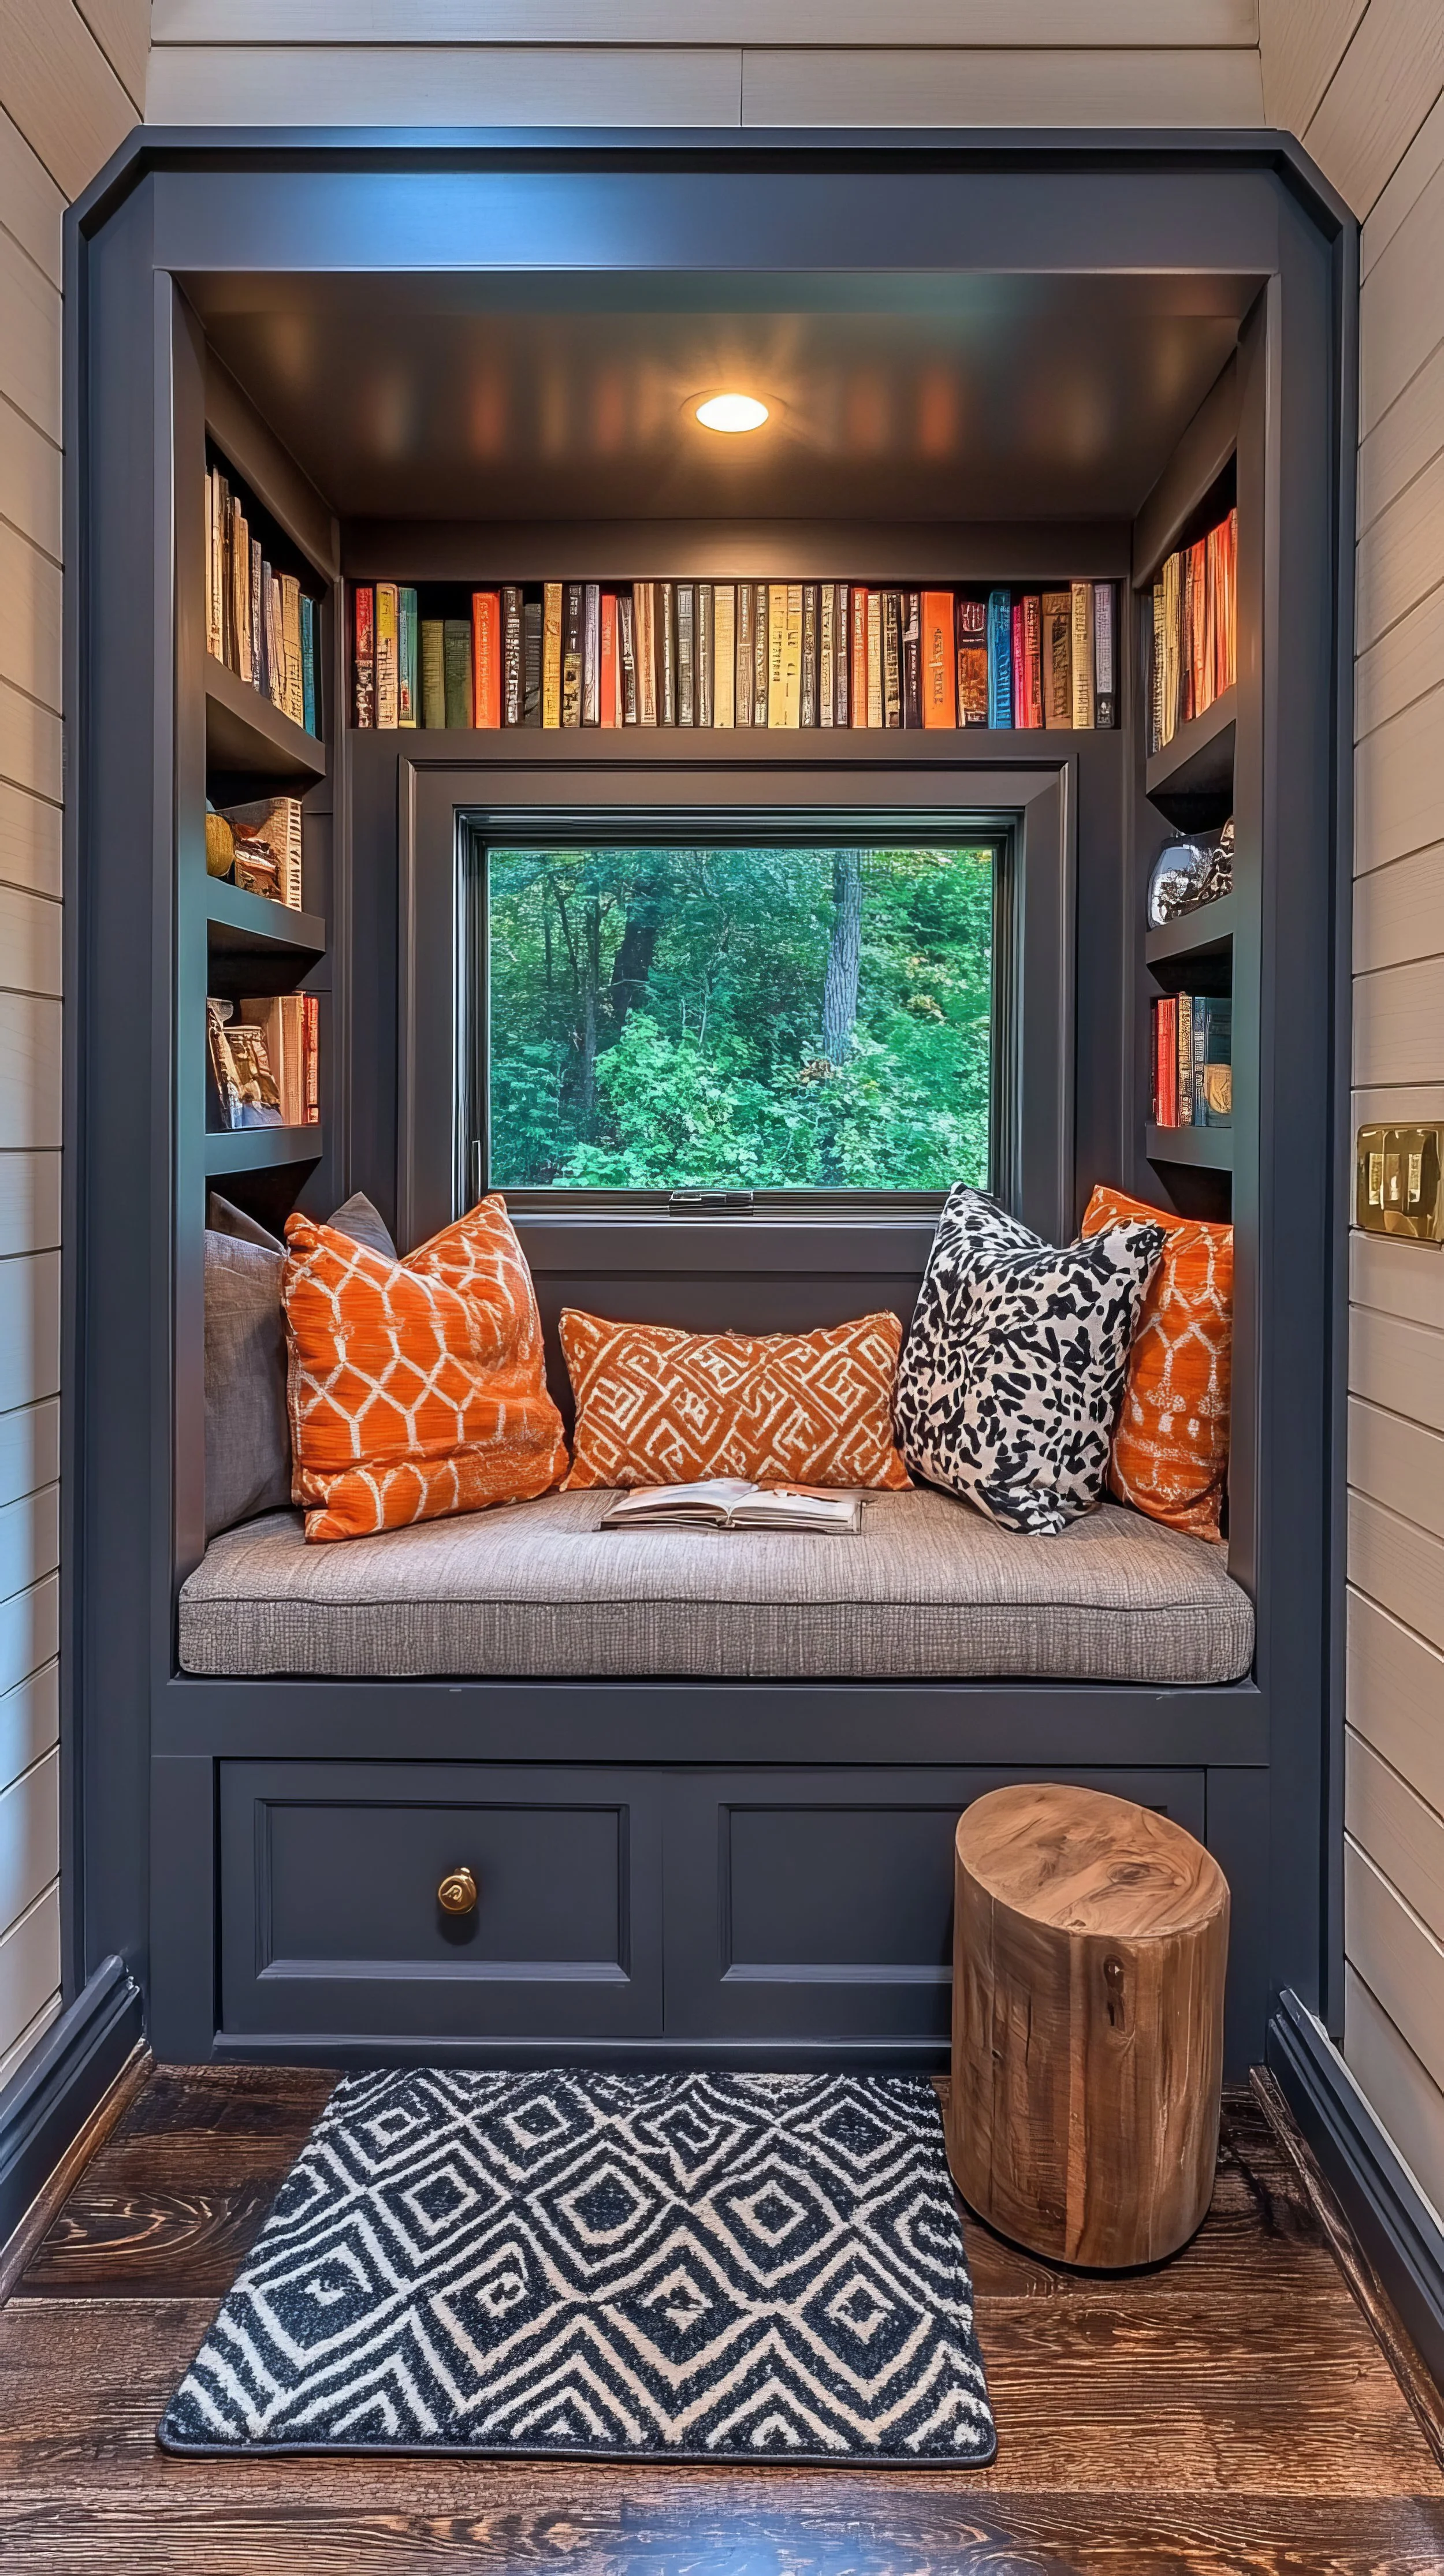
The hallway end or alcove
The trickiest of the three but often the most rewarding. A short bench against a blank wall, with floor-to-ceiling shelves on both sides forming a U-shape around it. No window required, the seat becomes a destination at the end of a corridor that previously did nothing but lead to the laundry. Add a wall sconce or a clip-on reading lamp and you've built a private little library in 1800mm of dead space.

Measurements worth getting right
Seat height
420 - 450mm from the floor to the top of the cushion is perfect for an adult sitting upright. For curling sideways with knees tucked in, drop it a touch lower (400mm) and let a thicker cushion make up the difference. Measure to the top of the finished cushion, not the bare seat box, otherwise you'll end up too high once the foam goes on.
Seat depth
550 - 600mm from the wall to the front edge of the seat box is the right range. Any deeper and you can't sit upright without your back leaving the cushion. Any shallower and you can't tuck your feet up without sliding off the front.
Cushion thickness
80 - 100mm of high-density foam with a wool or linen cover is the sweet spot. A thinner cushion makes the seat feel like a step stool. Thicker than 100mm and the seat height starts to feel wrong by the time you've added the foam to the box.
Shelf depth
200 - 250mm for paperbacks, 280 - 320mm for hardcovers and oversize books. Vary the depths deliberately across the bookcase, a few shallow shelves at the top for framed photos and small plants, deeper shelves at hand height for the books you reread, full-depth shelves at the base for the heavy ones.
Storage lid
A hinged top with soft-close stays is far better than a removable lid. Removable lids end up propped against the wall and never go back on properly. Soft-close stays let the lid hold itself open while you dig around for the spare blanket.
Pick the right board for the room
For most window seats and the shelving around them, Melteca-faced board in a warm white, oak-look or soft grey is the standard choice. It pairs with linen cushions and wool throws without fighting for attention, and it wipes clean when wet boots inevitably end up perched on the seat.
For a window seat in a sunroom, or anywhere it'll catch real condensation through a NZ winter, step up to HMR MDF. It holds its shape through the temperature swings of a winter morning when the seat is 8°C and the afternoon when the sun pushes it up to 22°C.
The shelf edges and the front of the seat box take more wear than most people expect: kids climbing on, books shoved in, the corner of a hardback dragged out. Specify ABS edging on every exposed edge. It's the difference between joinery that still looks crisp in five years and panels with soft, scuffed corners by next winter.
Building it without losing a weekend
A window seat library is one of the most forgiving custom builds you can take on. The seat box is essentially a long open-topped cabinet with a hinged lid. The shelving units either side are vertical carcasses with adjustable shelves. There are no curves, no mitred faces, no fiddly hardware to get wrong.
The thing that makes or breaks the build is the cutting. A bay window is rarely square (walls splay, sills slope, skirtings interrupt) and panels that need trimming on site to deal with all of that are where weekends disappear. Cutshop® cuts every panel to the dimensions of your specific space, edge-banded and labelled, ready to assemble.
Most people comfortable with a drill and a level can build a window seat library but if you'd rather hand it to a builder, they'll charge you significantly less for handing them finished components instead of a stack of raw board to mill themselves.
Your new favourite room
A window seat library is the kind of build that quietly changes how a house gets used. The lounge stops being the only place to sit. The hallway end stops being wasted space. The dormer earns its keep. And by July, it's the corner the rest of the family is competing for.

Frequently Asked Questions
-
For a confident DIYer working with precision-cut panels the seat box typically takes three to four hours, including the hinge fitting and the storage compartment dividers. Each shelving column is another two to three hours. The longest part is usually positioning the units against uneven walls, which is where careful measuring at the design stage saves you the most time on the build itself.
-
For anything over 1500mm tall, yes. Top-fix them into wall studs (not just into gib) with concealed L-brackets behind the back panel. This is non-negotiable in any home with kids, who will inevitably climb the shelves at some point. If your stud spacing doesn't line up with where the cabinet sits, run a horizontal batten across multiple studs first and fix the cabinet into the batten.
-
Two approaches. Scribe the new units around the existing skirting, or remove the skirting where the new units sit and run the joinery directly to the floor. The second option looks cleaner in most cases and is easier to execute. For older homes with deep, profiled skirtings, a third option is to continue the skirting profile along the front face of the seat box at the same height.
-
Two things can sort this out. First, leave a 20–30mm air gap between the back of the carcass and the gib, don't push the unit hard against the wall. Second, drill a row of ventilation holes along the back panel near the top, hidden behind the cushion: a 25mm hole saw, spaced every 200mm, is plenty. Air circulates, the storage stays dry, and the spare duvets and board games you've stuffed in there stay free of mildew.