
Put the Wood, the Kindling and the Poker all in One Place
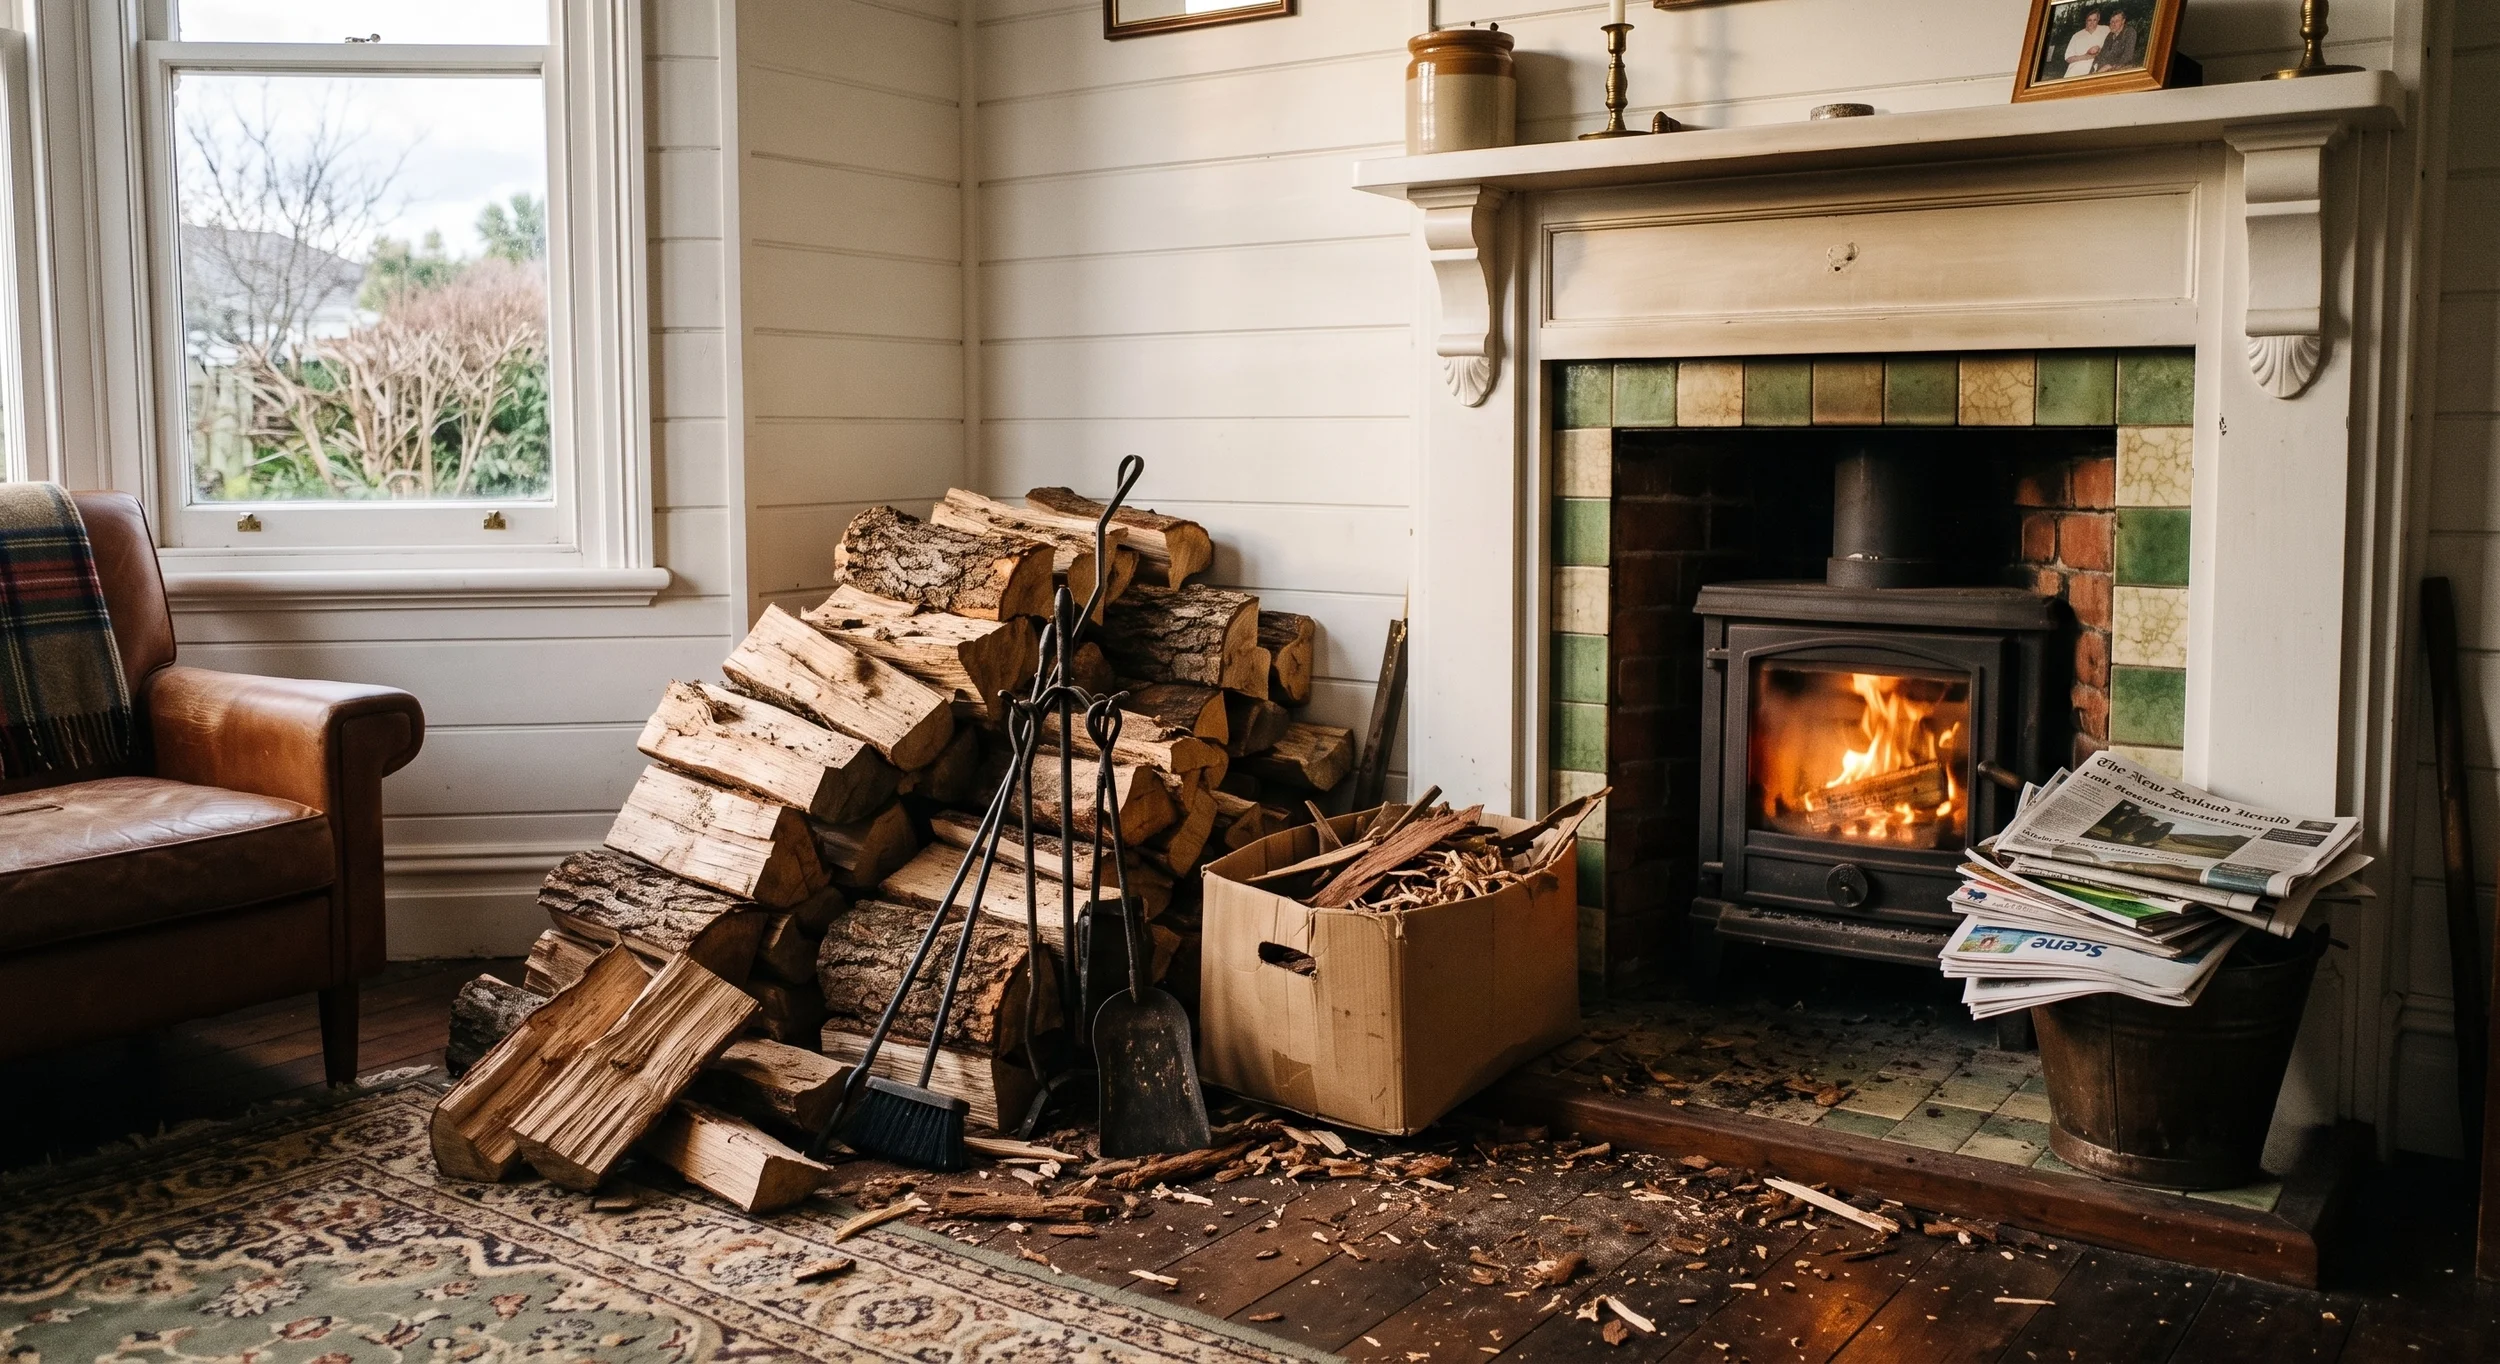
The lounge in winter has an extra inhabitant: the wood pile. It started tidy in May — a small stack of split logs beside the fire, a cardboard box of kindling, a metal fire stand with the poker in it. By July there's bark on the carpet, the kindling box has collapsed, the newspaper is stacked on top of the ash bucket, and the poker keeps falling into the log pile every time somebody pulls a log off the top.
It looks messy. The wood pile is a pile because you've had to stack it somewhere and the hearth was the nearest surface. The kindling lives in whatever cardboard box the online order came in. The fire tools stand in a metal rack that gets knocked over every second week. And the ash bucket is metal and hot, so it lives on the tile just far enough from the fire that you have to lean over the wood pile to reach it.
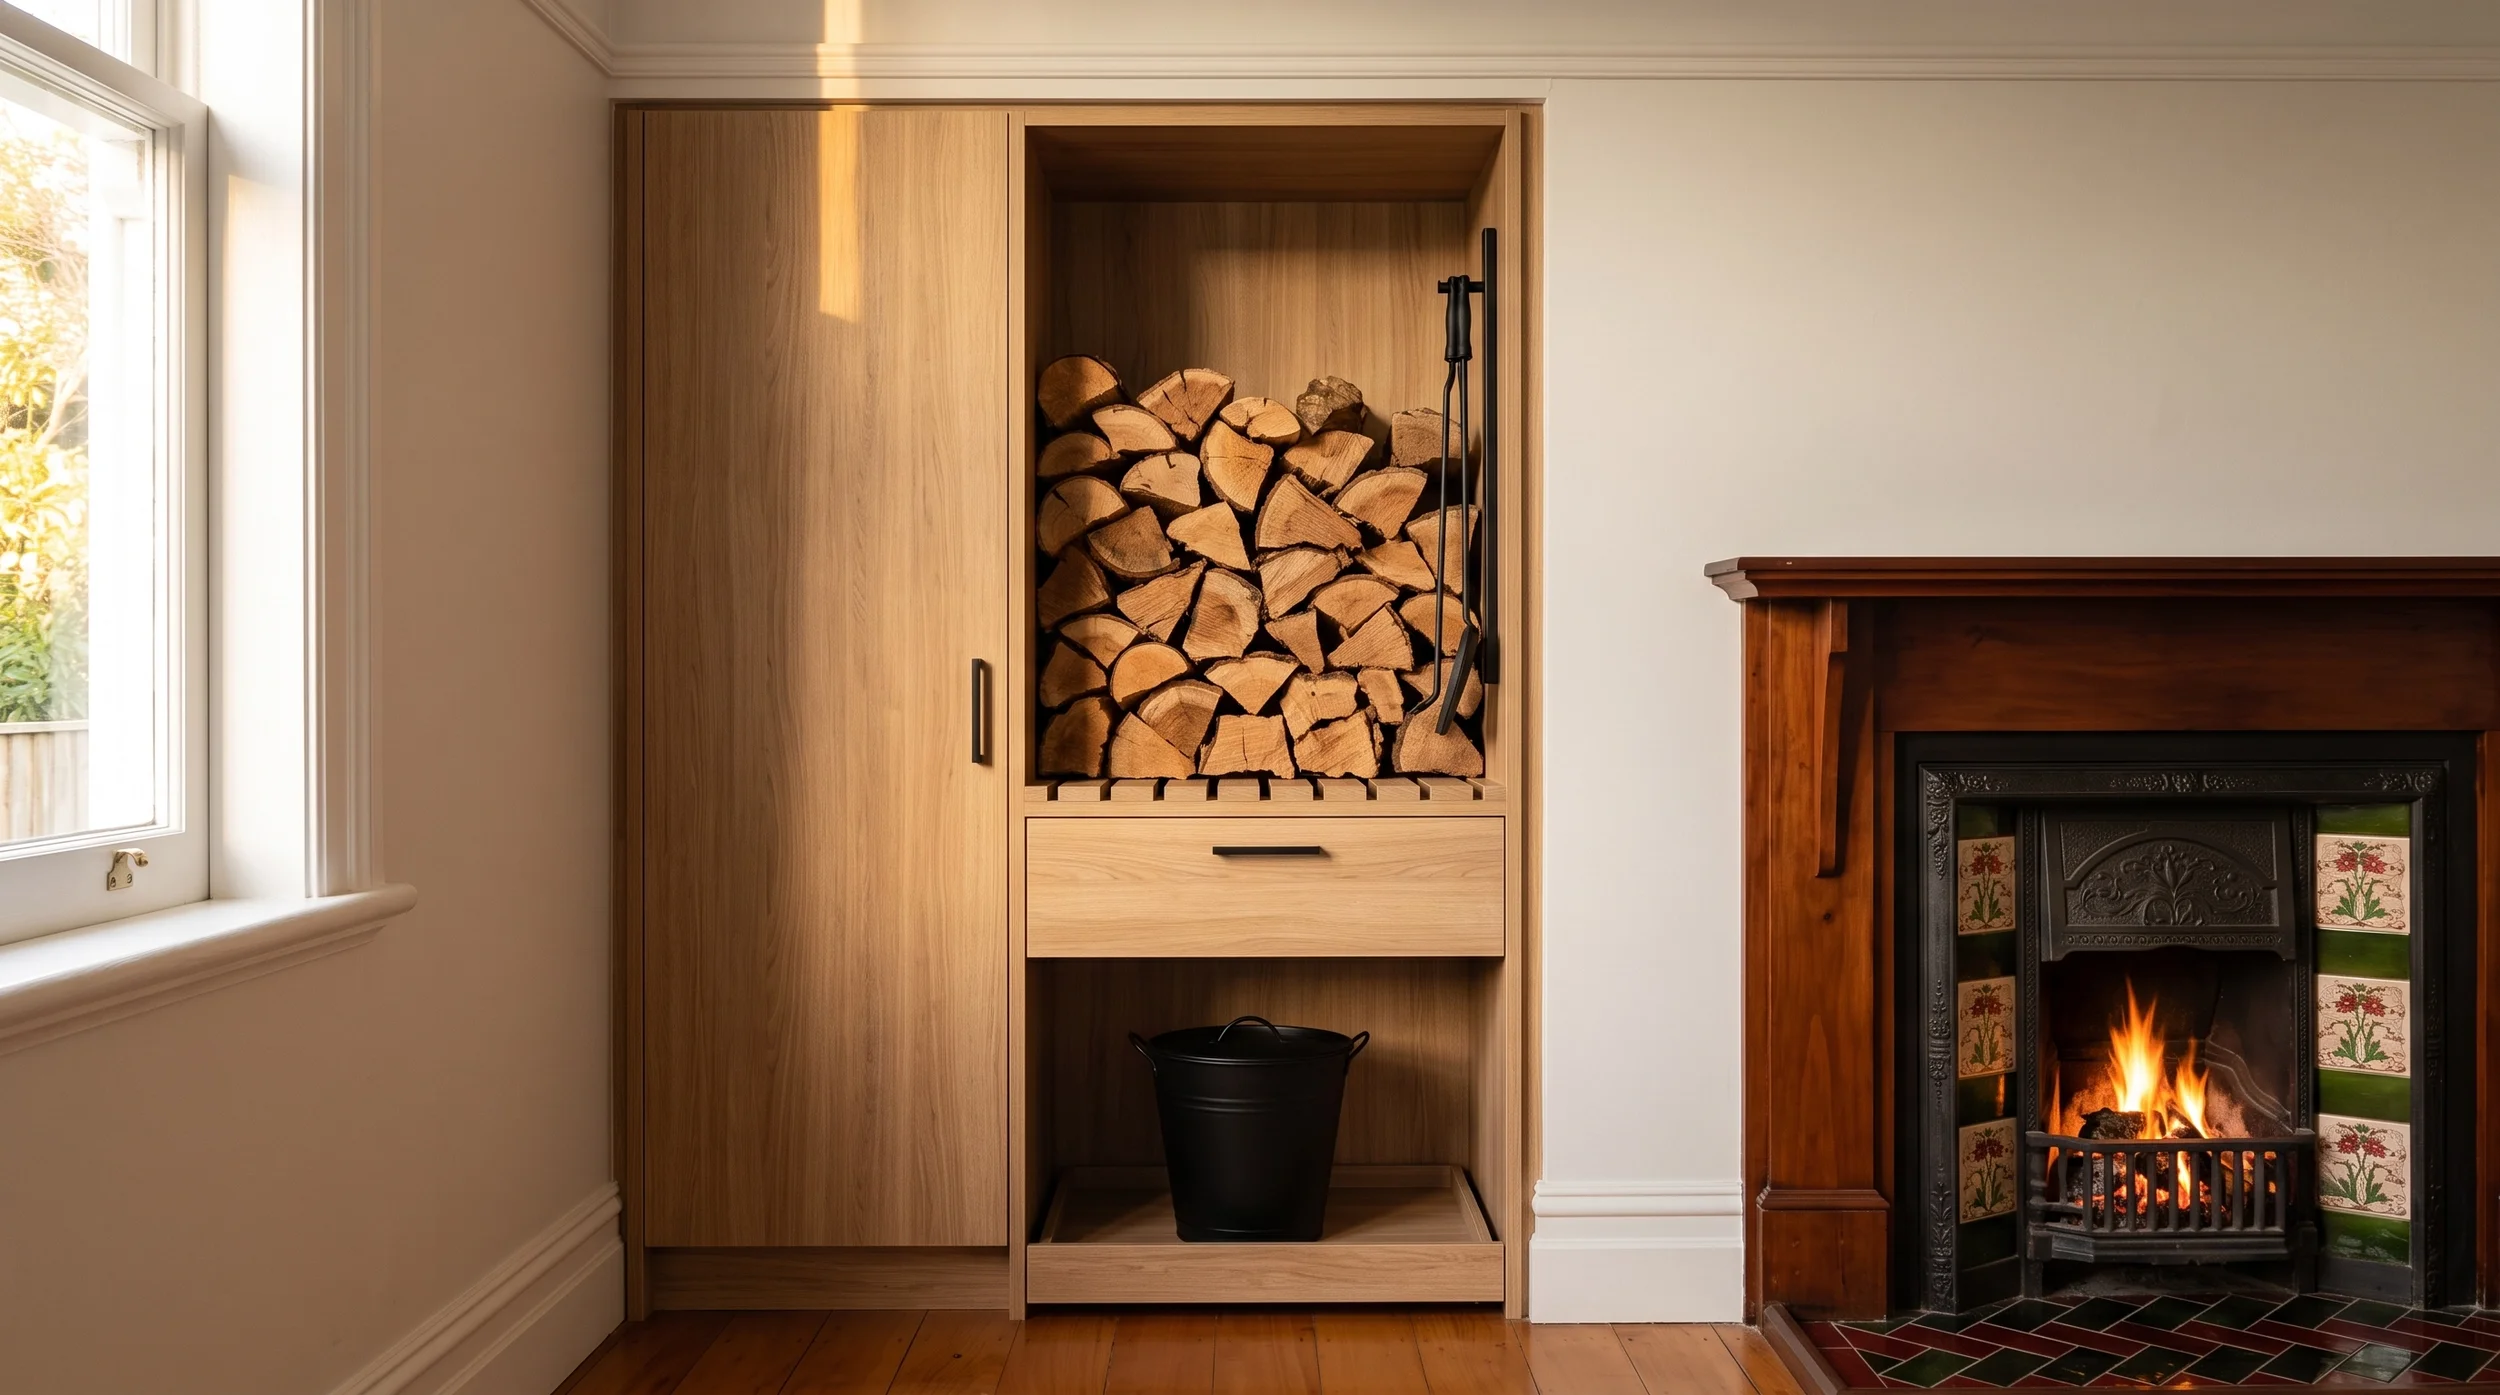
A fireside cabinet fixes all of this in one built-in. A tall bay beside the fireplace or wood burner that stacks the wood on a slatted base, a drawer underneath for the kindling and firelighters, a hook rail down the side for the poker, brush and shovel, and a removable tray at the bottom sized to the ash bucket. With Cutshop® precision-cut panels, it slots into the alcove beside the fireplace as if it had always been there.
Why the wood pile always ends up on the carpet
The pile grows because the wood has to be within arm's reach. Two or three logs a night, four or five nights a week, from May through to September. Nobody's walking to the wood shed in the rain every time the fire needs feeding, so the week's supply of firewood makes the trip once and then lives in the lounge until it's burnt.
The problem isn't the pile itself. It's that the pile is competing with the kindling, the fire tools, the ash bucket, the newspaper and the box of firelighters for the same square metre of hearth space. Everything is stacked on top of everything else, and every time somebody reaches for a log, three other things fall over.
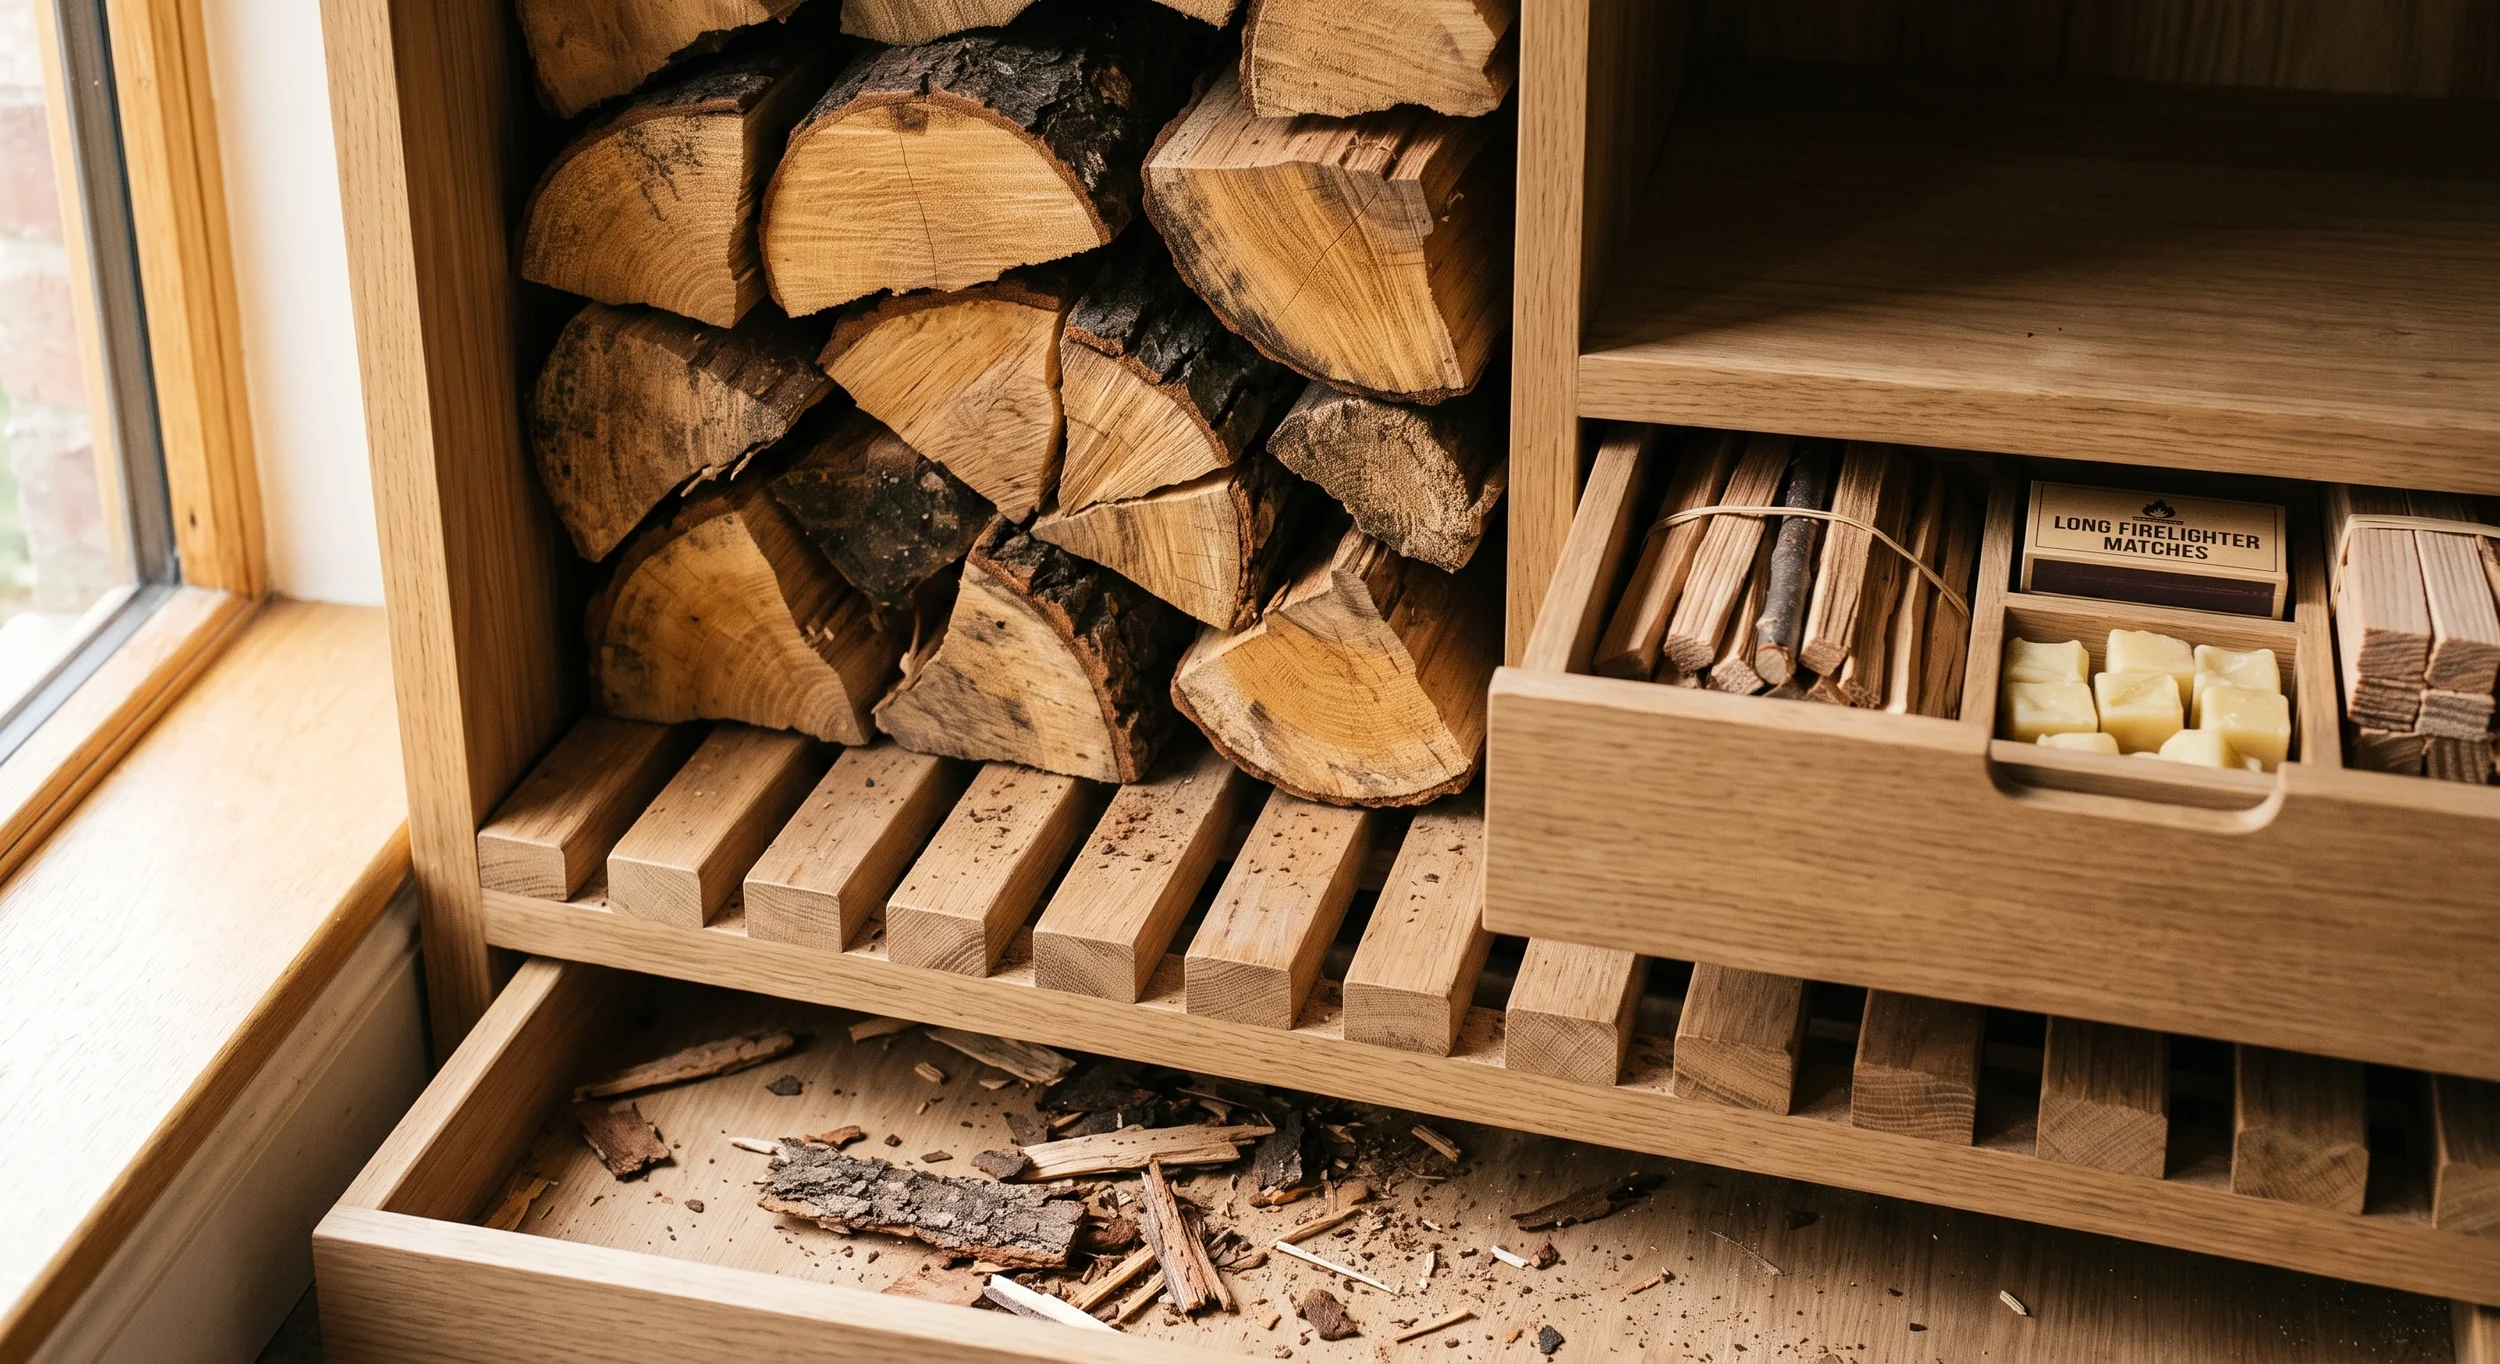
A cabinet gives each of them their own home. The wood stacks neatly, taking up vertical space instead of splaying outwards. The kindling sits in a drawer instead of a cardboard box. The tools hang instead of leaning. The ash bucket sits on its tray at the base instead of on the tile. And the hearth is finally clear again.
Cutshop® Tip: A slatted base at the bottom of the wood stack lets the bark and dust drop through into a shallow tray below. Empty the tray once a week and the carpet in front of the fire stays clean.
What lives in a fireside cabinet
The exact mix depends on the fire, but most Kiwi households end up with some combination of:
- A vertical wood stacker sized for a week's supply of wood
- A kindling drawer at hand height
- A slot or small compartment for the firelighters and long matches
- A hook rail down one side for the poker, brush and shovel
- A removable tray at the bottom for the ash bucket
- A bin or slot for the day's newspaper
- A hook or shelf for the fire gloves
For households with a fussy fire that needs coaxing, add a small compartment for the bellows. For households that burn coal as well as wood, keep the coal in its own labelled sub-compartment so the two don't mix on the way to the burner.
Where the cabinet goes
Three positions work well in most NZ homes.
In the alcove beside the fireplace
The classic spot in villas, bungalows and any home with a chimney breast. The recesses either side of the fireplace are almost always the right height and depth for a fireside cabinet, and building into one of them fills a slot that usually holds a wobbly bookshelf or nothing at all. The cabinet reads as part of the fireplace surround rather than an add-on.
Beside a freestanding wood burner
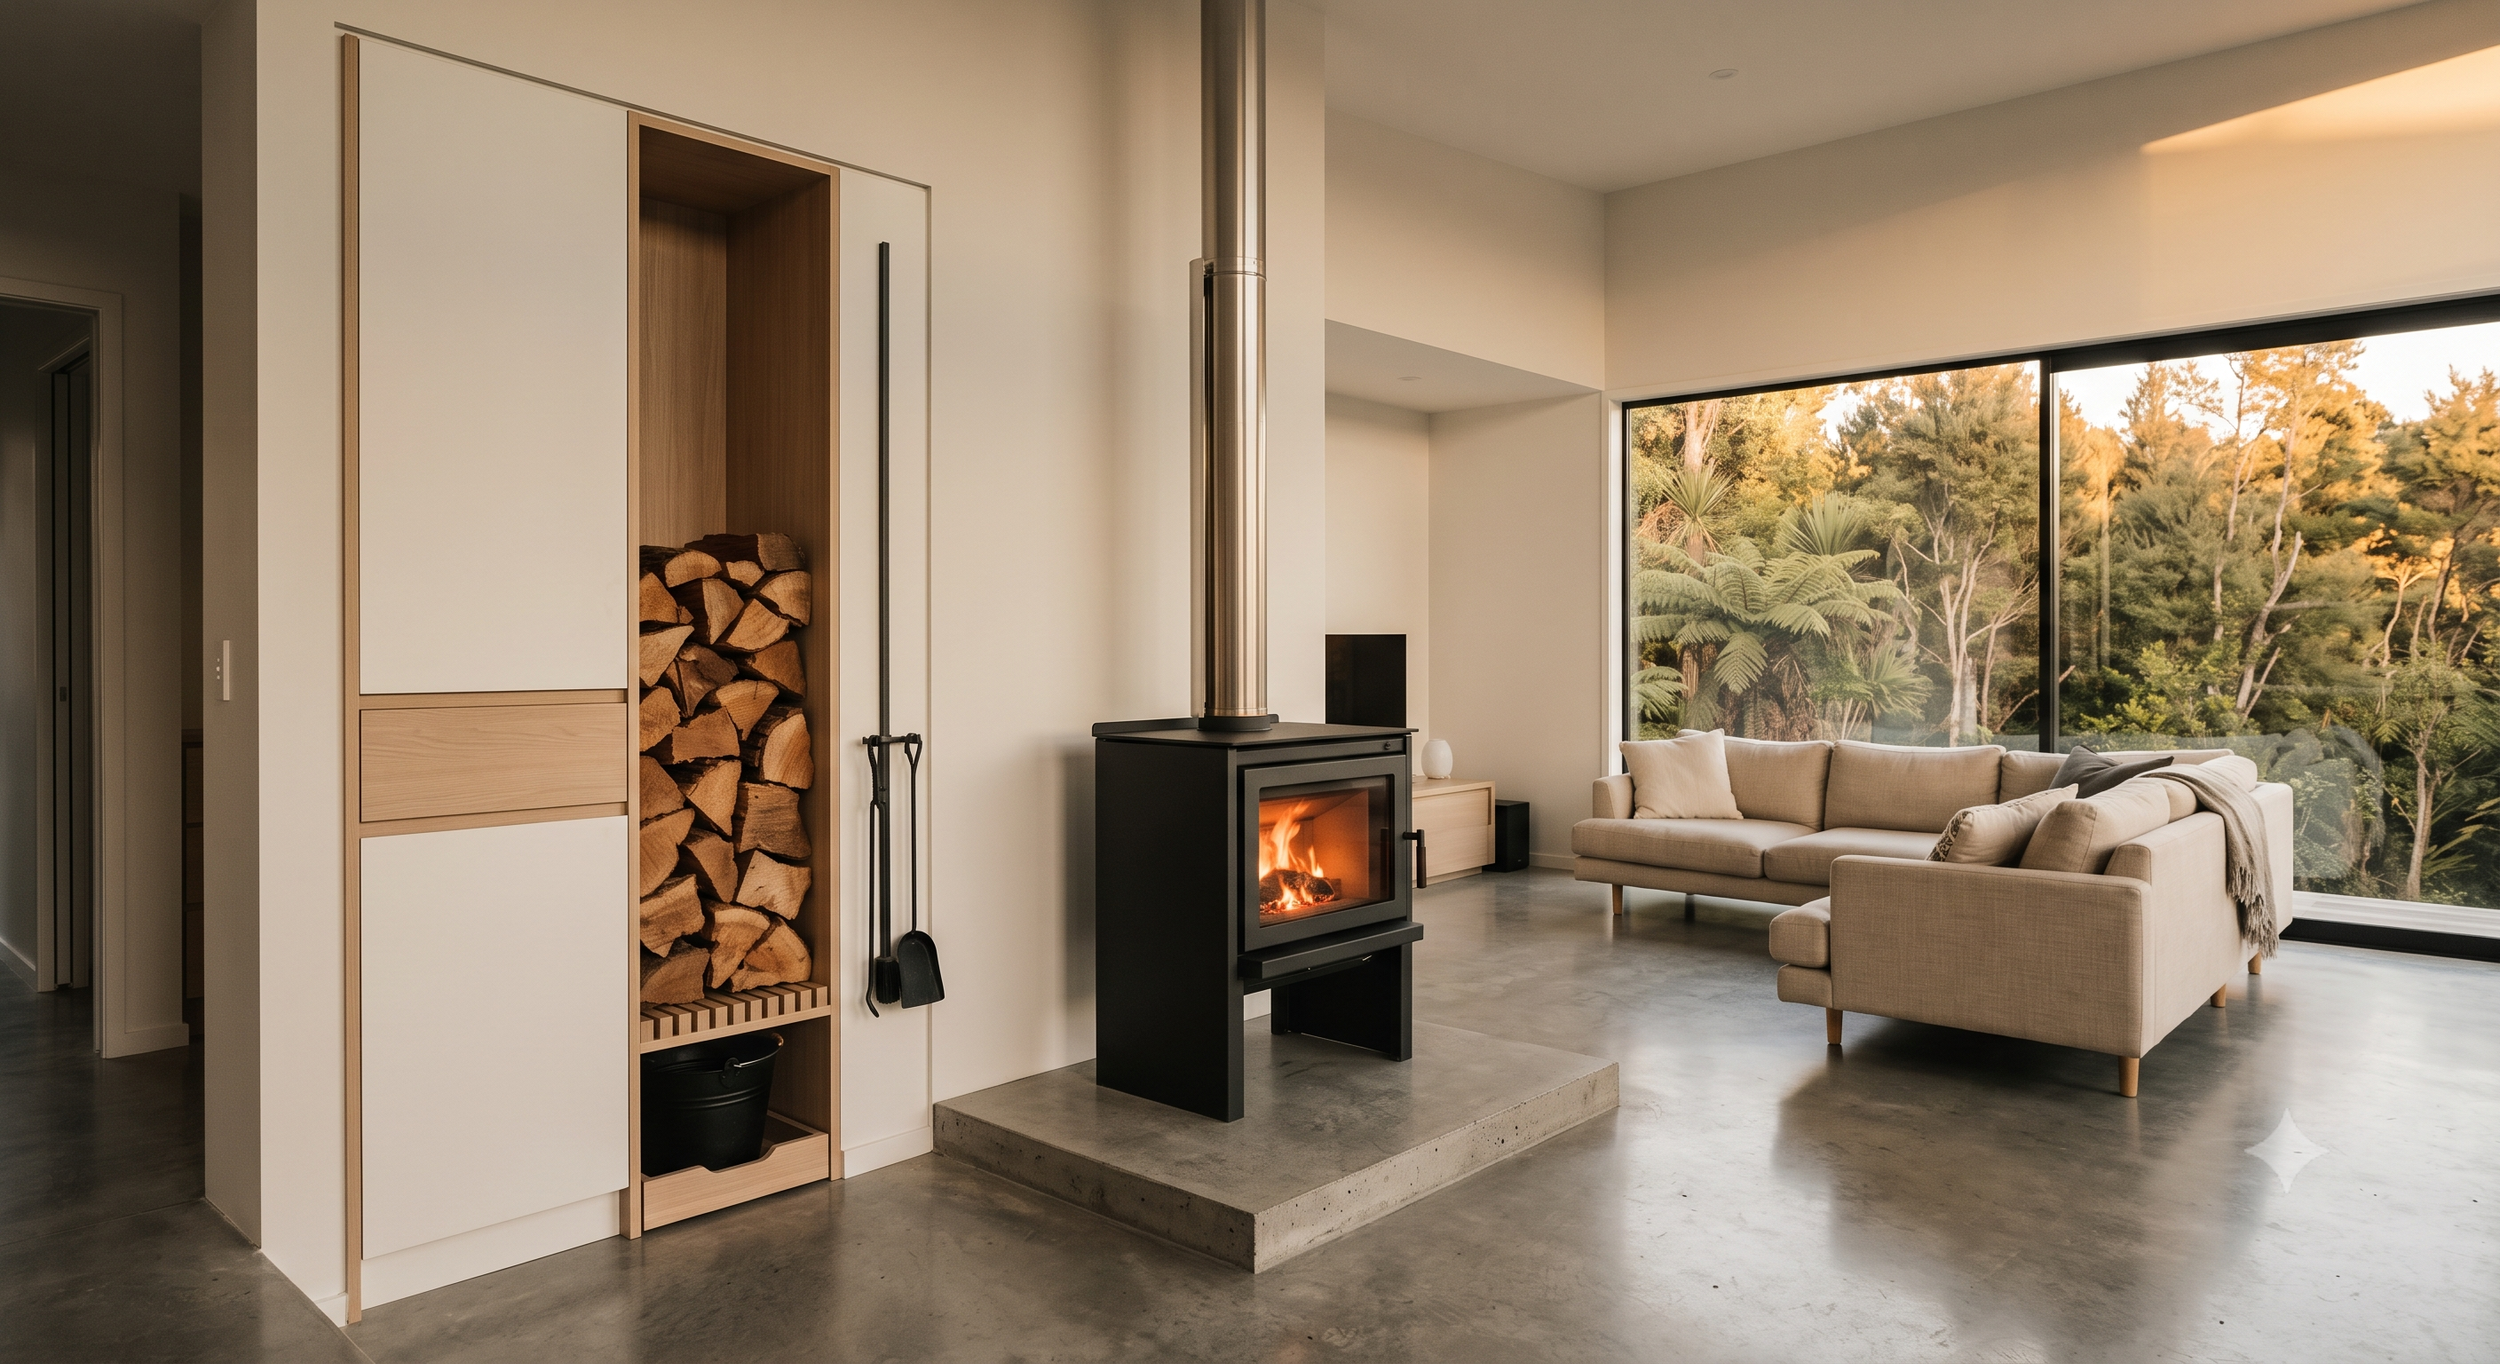
For homes with a modern flue-through-the-ceiling wood burner rather than a chimney breast. The cabinet sits alongside the burner at the required clearance distance (check your appliance's install manual), with the flue and hearth in the middle. Works particularly well in open-plan lounges where the burner is a feature rather than tucked into a wall.
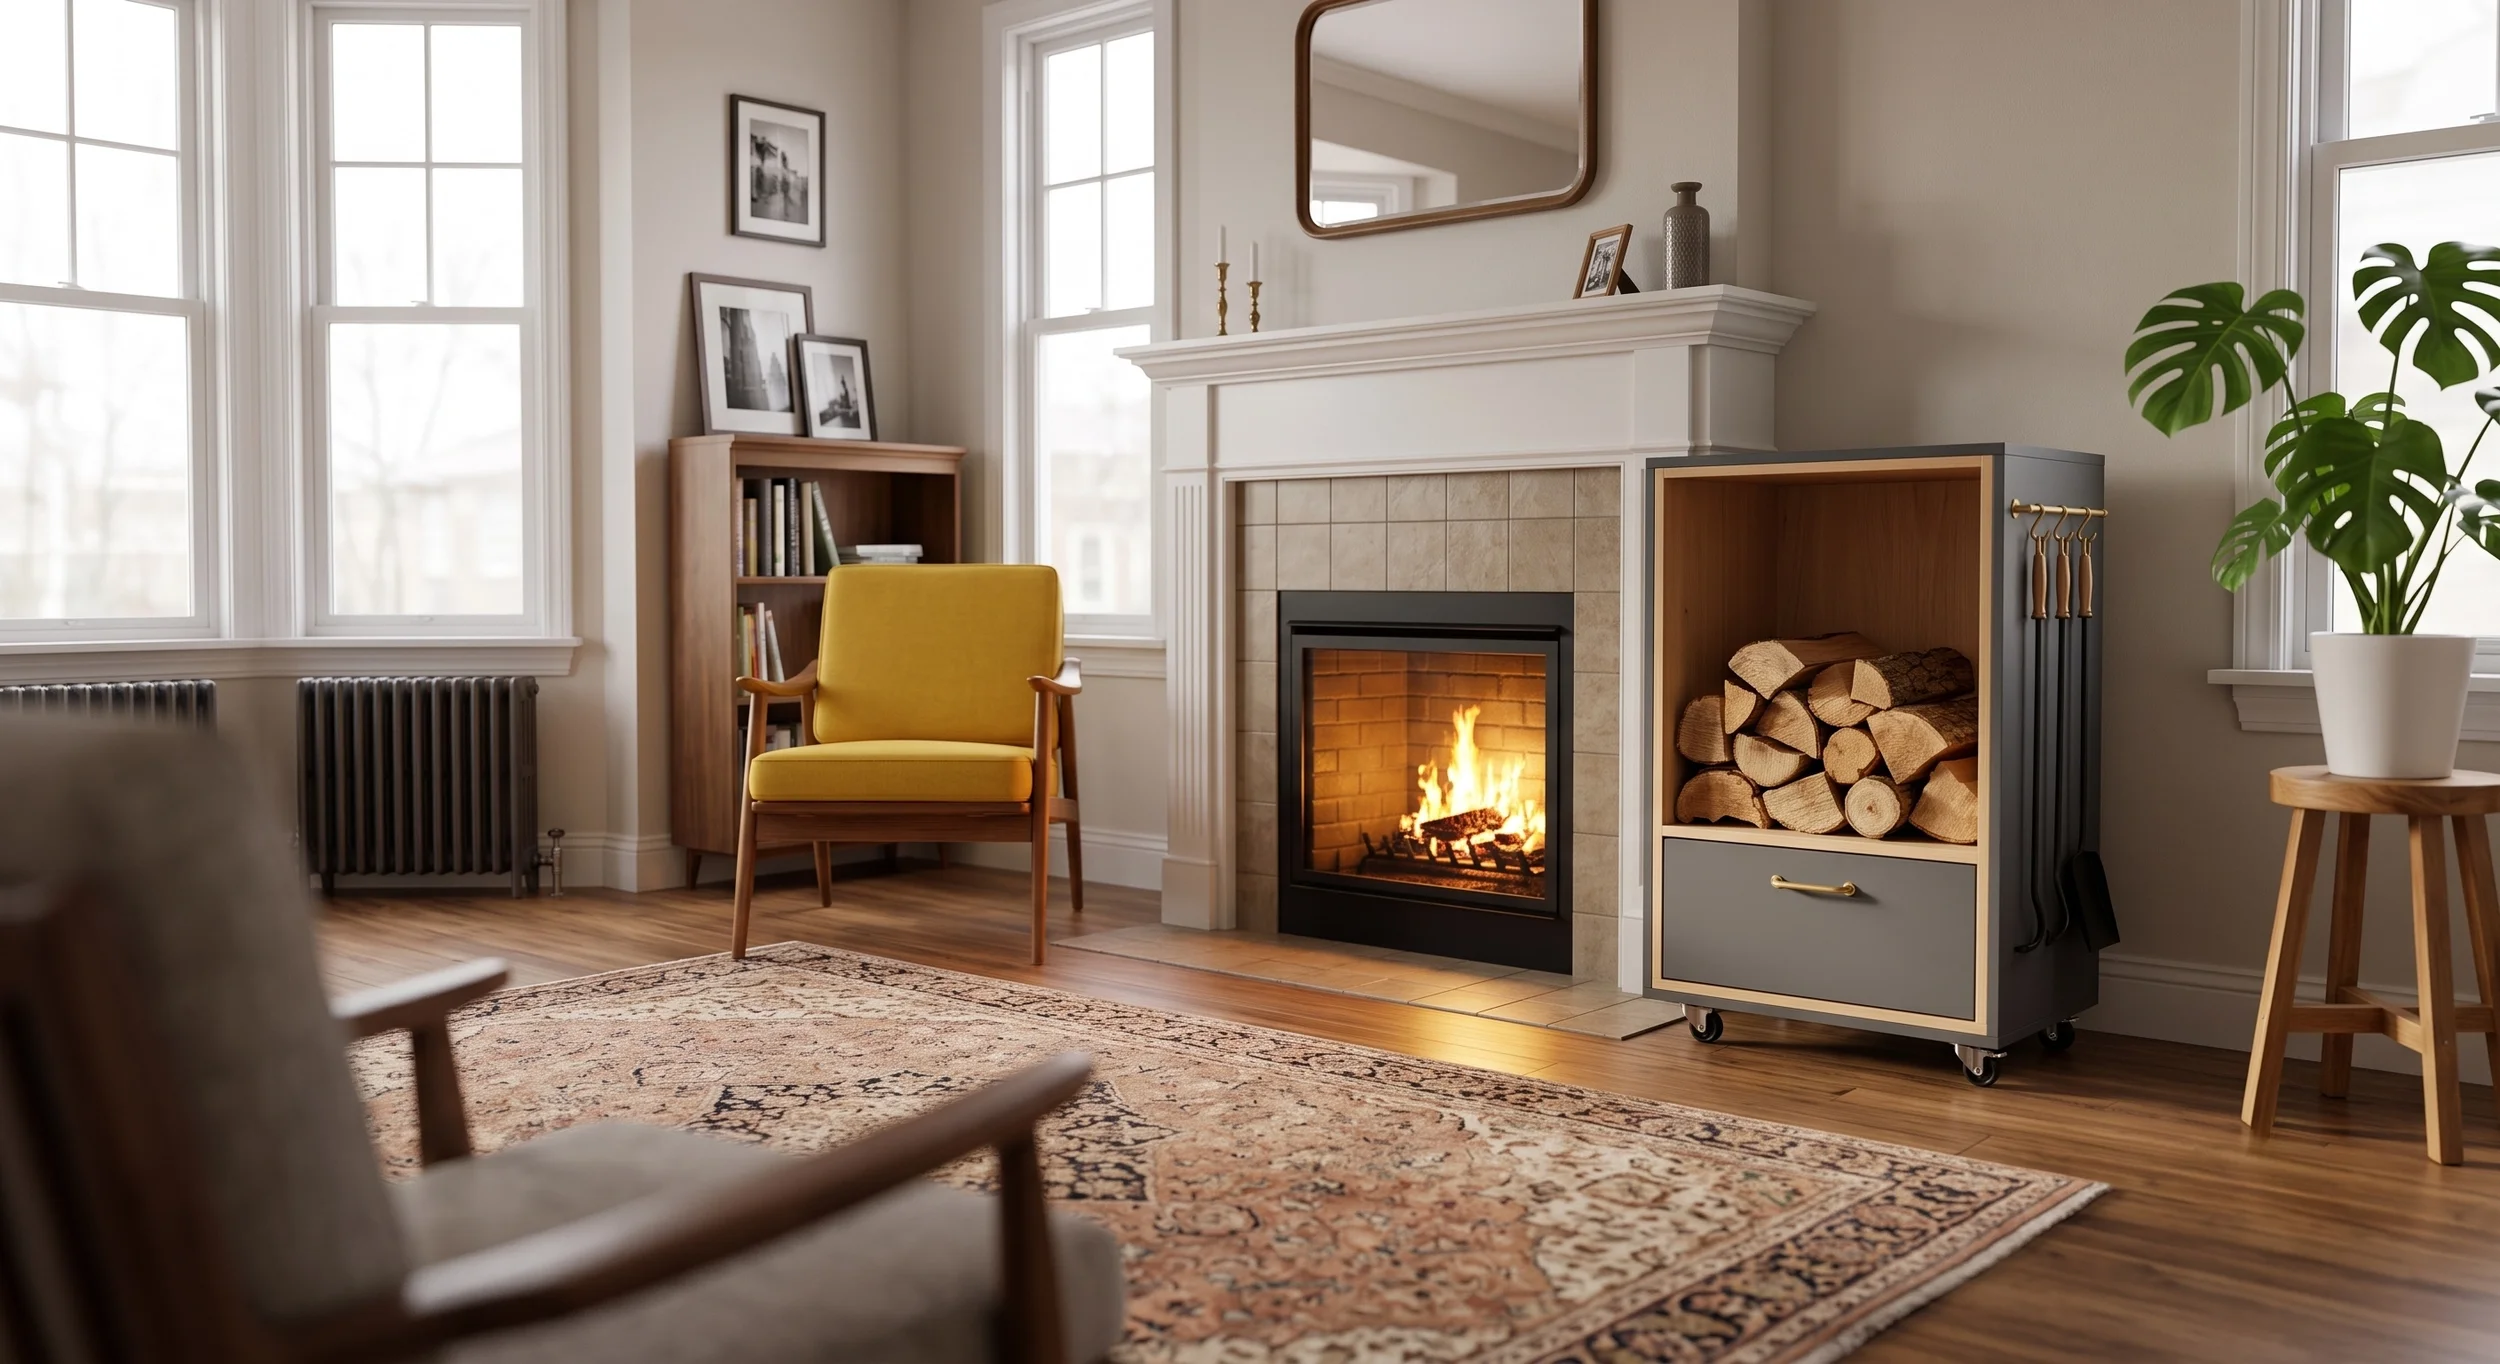
Freestanding, on wheels
For rentals or households that aren't ready to commit to fitted joinery. A wheeled version of the same cabinet, sized to roll in front of the fire for feeding and back against the wall for the day. All the same compartments, none of the fixing.

Sizing the cabinet around the wood
The wood drives the build. A typical NZ household burning wood five nights a week through winter uses roughly 40–60 split logs a week, at a standard 300mm log length. Size the cabinet to that.
Wood stack width and depth
A vertical stack for a week's supply of 300mm logs wants around 400mm internal depth (so the logs sit lengthways with a little clearance) and 350–450mm width. Any wider and the logs stack unevenly; any narrower and the stack topples.
Wood stack height
1200–1500mm of vertical stack holds a comfortable week's supply. Any taller and the top logs are out of easy reach; any shorter and you're refilling every three days.
Slatted base
50mm-wide slats with a 15–20mm gap between them let the bark, dust and moisture drop through into a shallow tray below. The tray sits on a pull-out runner so it can be tipped into the compost bin once a week.
Kindling drawer
A shallow 100–120mm drawer sized for a couple of days' kindling works well at hand height, roughly 700–800mm off the floor. Deeper than that and you're rummaging for the small pieces.
Ash bucket tray
Standard NZ ash buckets are around 250mm in diameter and 300mm tall. Cut the base tray to around 300mm x 300mm x 320mm high, with a pull-out runner so the bucket can be extracted without lifting.
Tool hook rail
Fire tools are usually 700–800mm long. A hook rail at 900mm from the floor lets them hang without the tips touching the base.
The clearance conversation
This is the safety detail that decides where the cabinet can sit.
Every wood burner and open fireplace has a manufacturer-specified clearance to combustible materials. For most modern NZ wood burners, that's 200–500mm from the burner body and 500–1000mm above the burner top. Your appliance install manual has the exact figures. Chimney-breast fireplaces have their own set of rules, usually specifying the depth of the non-combustible hearth extension beyond the fire opening.
The fireside cabinet sits outside this clearance zone. That's usually easy in an alcove-beside-the-fireplace setup because the alcove itself is set back from the fire opening by 200–300mm. For a freestanding wood burner, the cabinet sits alongside at the required distance rather than tucked in tight.
Cutshop® Tip: If the alcove sits partly within the clearance zone, spec the cabinet with a fire-rated backing panel on the side facing the fire. It doesn't have to be visible — it lives behind the finished panel.
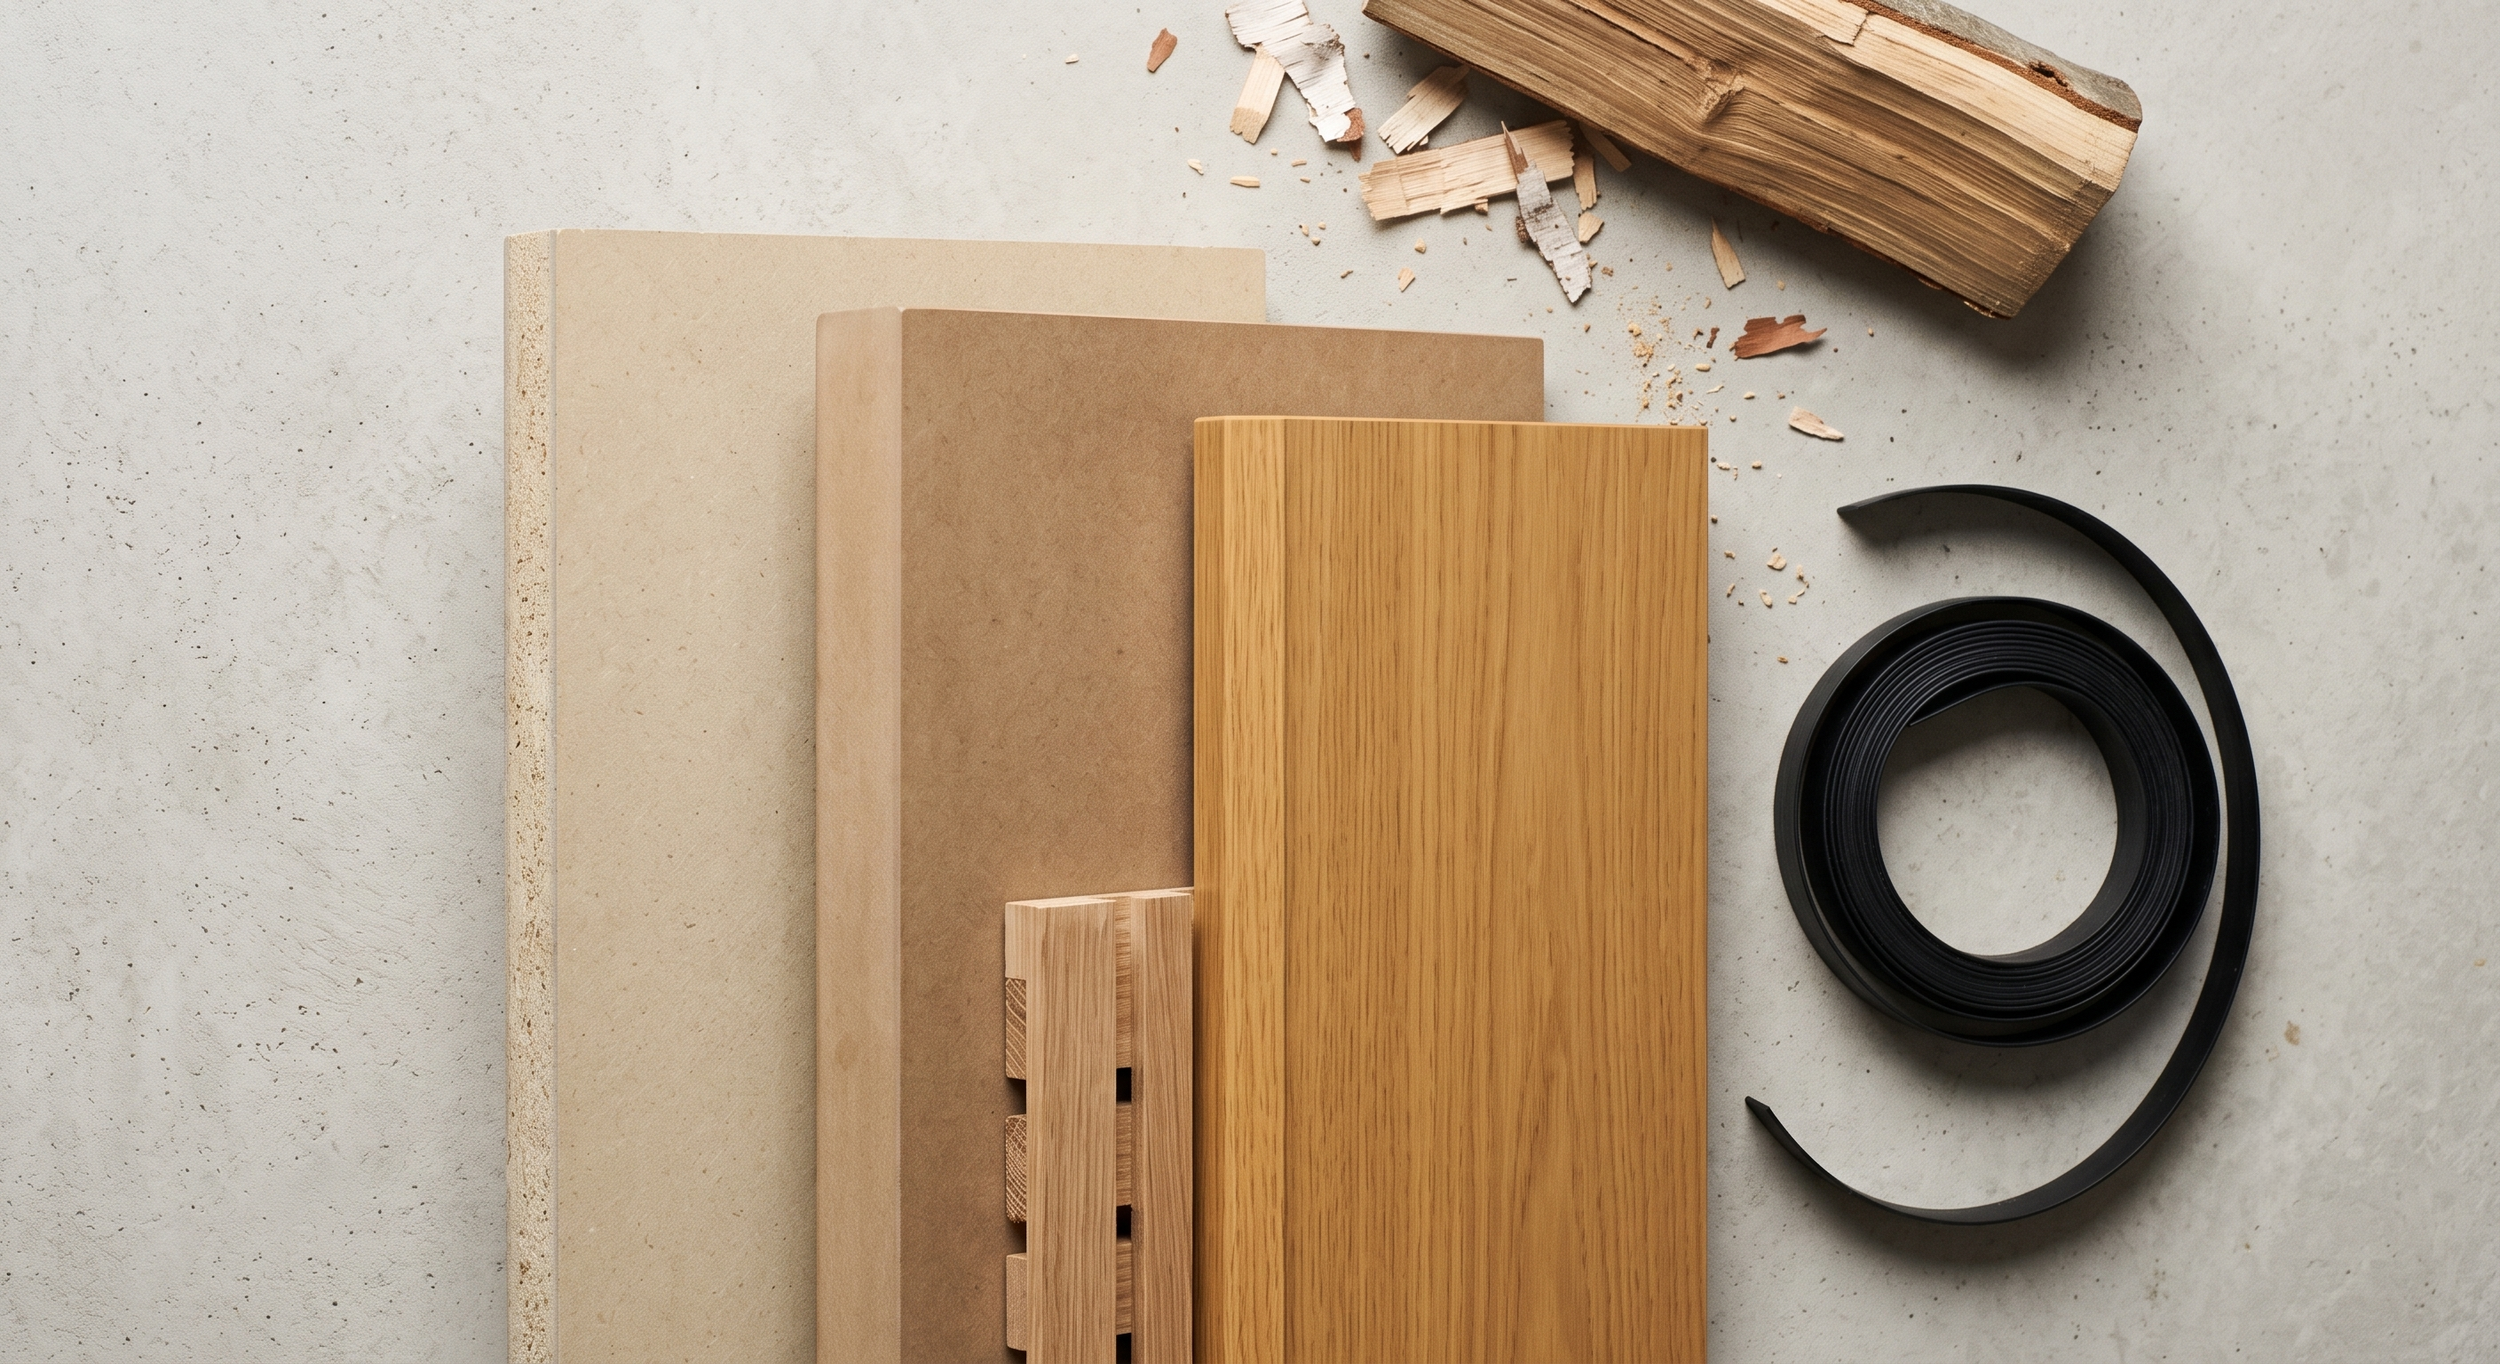
Boards that handle the heat, the dust and the moisture
A fireside cabinet lives in a slightly punishing environment. Radiant heat from the fire, bark dust from the wood, the occasional ember from an over-enthusiastic log, and the moisture that comes off newly-split firewood as it seasons in the room. Specify accordingly.
FR MDF (fire retardant) belongs on any panel facing a fireplace, this is a good choice for the carcass. It's standard MDF engineered with flame retardants through the fibre. Products like Prime MDF FR and Plytech's Firesafe MDF are our recommended options. Worth noting FR MDF is a surface finish rating, not a fire barrier.
MR MDF (moisture resistant) is the right choice for the carcass and the wood stack panels. It handles the temperature swings without warping, and it copes with the moisture off green-ish firewood better than standard MDF.
Melteca-faced board suits the drawer fronts and the visible outer panels. It wipes clean, matches the rest of the lounge joinery, and doesn't pick up soot marks the way painted MDF does.
ABS edging on every exposed edge is essential here. The wood stack in particular takes years of logs being dropped in and pulled out. Edge banding is what keeps the panel core intact.
Skip timber veneer near the fire side. Radiant heat over years of winters will dry veneer out and cause lifting.
Building it in a weekend
A fireside cabinet is mostly straightforward box-building. Carcass panels, a slatted base, a drawer box, a hook rail, an ash tray. There are no fiddly profiles and no plumbing.
The two parts that take the most planning are the slatted base and the clearance-zone check. Cutshop® can pre-cut the slats, pre-drill the hook rail positions, and edge-band all the openings so the build itself is standard assembly.
Most people comfortable with a flat-pack cabinet can put this one together over a Saturday and Sunday. If you're handing it to a builder, the pre-cut panels save them the fiddly work of getting the alcove dimensions right on site.
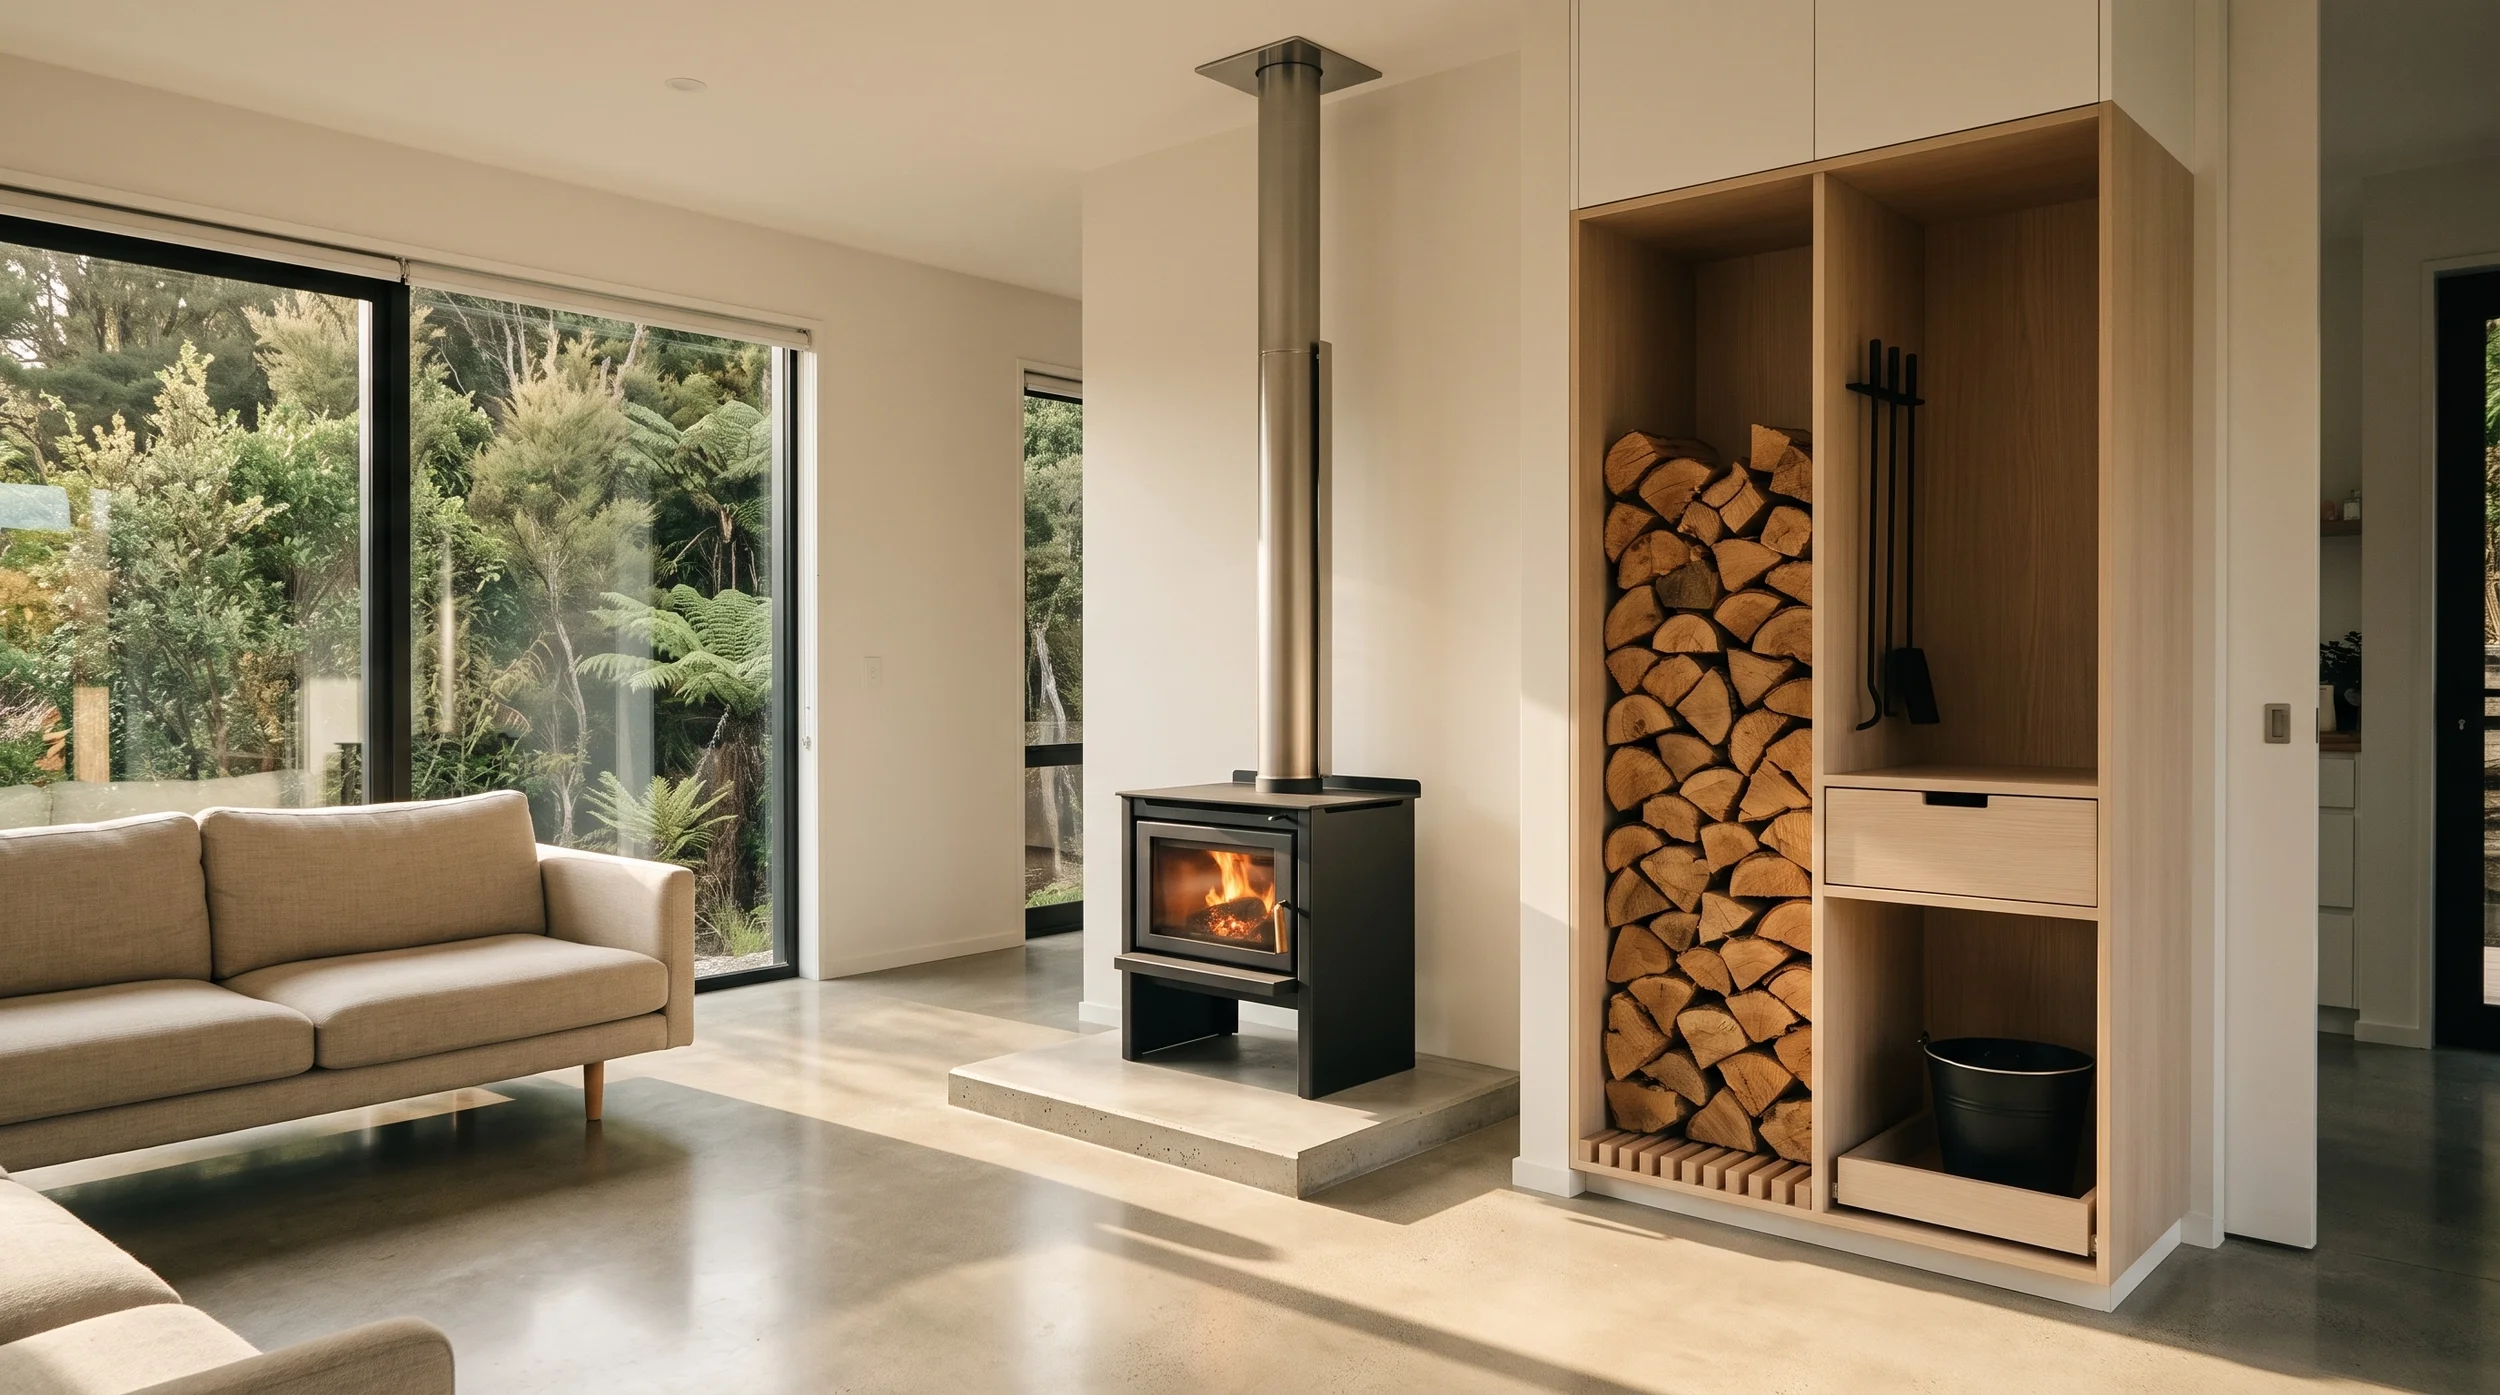
The final outcome
The first evening the wood pile isn't sitting on the carpet — the logs stacked neatly in your new cabinet, the kindling in its drawer, the poker on its hook — is the evening the lounge starts feeling truly cozy and inviting. The wood is still within arm's reach. But the room is tidy again.
A fireside cabinet is one of those built-ins that changes how the lounge gets used through winter. The mess disappears, your routine gets easier, and the fireplace goes back to being the centrepiece it was designed to be rather than the middle of a slow-motion pile-up.
FAQ’s
-
Depends on the appliance. Every modern NZ wood burner has a manufacturer-specified clearance to combustibles listed in the install manual — usually 200–500mm from the sides and 500–1000mm from the top. The cabinet sits outside that clearance zone. For open fireplaces in villas and bungalows, the clearance is defined by the hearth extension rather than a distance from the fire, so the cabinet can sit right at the edge of the hearth as long as it's not overhanging the fire opening. If you're not sure, bring the burner's install manual into your nearest Cutshop® branch and we'll size the cabinet to sit safely.
-
A stack sized to 400mm depth x 400mm wide x 1500mm high holds roughly 60 split logs at 300mm length — about a week's supply for a household burning five nights a week. For a household that only lights the fire on weekends, size the stack smaller (say 800mm high) and add another drawer or shelf where the wood would have gone. For a serious wood-burning household running the fire seven nights and cooking on it, double the stack width to 800mm and it'll hold a fortnight's supply comfortably.
-
Not for the whole thing. Standard MR MDF and Melteca handle the ambient warmth of a lounge with a fire in it — no different from the wall linings next to the fire, which are also standard gib. Where fire-rated board becomes worth specifying is on the panel directly facing the fire, if the cabinet sits within the burner's clearance zone. That specific panel can be a fire-rated backing board (13mm fire-rated gib works fine), hidden behind the visible finish panel. Cutshop® can spec this at the design stage.
-
Yes, usually. The flue has its own clearance requirement — typically 50–150mm to combustibles — and the cabinet sits outside that. If the flue passes very close to the cabinet, spec a routed cutout in the top panel to give the flue clear airflow, and finish the cutout edge with a metal ring or high-temperature seal. For flues that require a wider clearance than the cabinet allows, the alternative is to end the cabinet at the flue and start a matching cabinet on the other side, so the flue rises between the two.
-
Less than you'd think, but a bit. The wood stack itself gathers a fine layer of bark dust that drops through the slatted base into the removable tray — that's what the tray is for. The rest of the cabinet stays reasonably clean, because the fire is drawing air toward it rather than blowing soot out. The bigger cleaning task is the ash bucket tray, which picks up ash dust every time you empty the fire. A wipe-down of the whole cabinet with a damp cloth once a fortnight through winter keeps it looking sharp.
